
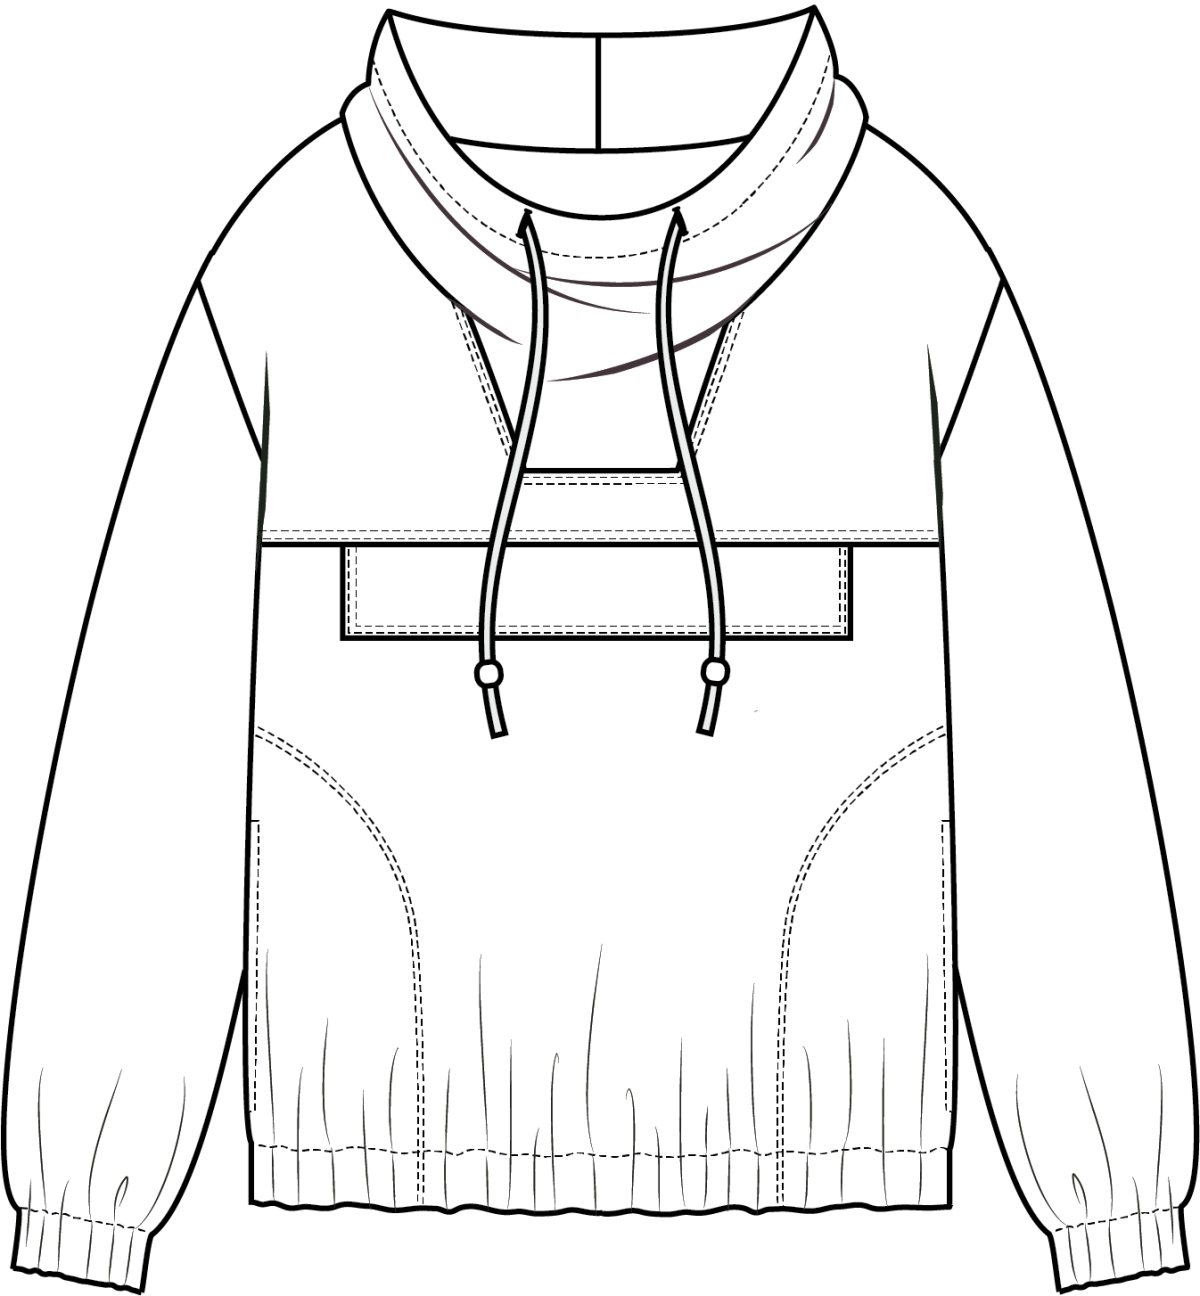
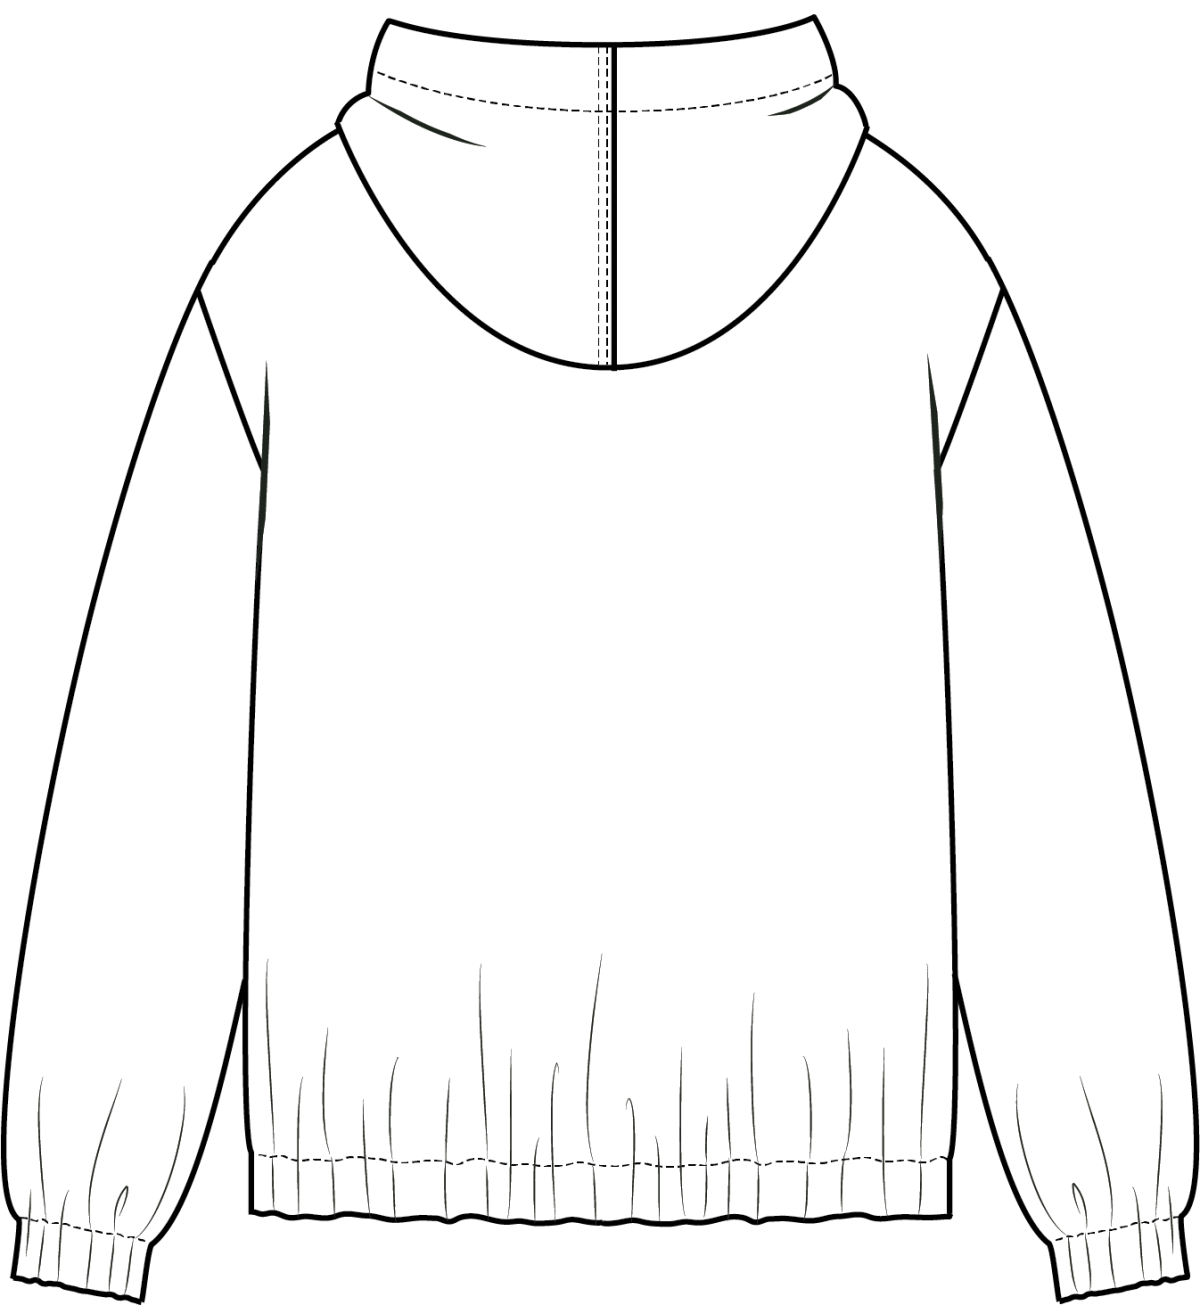
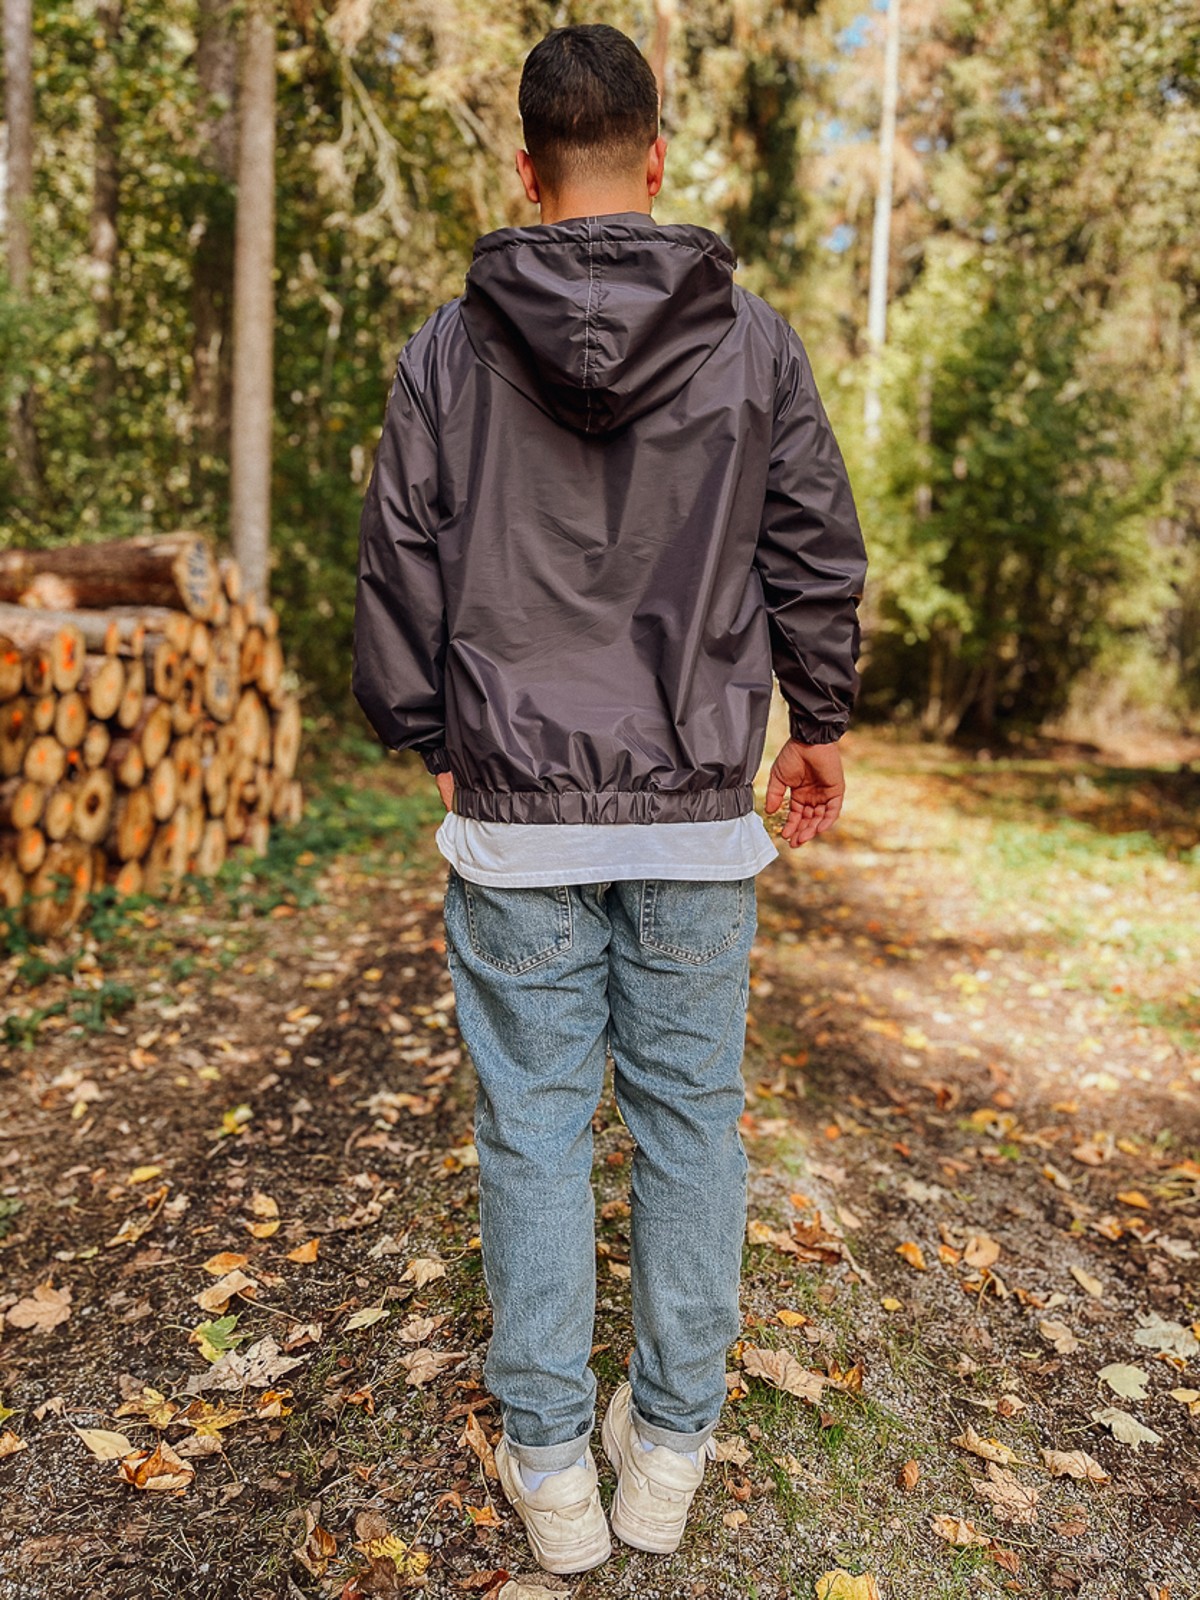
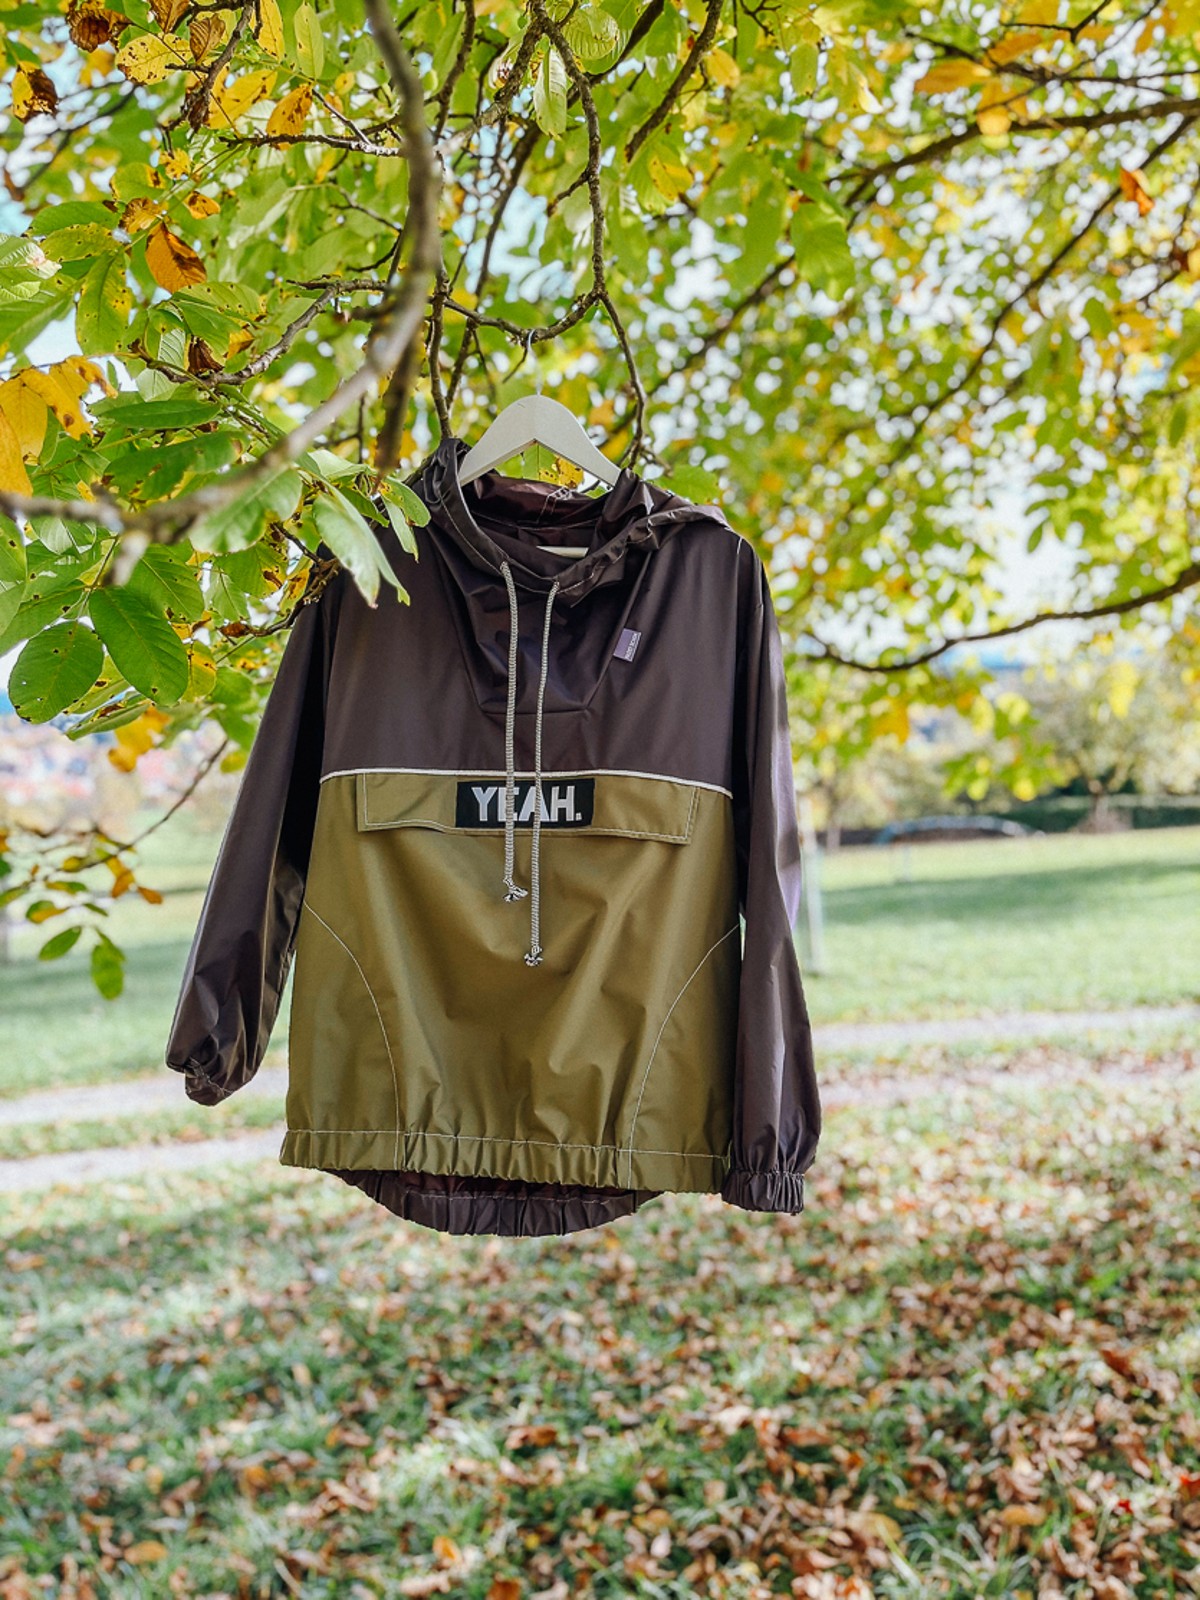
Windbreaker
Have you already entered into autumn with a weatherproof outfit? If you're still looking for the perfect all-rounder, then you've come to the right place. We have a windbreaker for you, with all design options for you to decide. You always cut a fine figure with this pullover anorak in the transition period and cleverly stow away small things in the pockets. With the material selection, creativity knows no bounds – from denim to oilskin or nylon fabrics, nothing is impossible. And should the sun happen to come out, you can stow the whole jacket in the breast pocket using a clever folding technique – so you'll always have it handy when the weather gets nasty again.
#80sstyle #windbreaker #colorblocking #autumnstyles #autumnvibes
Tipp: Reflective elements such as piping, patches or fluorescent sewing thread are always an eye-catcher in the darker months of the year. Labels, color blocking and a great hoodie cord also go great with the pattern. And before you know it, the anorak will be your new favorite piece.
Note: We classify the project in the category of experts. Depending on which shell fabric you choose, the difficulty level will vary, of course. Nylon, for example, is a little trickier to work with than, say, denim. No matter which variant you choose in the end, the pattern is designed for non-stretch fabrics.
What you'll need
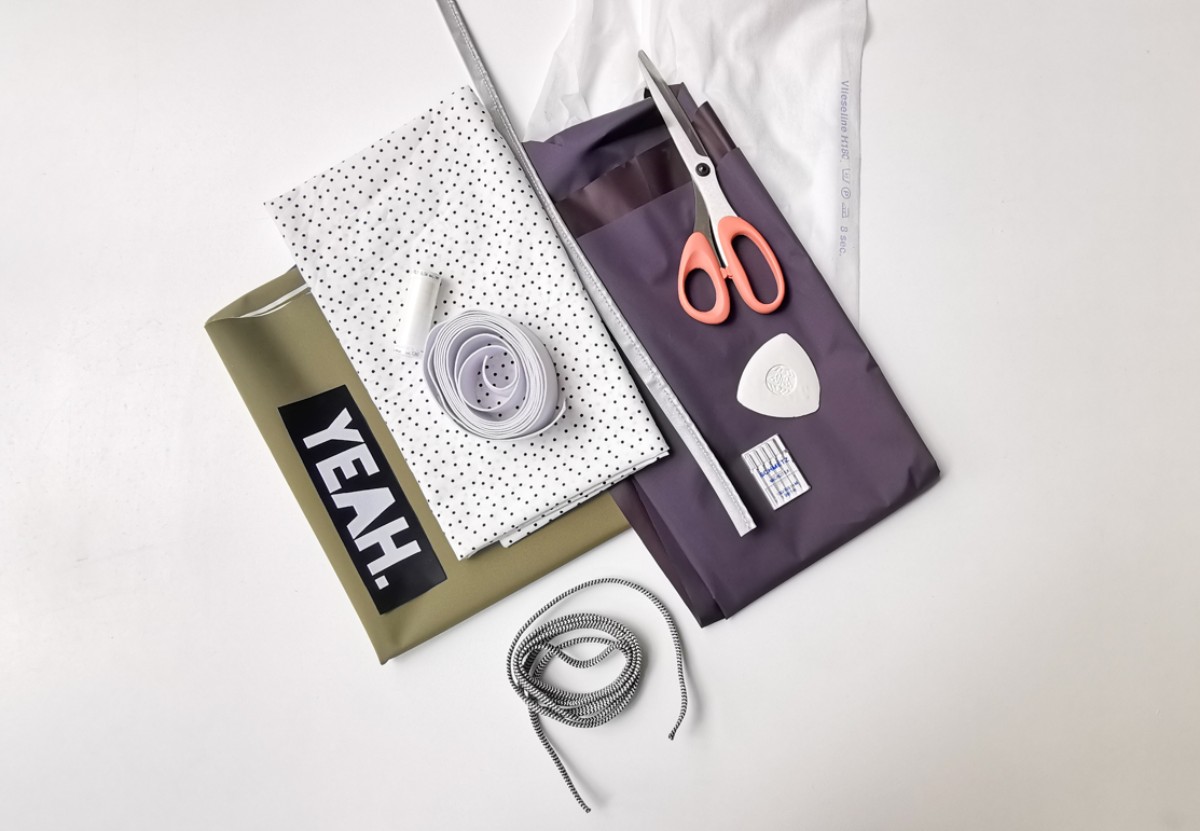
- Sewing pattern for download
- Shell fabric, 150 cm width (inelastic):
size XS: 2.05 m, sizes S - M: 2.10 m, sizes L-XXL: 2.15 m
We used nylon fabrics for our anorak. - Cotton, 140 cm width (100 % cotton): 40 cm
- Drawstring 4 mm, 160 cm
- Elastic band 30 mm width:
size XS: 160 cm, size S: 170 cm, size M: 180 cm, size L: 190 cm, size XL: 200 cm, size XXL: 210 cm - SCHMETZ needles suitable for the selected fabric. We chose the Microtex Needle in size 80 for the windbreaker. (The SCHMETZ Needle ABC can give useful information)
- Constrast thread for topstitching
- Interfacing H180
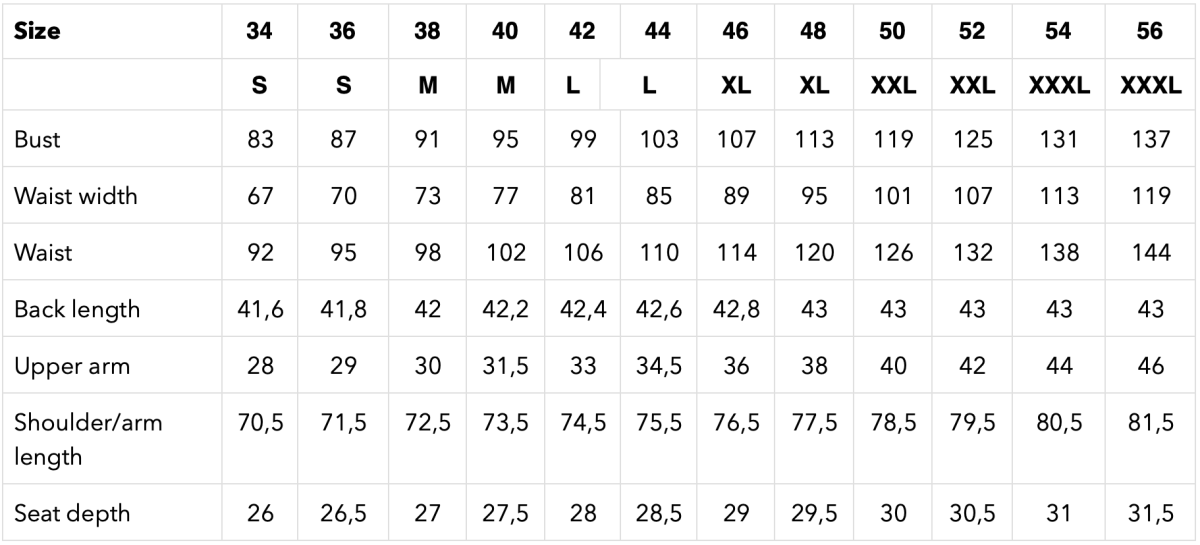
What size fits me?
Important: Our sizes cannot be compared with ready-to-wear sizes. It is very important that you take your measurements before you start.
- Tie a tight threat around your waist and pin the ends together.
- Take notes of your body measurements and use the measurement table to determine your sewing pattern size.
- Compare your body measurements with the table measurements. Your measurements may vary between different sizes. Choose the size closest to your measurements.
- Choose tops (for example dress, blouse, or jacket) according to the size of your bust; pants and skirts according to the size of your hips/waist.
- Always compare the body measurements with the table measurements, never with the paper pattern pieces. All pattern pieces already include a comfortable allowance.
- Are you taller or shorter? You can alter small differences directly on the paper pattern piece.
How to take measurements:
It is best to take your measurements directly on your underwear. Wear a bra that fits. The waist band should not be too tight around the waist (it must still be possible to adjust it).
- Full body length: From to toe.
- Bust: Over the fullest part of the chest. The measuring tape should be placed horizontally around the body.
- Waist: Measure at the waist. The tape should be at the level of your navel. Add 2 cm if you prefer a looser fit.
- Hips: Place the measuring tape around the widest part of your buttocks. The measuring tape should be placed horizontally around the body.
- Back length: Measure from the bottom of the neck (protrudes slightly) to your waist.
- Upper arm circumference: Place the measuring tape around the widest part of the upper arm.
Women's size chart, full body length 172 cm
Cutting
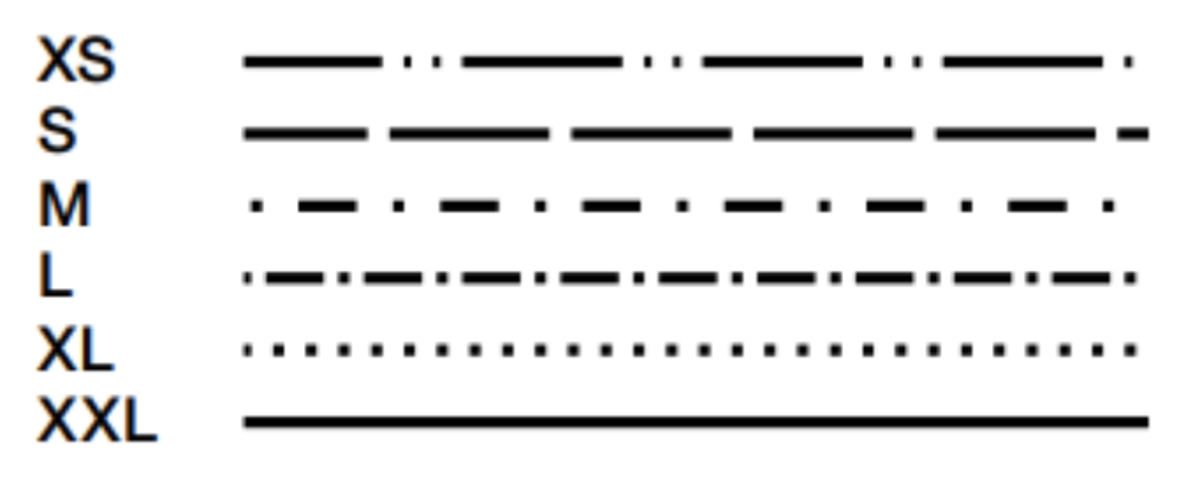
Sizes:
XS (S) M (L) XL (XXL)
Length:
69 (70) 71 (72) 72.5 (73) cm
Sleeve length:
80.5 (82) 83.5 (84.5) 85.5 (86) cm
Pattern pieces

Shell fabric:
1: Upper front, 1 x on fold
2: Lower front, 1 x on fold
3: Hood, 1 x on fold
4: Back, 1 x on fold
5: Sleeves, 2 x
6: Facing (hood), 1 x on fold
7: Pockets (side seam pocket), 2 x
8: Pocket pouch (chest), 1 x on fold
Pocket flap (chest): 12 x 35 (35) 36 (36) 37 (37) cm (incl. 1 cm seam allowance)
Cotton fabric:
7: Pocket pouch (side seam pocket), 2 x
9: Pocket pouch (chest), 1 x on fold
Note: Trace the facing for the drawstring / hood in part 3 as extra pattern piece = part 6.
Time to get sewing! Sewing instructions
The sewing pattern includes 4 cm seam allowance for hem and sleeves. Add 1 cm seam allowance for all other edges and seams. All pieces are sewn together right sides together unless otherwise noted.
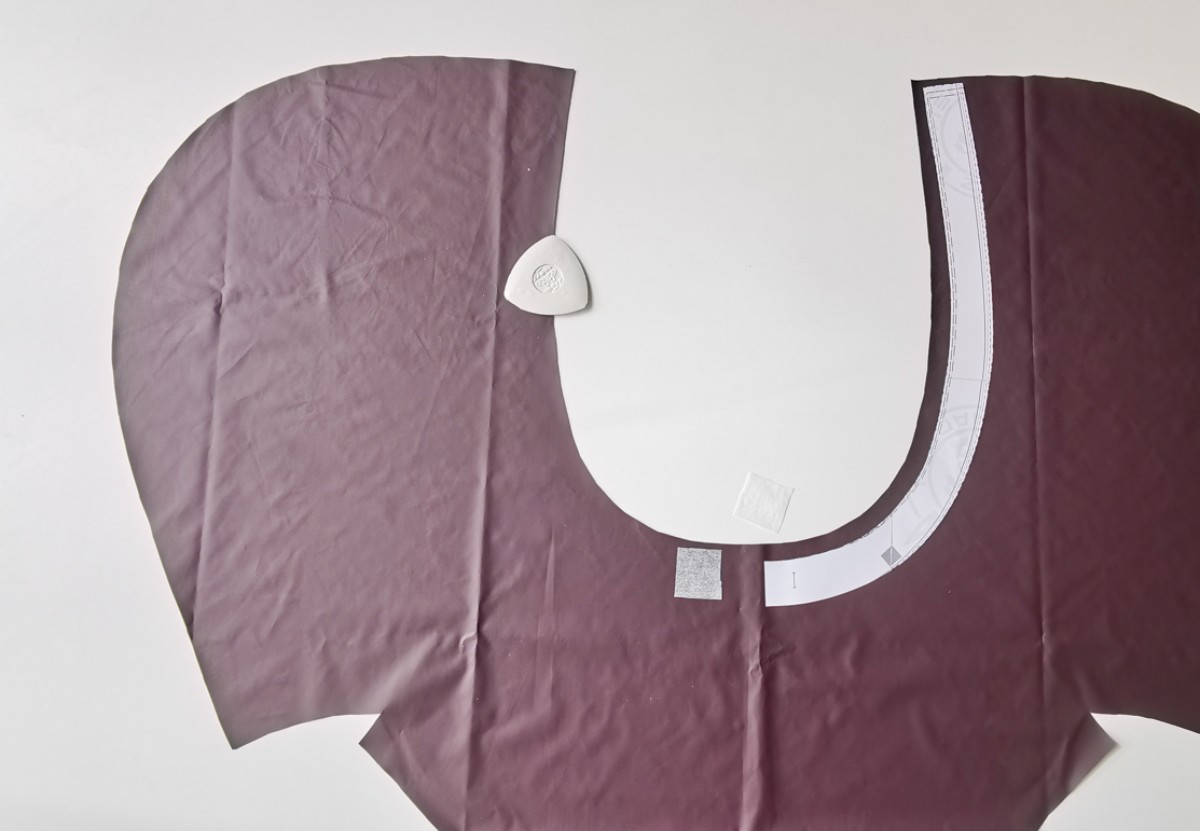
Reinforce the facing (part 6) with interlining (wrong side of fabric). In addition, iron an approx. 3 x 3 cm interfacing piece onto each of the slits in part 3 (wrong side of the fabric).
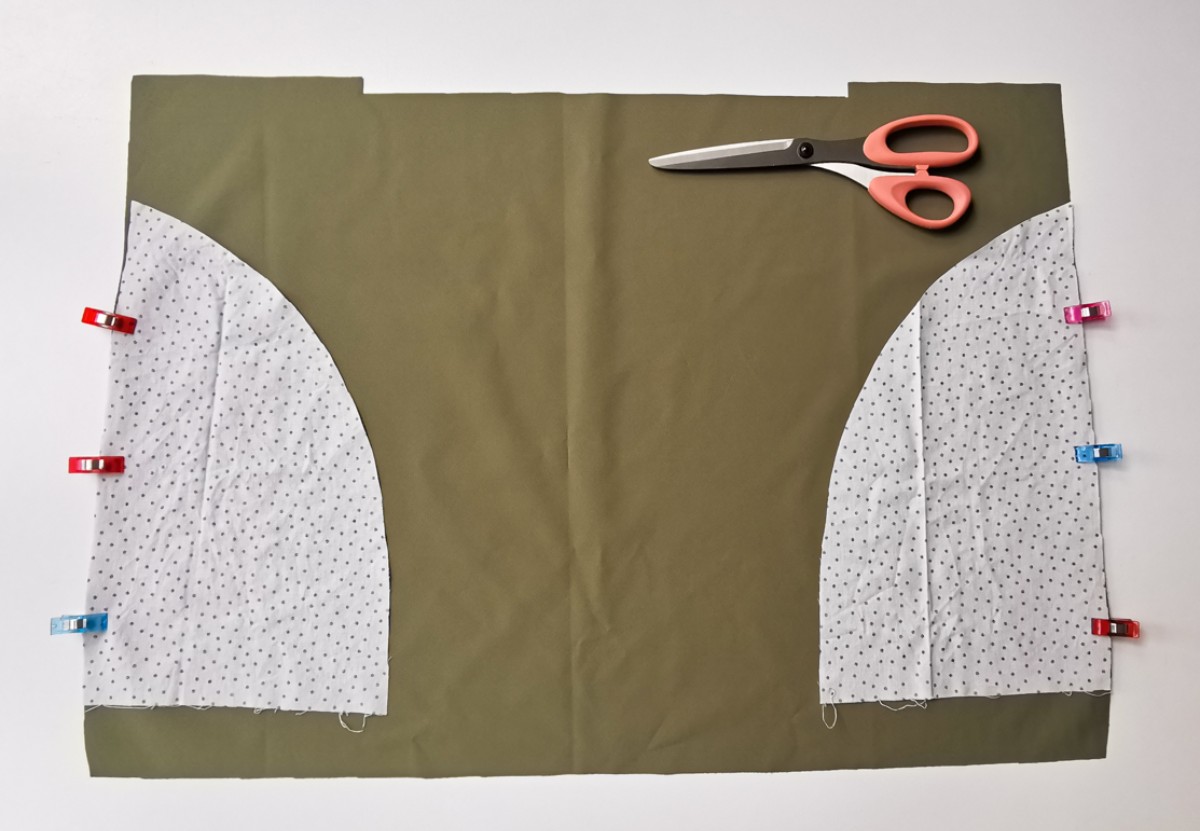
Seam pockets: Pin the cotton pocket pouch right sides together on the side edges of the lower front piece. Cross stitches A meet.
Stitch along the edge of the pocket opening, stitch along the horizontal lines at the top and bottom at a 45° angle up to the edge of the seam allowance. Cut the seam allowances of the front piece and pocket bag at an angle in the corners. Turn pocket bag inside out, iron edges. Stitch the edge of the pocket opening 5 mm wide with yarn in a contrasting color, stitch across the top and bottom towards the seam allowance. Secure seam ends.
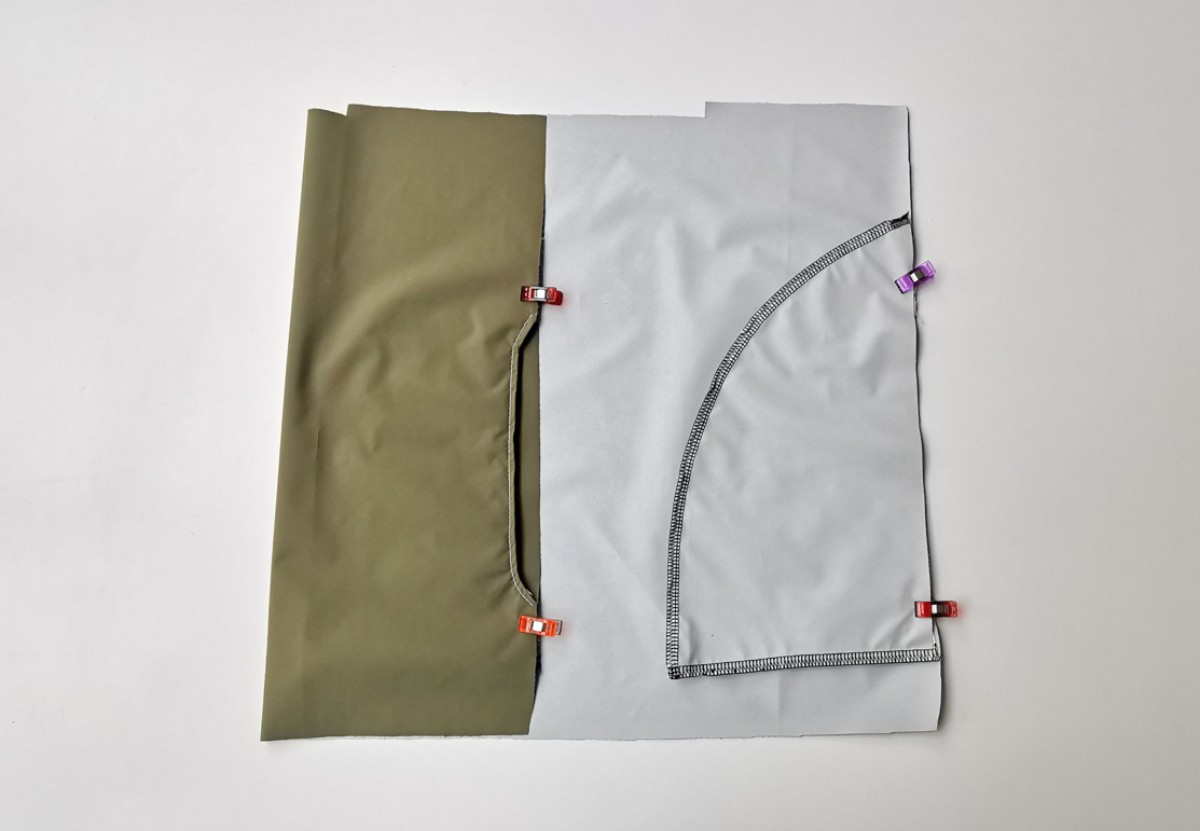
Place the shell fabric pocket bag under the sewn-on cotton pocket bag. The horizontal lines A meet. The right sides of the fabric face each other. Stitch the pocket bags together on the inside. Neaten the seam allowances. Pin side and edges together.
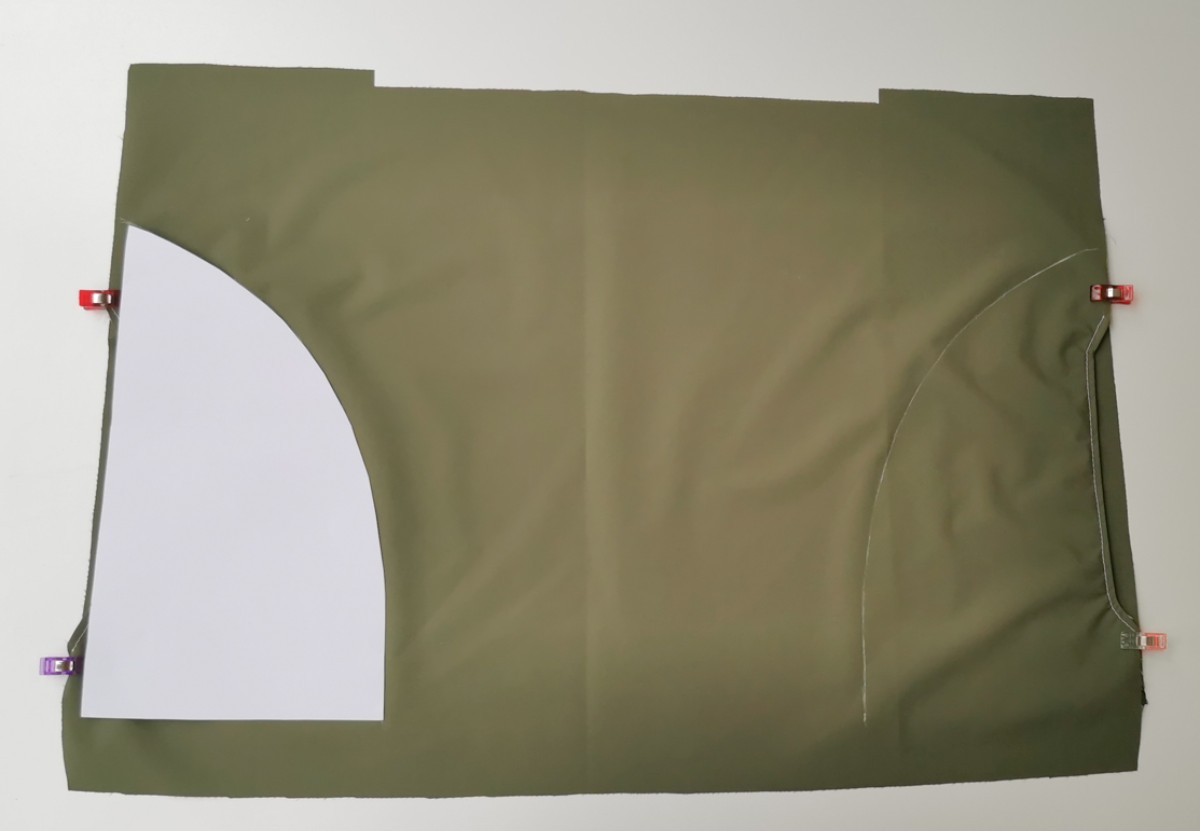
Pin pocket pouch along curved pocket pouch line. Stitch front along curved line, stitching the pocket pouch in place.
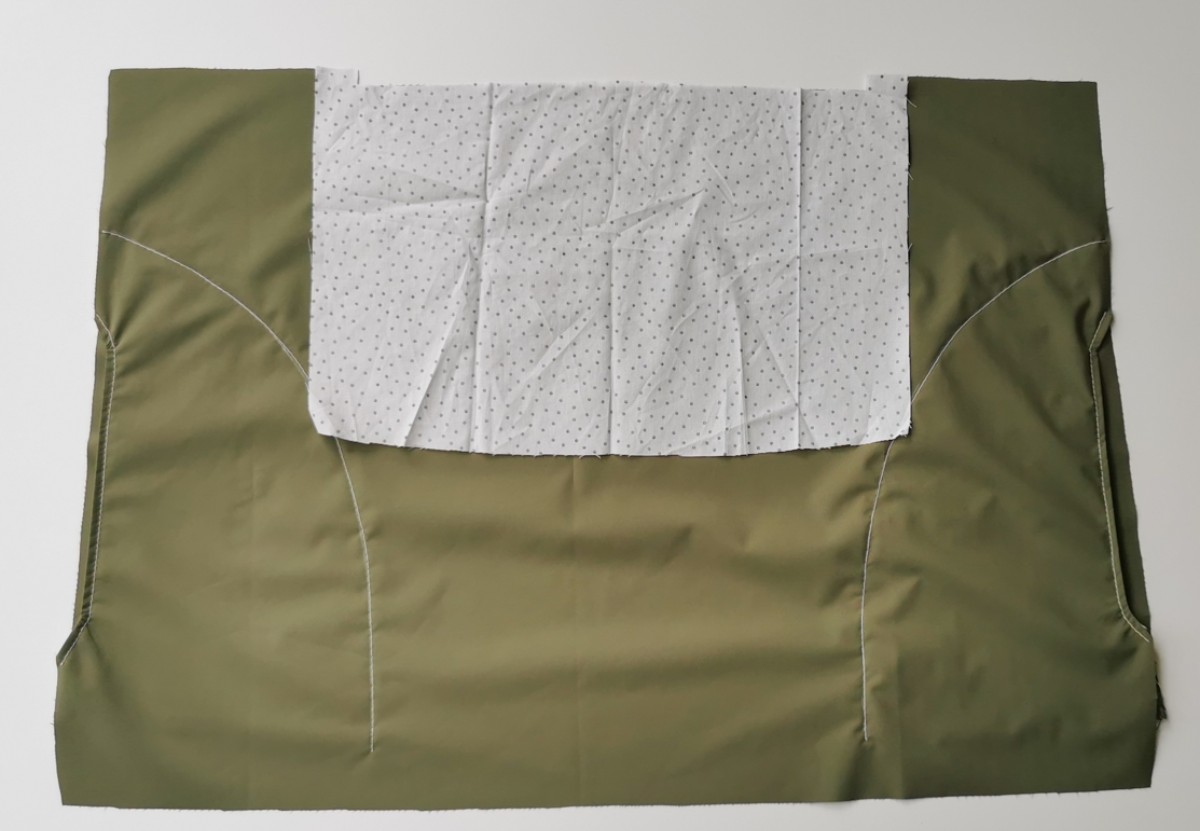
Chest pocket: Place the front pocket bag (part 9) right sides together on the upper edge of the lower front part. The pocket opening lines meet. Stitch along the pocket opening lines. Cut the seam allowances diagonally at the corners.
Turn pocket bag inside out, iron edges. Stitch pocket opening 5 mm wide. Place rear pocket bag (part 8) right sides together under the stitched pocket bag. Stitch pocket bag edges together. Neaten seam allowances. Pin the top edges together.
Fold the pocket flap in half lengthwise, right side inside. Topstitch the narrow sides. Cut off allowances at an angle at the corners. Turn flap, iron.
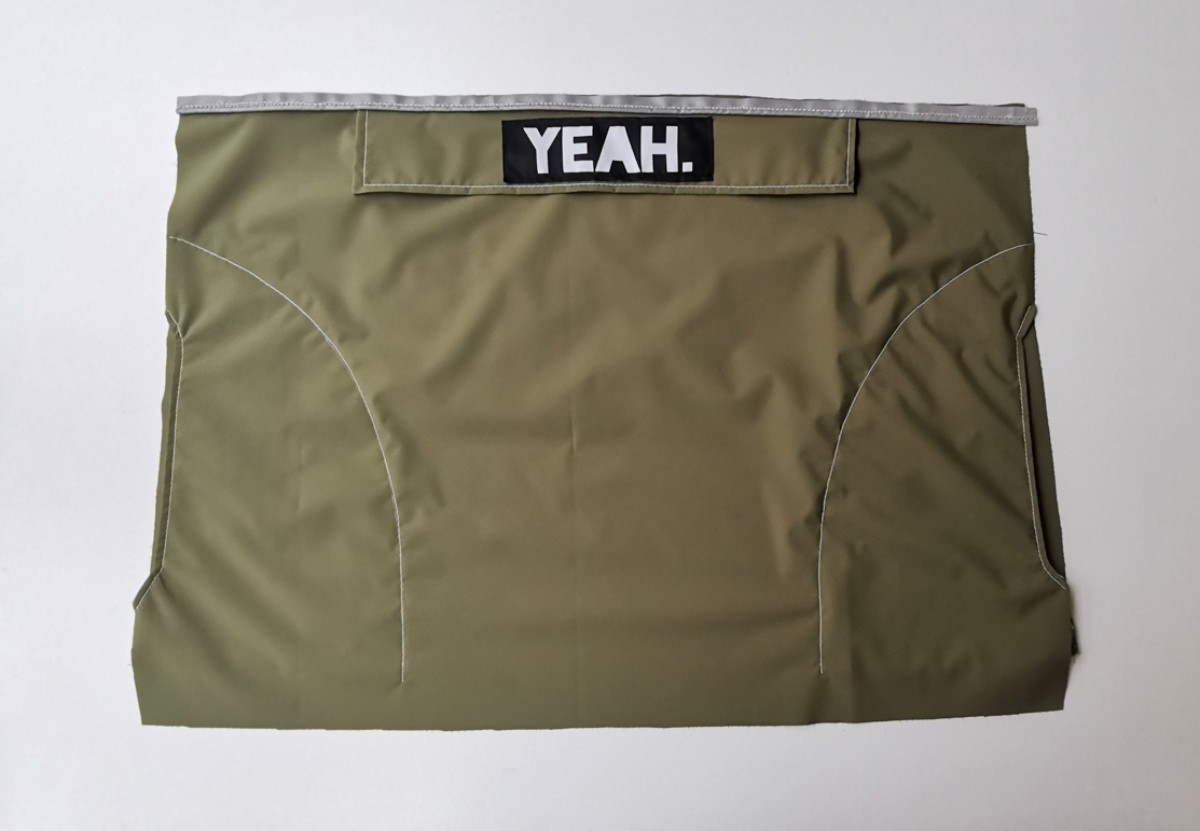
Stitch the flap close to the edge and at a distance of 7 mm and baste between the cross stitches (B) on the upper edge of the lower front piece.
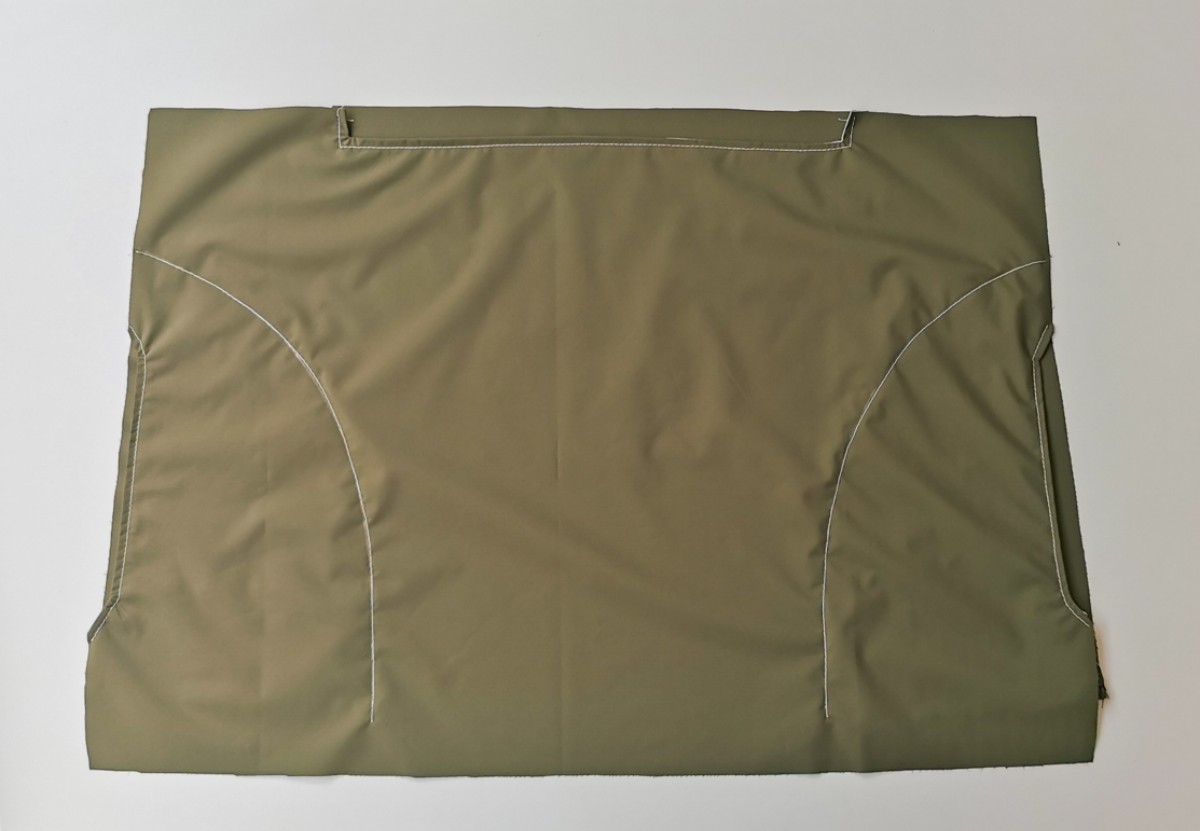
Stitch the upper front piece to the lower front piece, including the flap. We added a reflective piping in this place. Neaten the seam allowances and iron upwards. Optionally, topstitch the seam from the outside, securing the allowances.

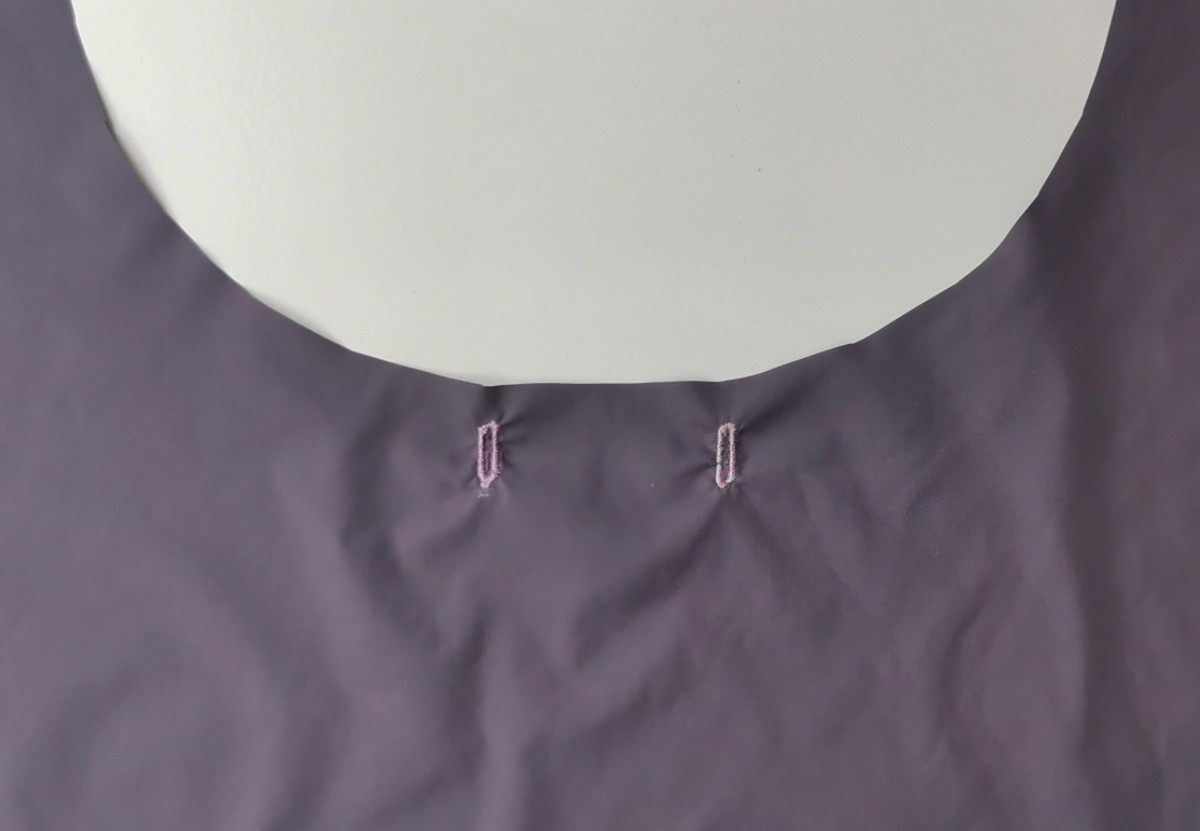
Sew the slits (like buttonholes) on the hood as shown.
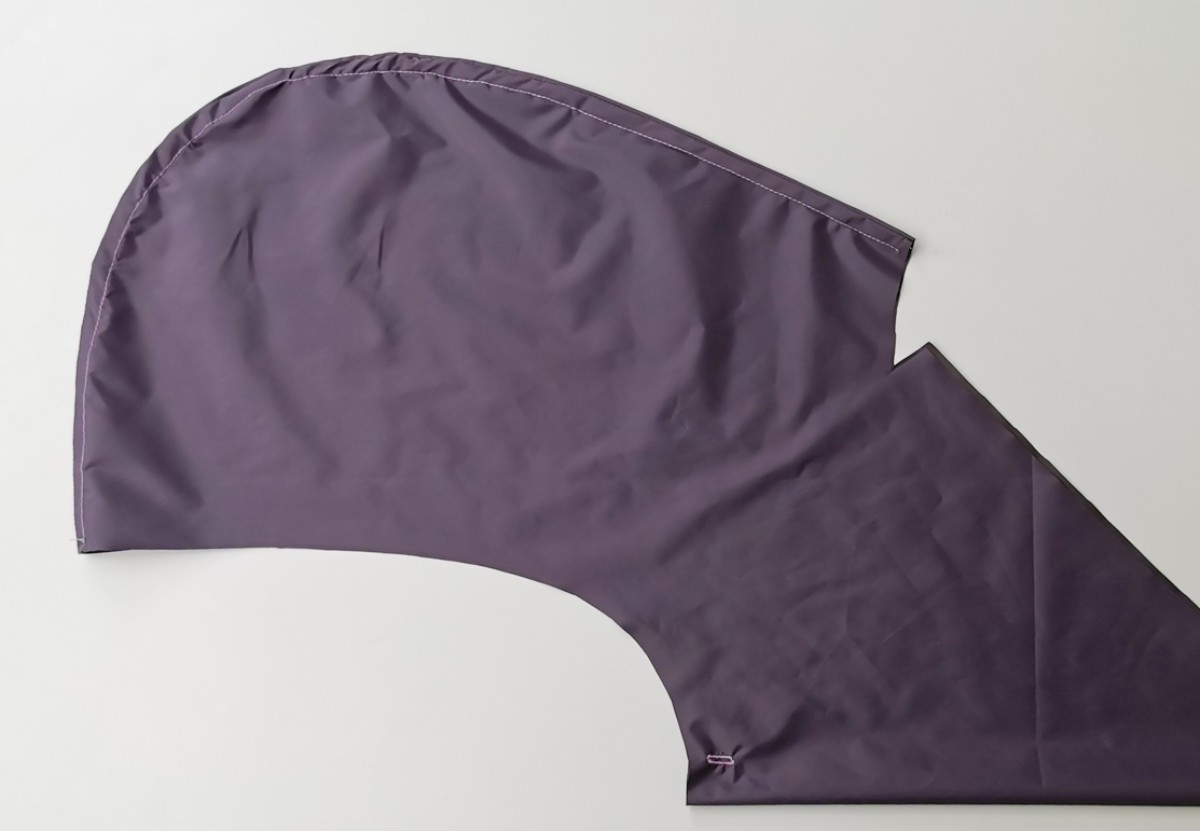
Stitch the middle seam on the hood. Overcast the seam allowances together and iron to one side. Stitch the seam from the outside, stitching the allowance.
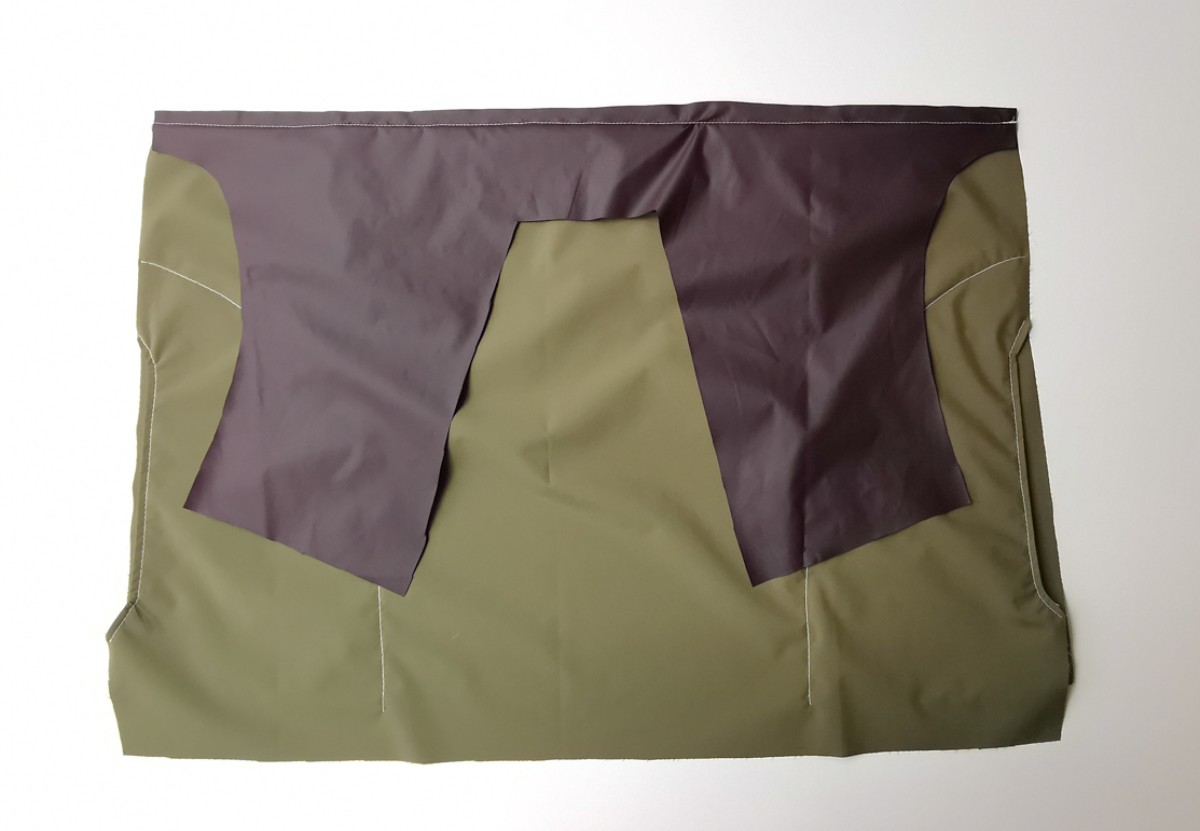
Stitch the insert between the corners C onto the front piece. Secure seam ends. Cut the front part diagonally at the corners up to the seam ends.

Stitch side insert edges to front piece, one after the other, from corner to shoulder edge. Neaten the seam allowances together and iron into the front piece. Stitch the front piece along the seam.
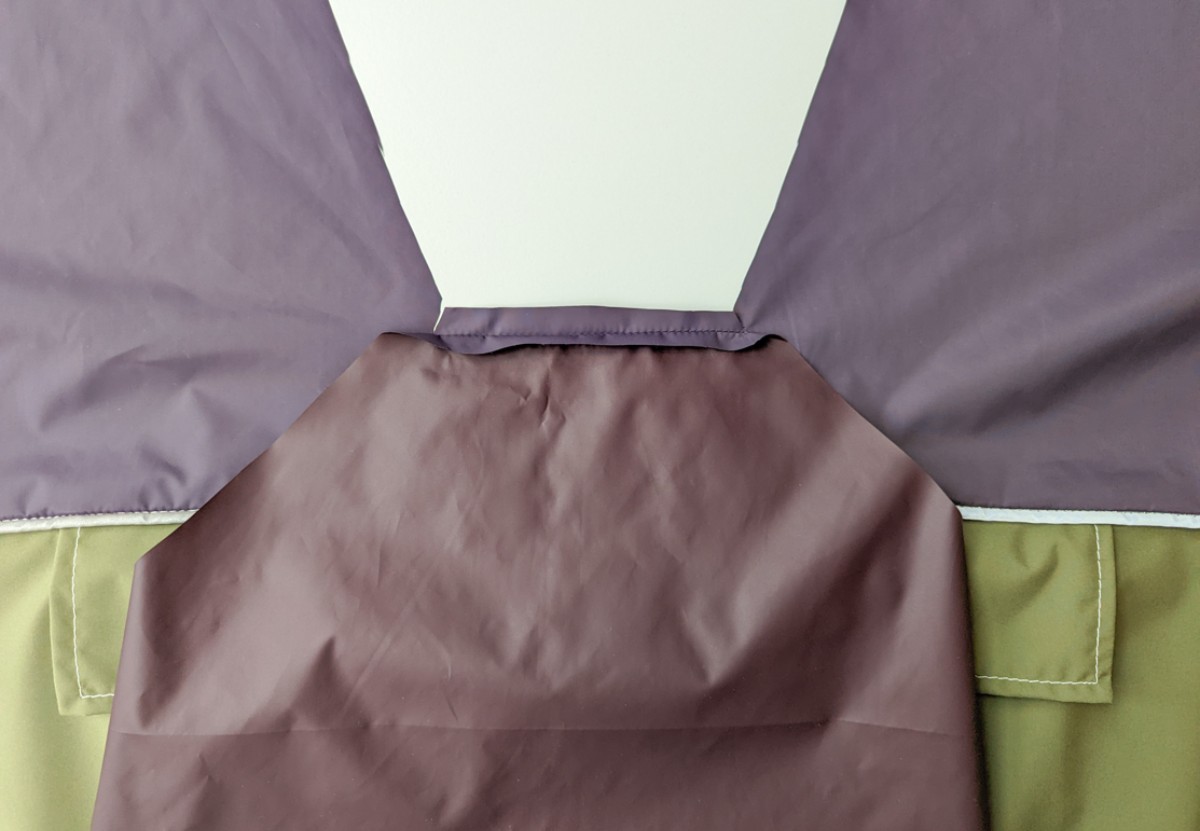
Stitch shoulder seams (up to corner S). Secure seam end. Cut the allowance of the hood diagonally at the corner up to the end of the seam. Stitch the hood to the back neckline. Neaten the seam allowances together and iron into the back piece.
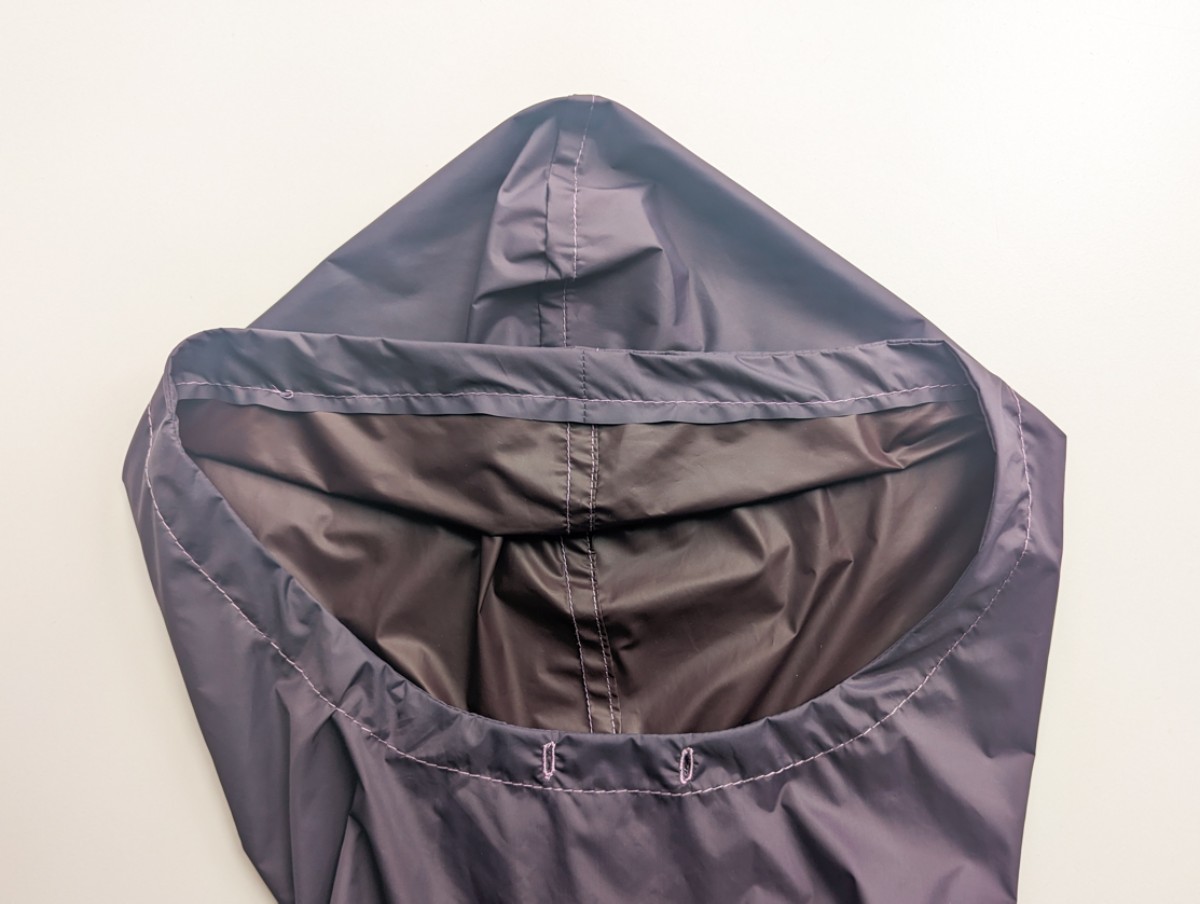
Stitch the trimmings to curve = middle seam. Iron the allowances apart. Neaten the outer facing edge. Pin the trimmings to the hood right sides together and stitch. The seams meet. Cut back the seam allowances, cut into the curves. Turn facing inside, iron edge. Stitch facing as shown.
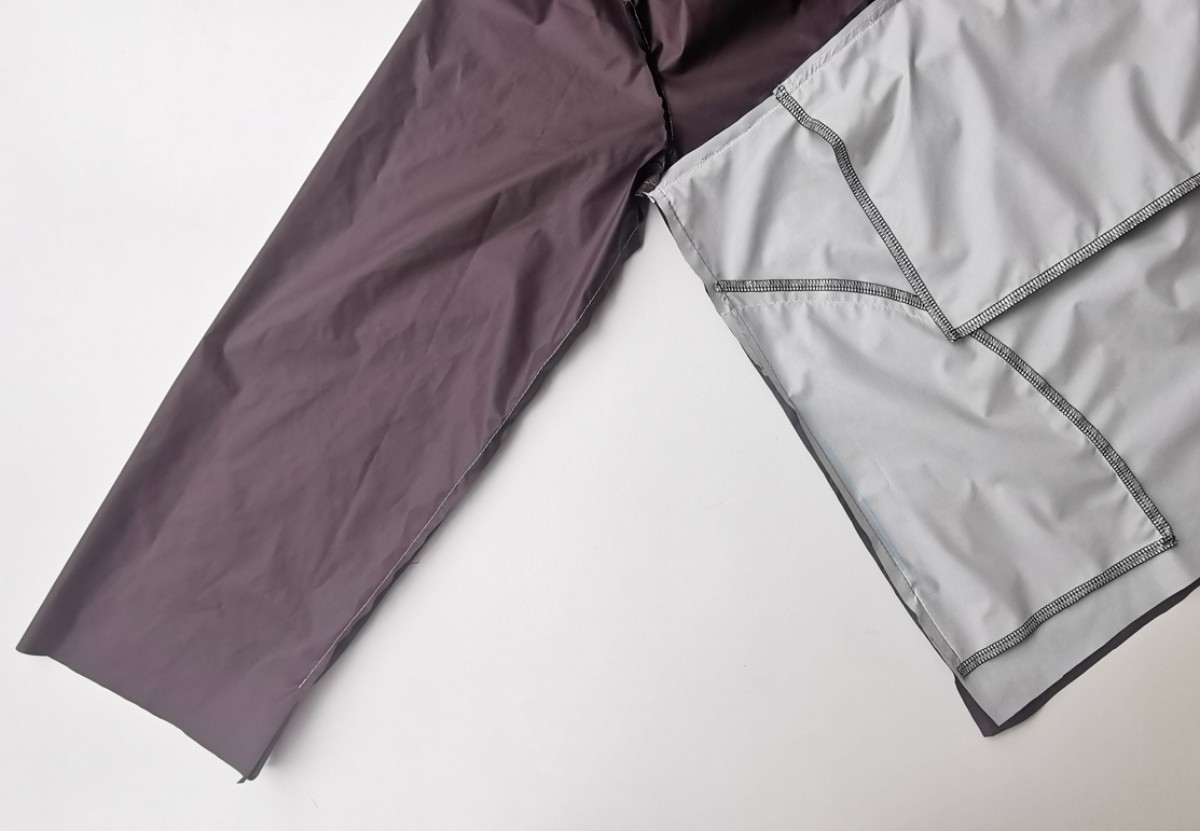
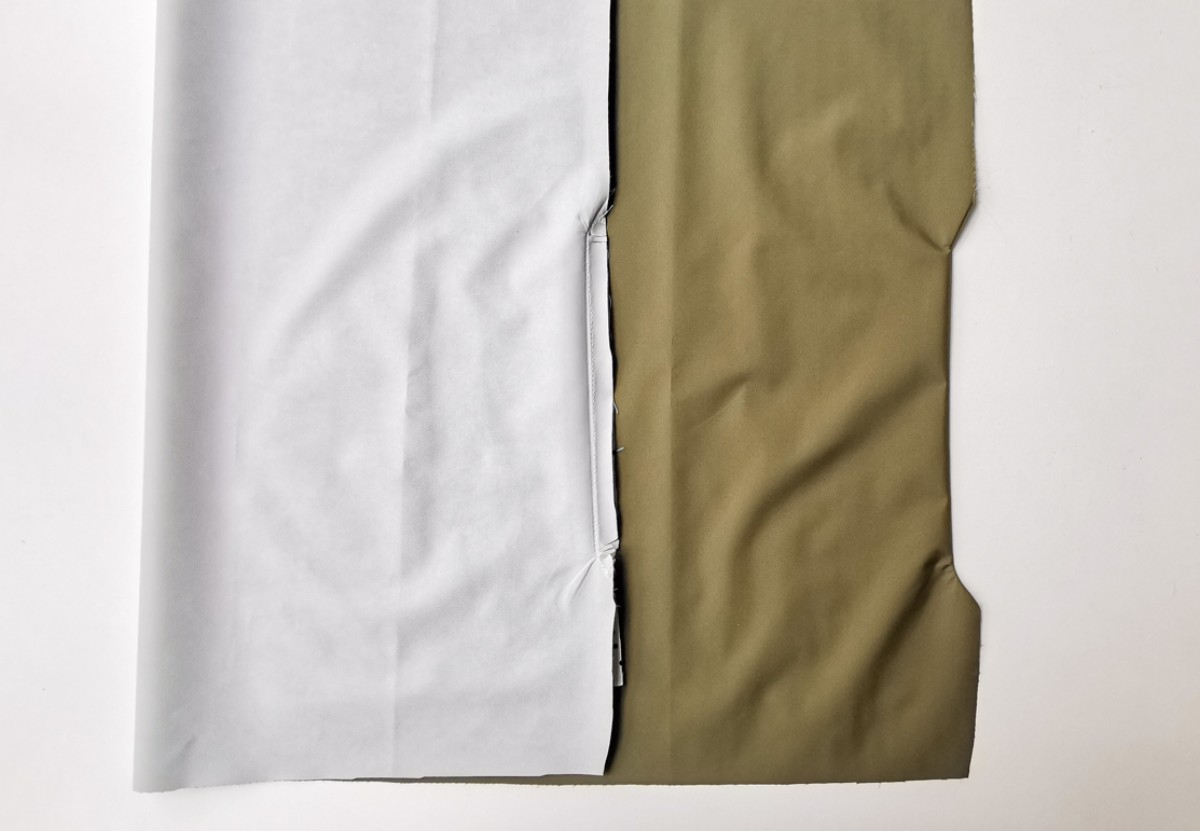
Stitch sleeves to armholes. Neaten the seam allowances together and iron into the sleeves. Stitch the side seams and sleeve seams, only stitching up to the cross stitch at the hem to pull in the elastic band (on the front and back only on one side seam). Neaten the seam allowances and iron them apart.
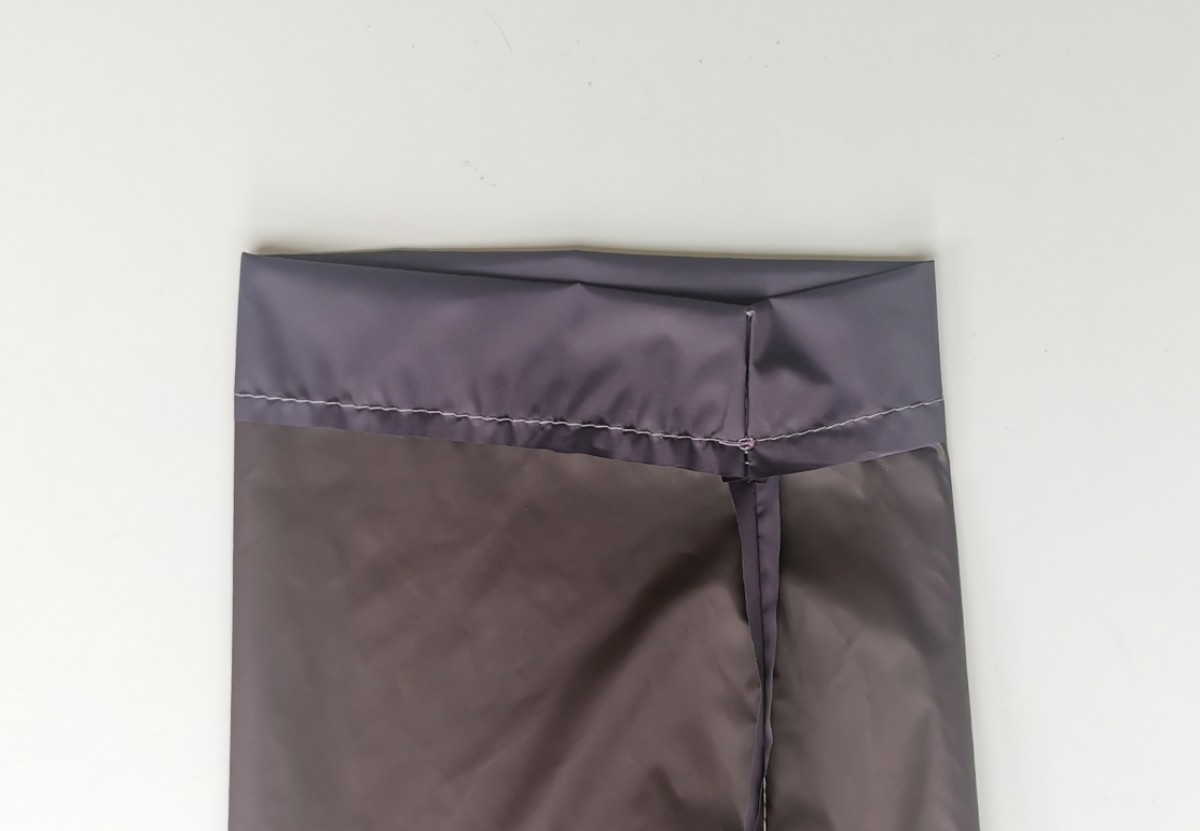
Neaten the hem and sleeve hem allowances, iron 4 cm to the inside and topstitch.
For the sleeves, cut 2 pieces each of 24 (25.5) 27 (28.5) 29 (29.5) cm off the elastic band. Shorten the remaining rubber band to 100 (108) 116 (124) 132 (140) cm. Use a safety pin to thread the rubber band into the tunnels. Stitch the ends together or sew them together by hand. Sew up seam openings by hand.
Use a safety pin to pull the cord through the draw-through slits into the hood. Knot the cord ends.
Done! You have created a multifaceted all-rounder for the upcoming fall season.
Share your windbreaker in social media with hashtag #smagzwindbreaker and tag @schmetz_official
Sewing pattern: Burda