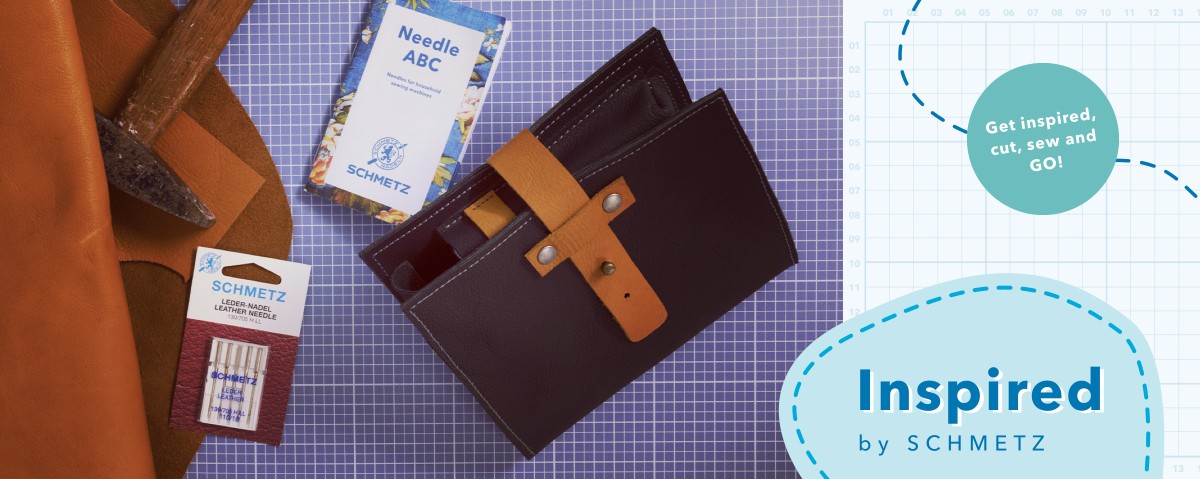
A cigar case for enthusiasts
As the temperatures begin to drop, now is the time that evenings draw in: perfect for snuggling up. And perfect for venturing into more time-consuming projects and starting work on some great gift ideas – regardless of whether they’re for ourselves or a gift for our loved ones. The high-quality leather cigar case is sure to catch the eye during a cosy gathering. Nice and neat, you may find it that it is not just a useful accessory, but a stylish one, too.
#cigarlovers #vintage #handsewn #menwithstyle
What you'll need
- Cutting pattern for download
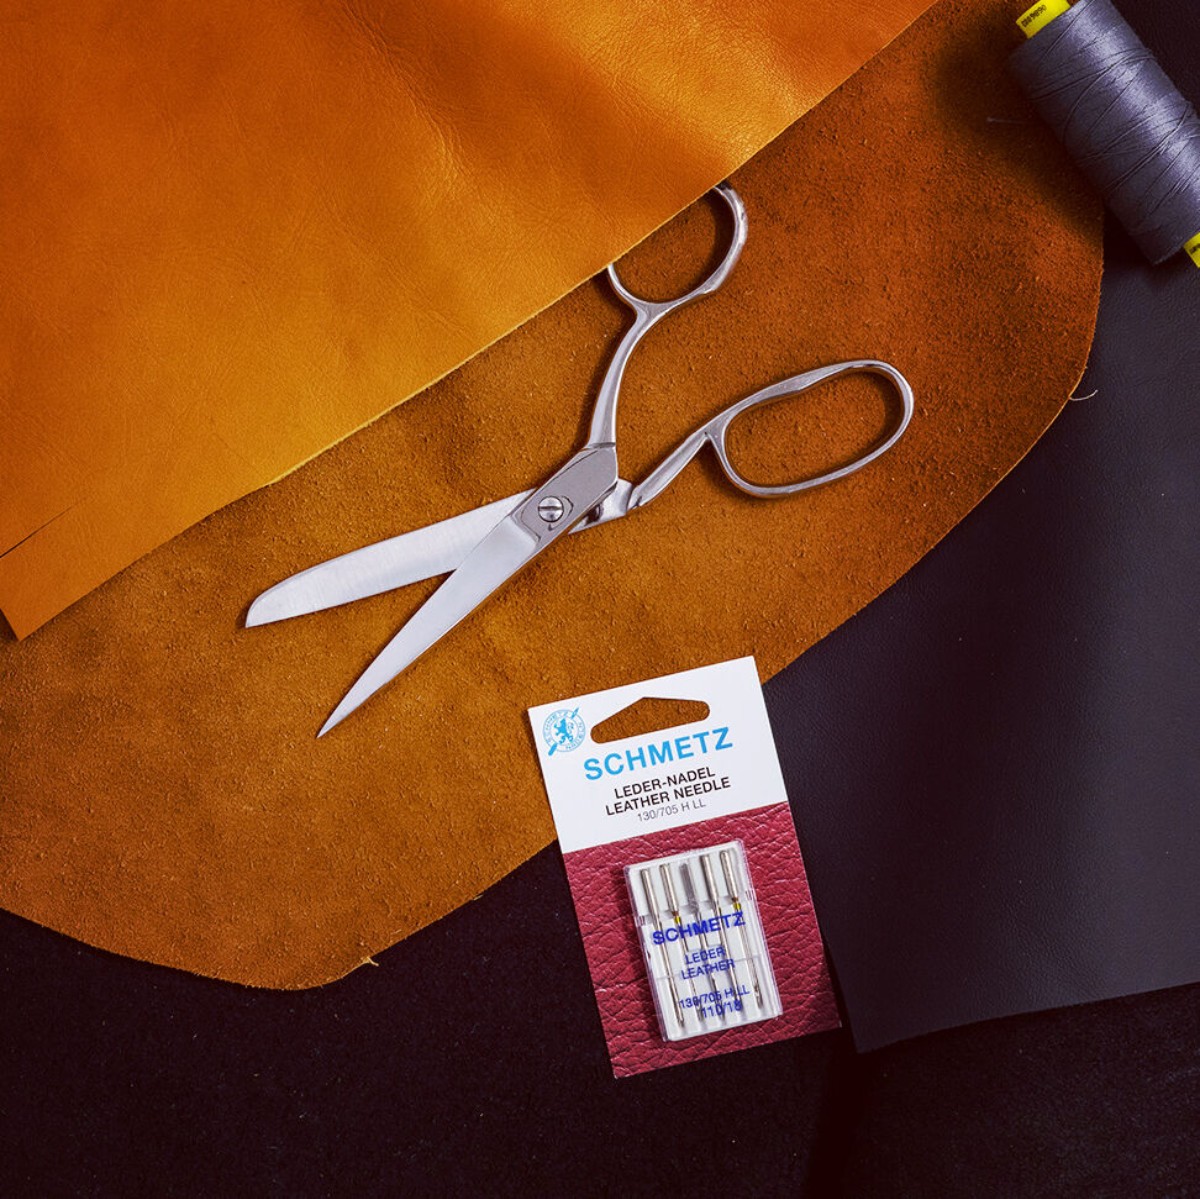
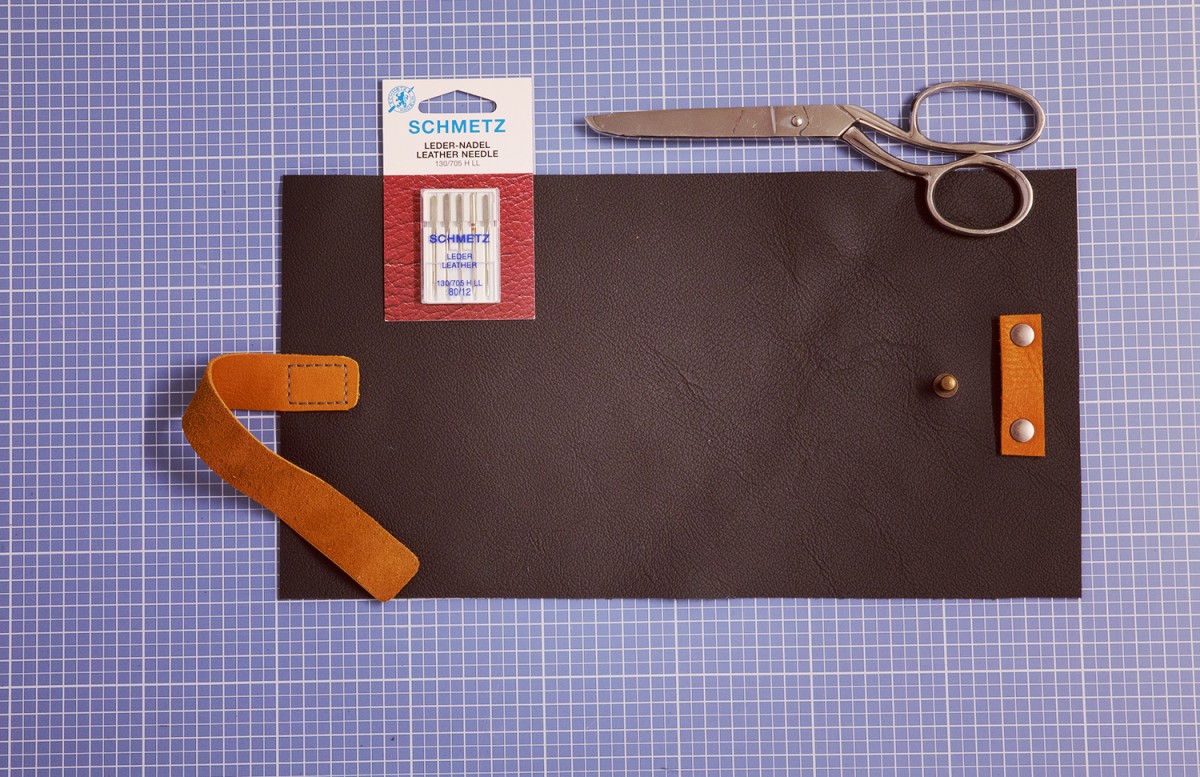
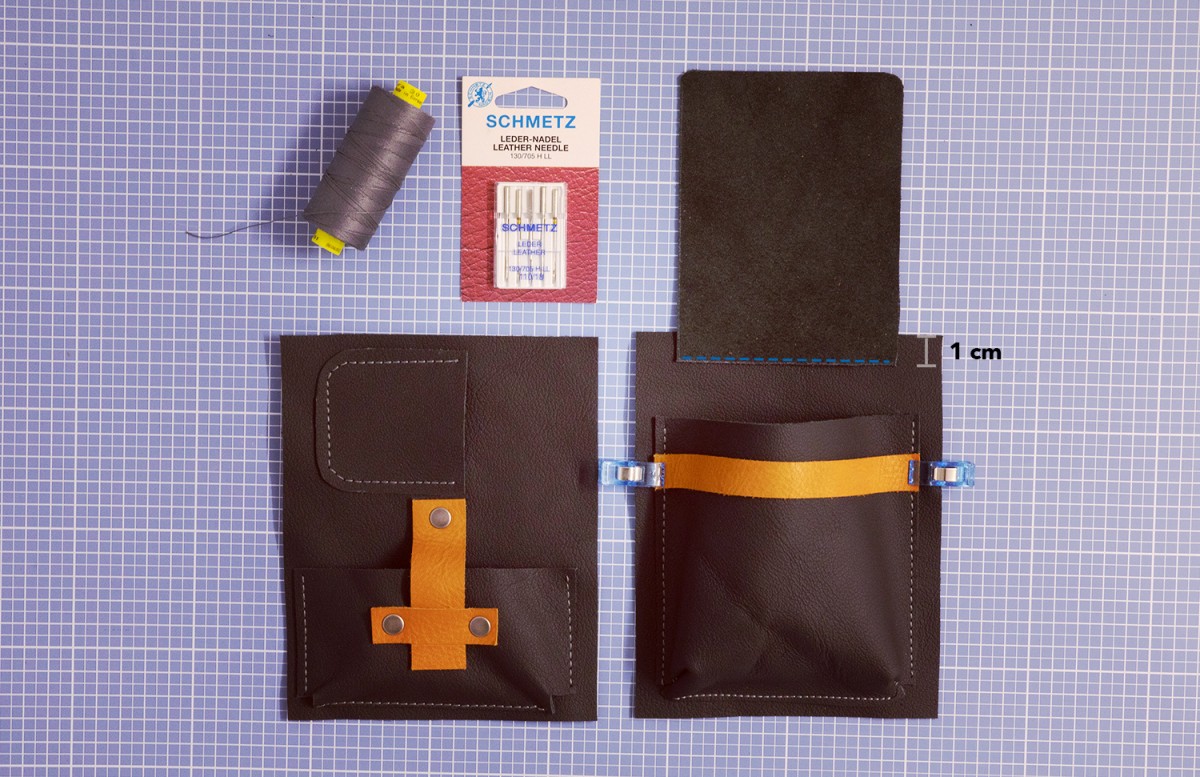
- Leather, approx. 1 mm thick (depending on preference and sewing machine)
Approx. 30 x 36 cm dark leather
Approx. 10 x 20 cm light leather - 5 universal rivets, 9 mm
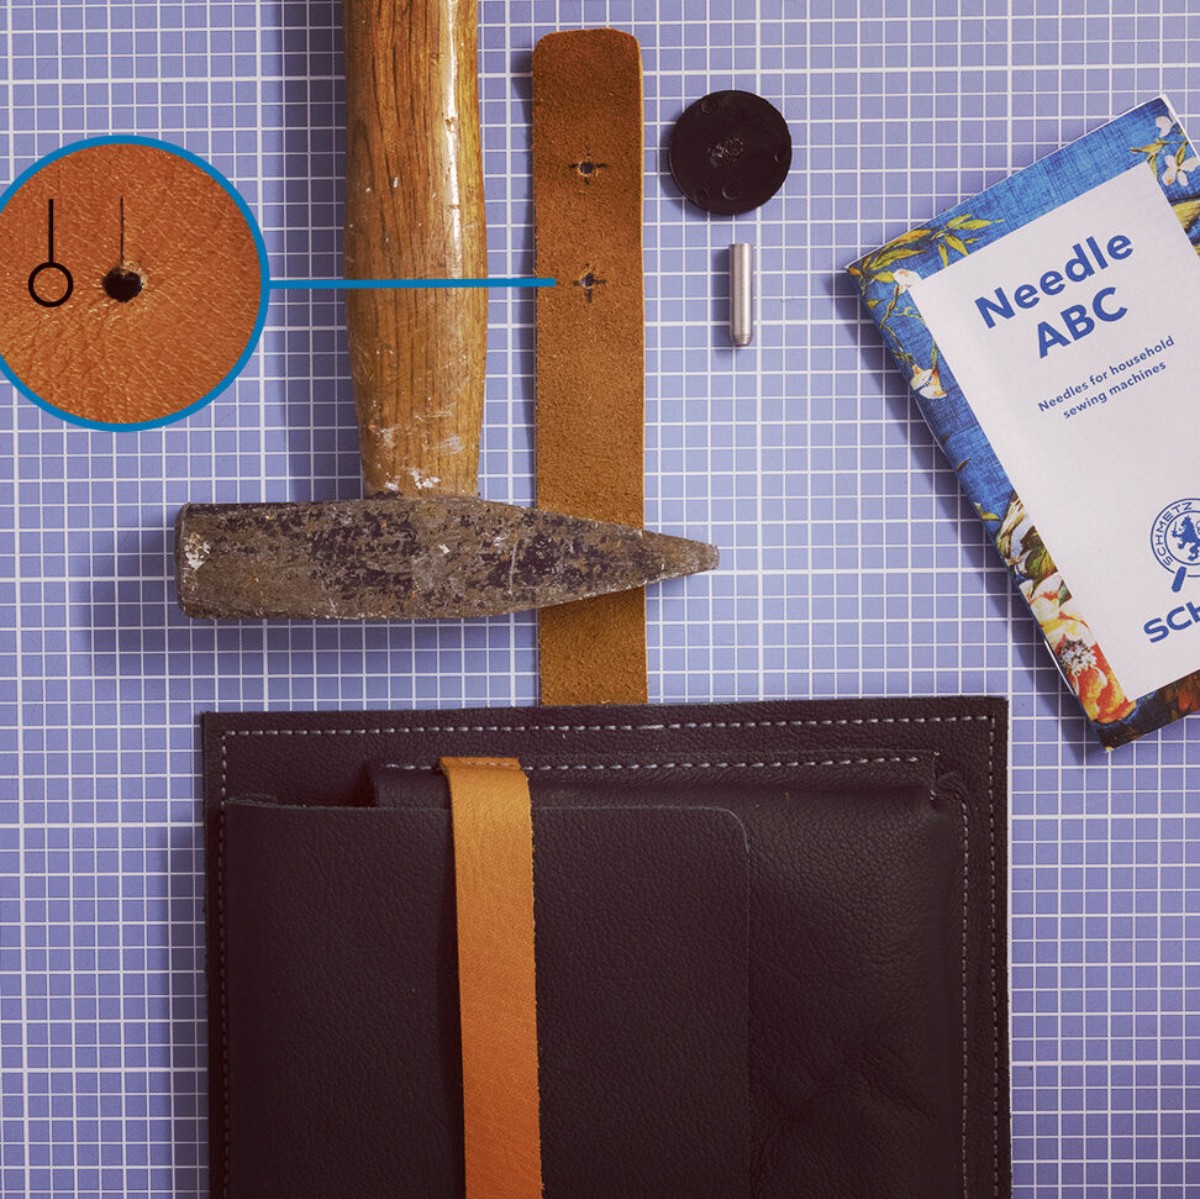
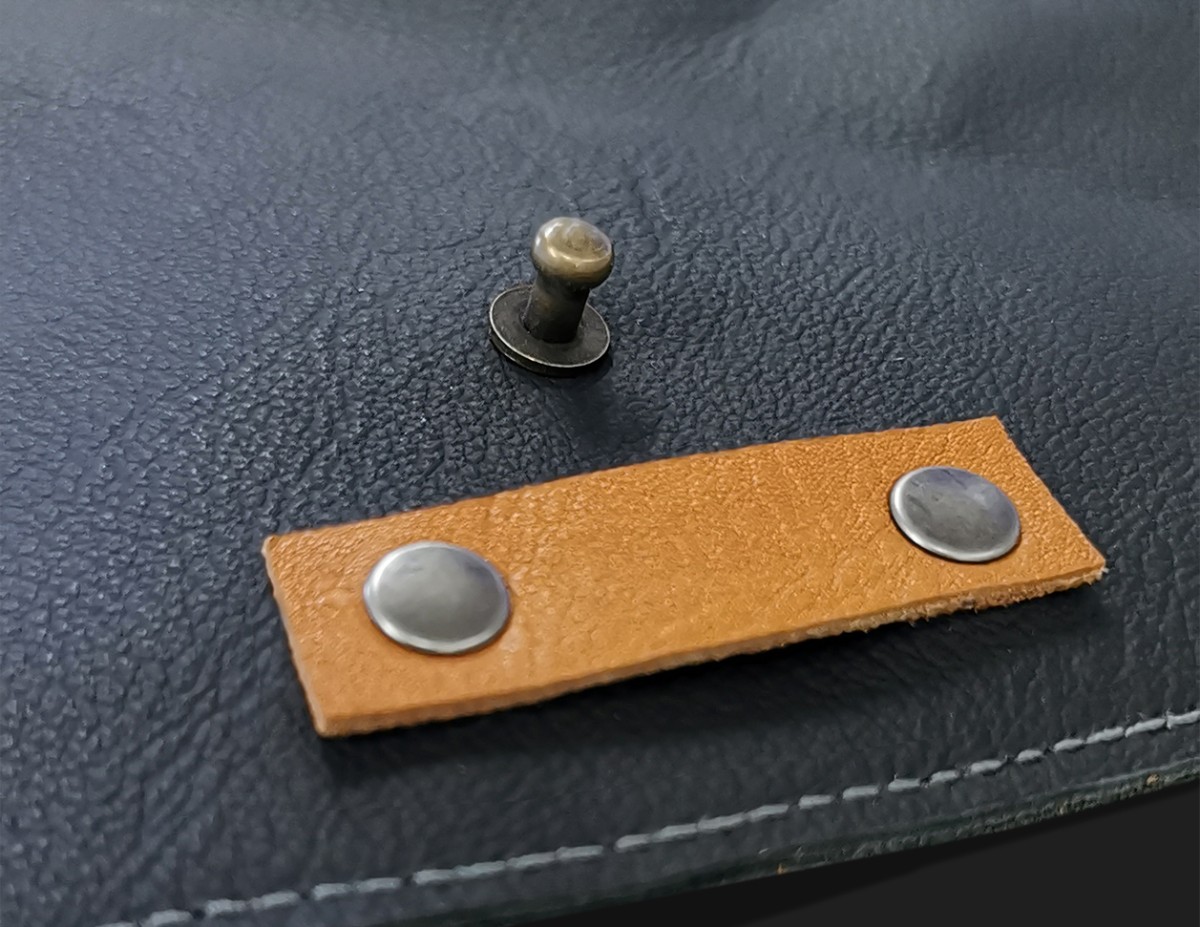
- 1 roundhead screw rivet (close-up picture)
- Color-coordinated or contrasting sewing thread (it’s up to you)
- SCHMETZ Leather Needle in needle size 110/18 or 120/19
Note: The pattern is designed to have no seam allowance – you don’t need one for this project. Make sure you print it in the original size (at 100 % scale). To do this, check the size of the control square after printing. The seams are about 2–3 mm away from the edge of the leather.
Equipment
- Household sewing machine
- Fabric clips or paper clips
- Scissors or rotary cutter with cutting mat and ruler
- Hole punch (included with universal rivets) or leather punch
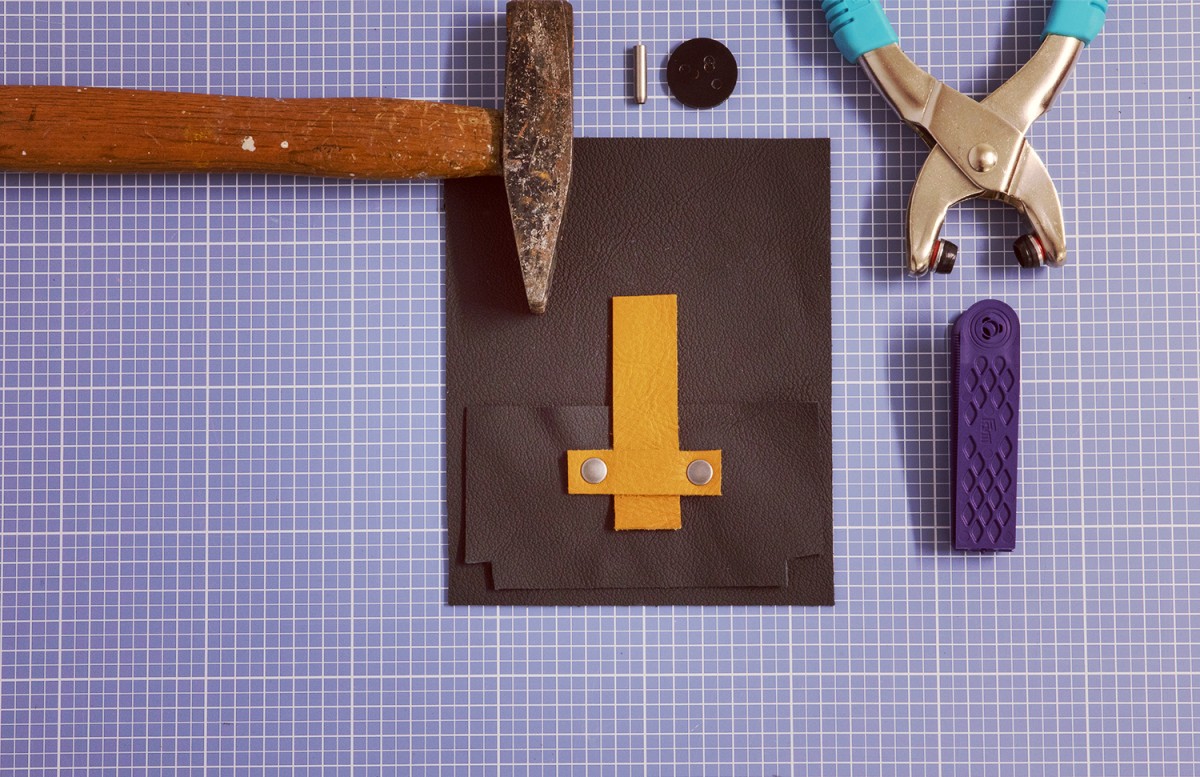
- Hammer for hole punch and rivets
- Rivet pliers for rivets
- Hand gauge
- Double-sided tape for sewing ( e.g. Stylefix tape or WonderTape)
- Tailor’s chalk or pen for transferring the pattern
General information
Sew a test piece with two layers of leather (using thicker decorative thread and thinner bobbin thread).
You can also test the sewing machine’s backstitch function and then check the strength of the seam. If the seam opens again, make sure you do not use the automatic backstitch function in any of the subsequent steps. Instead cut off the ends of the threads, leaving a tail of approx. 4 cm, knot by hand and allow to melt slightly. Practice finishing your stitches using this method a few times on the sample piece.
You will find it easier to sew together the individual pieces without them slipping if you stick them together first using PRYM WonderTape, for example, or secure them carefully with fabric clips. We don’t recommend using pins as they would create puncture holes in the leather.
Choose a stitch length of at least 3 mm so as not to perforate the leather.
Unless explicitly stated otherwise, always sew with the smooth (right) side of the leather pointing upwards.
Follow the manufacturer's instructions when attaching universal rivets and roundhead screw rivets. In most cases, each layer of leather will have to be punched using a hole punch in advance before then attaching the rivet with a hammer or rivet pliers.
Time to get sewing! Sewing instructions
PREPARING THE OUTER PART OF THE CASE
Rivet strap number 3 onto the outer part of the case at the point marked on the pattern. Screw in the roundhead screw rivet into the point marked on the pattern. Sew strap number 1 onto the position marked on the pattern.
ASSEMBLE THE LEFT-HAND INNER SIDE: LARGE COMPARTMENT FOR ACCESSORIES
Rivet strap number 4 onto the point in the large accessories compartment marked on the pattern. Start sewing the bottom edge of the large compartment in the middle, 5 mm from the bottom edge of the left-hand inner side. Start sewing the sides accordingly, 1 cm from the edge in question. Rivet on strap number 5 as marked in the pattern.
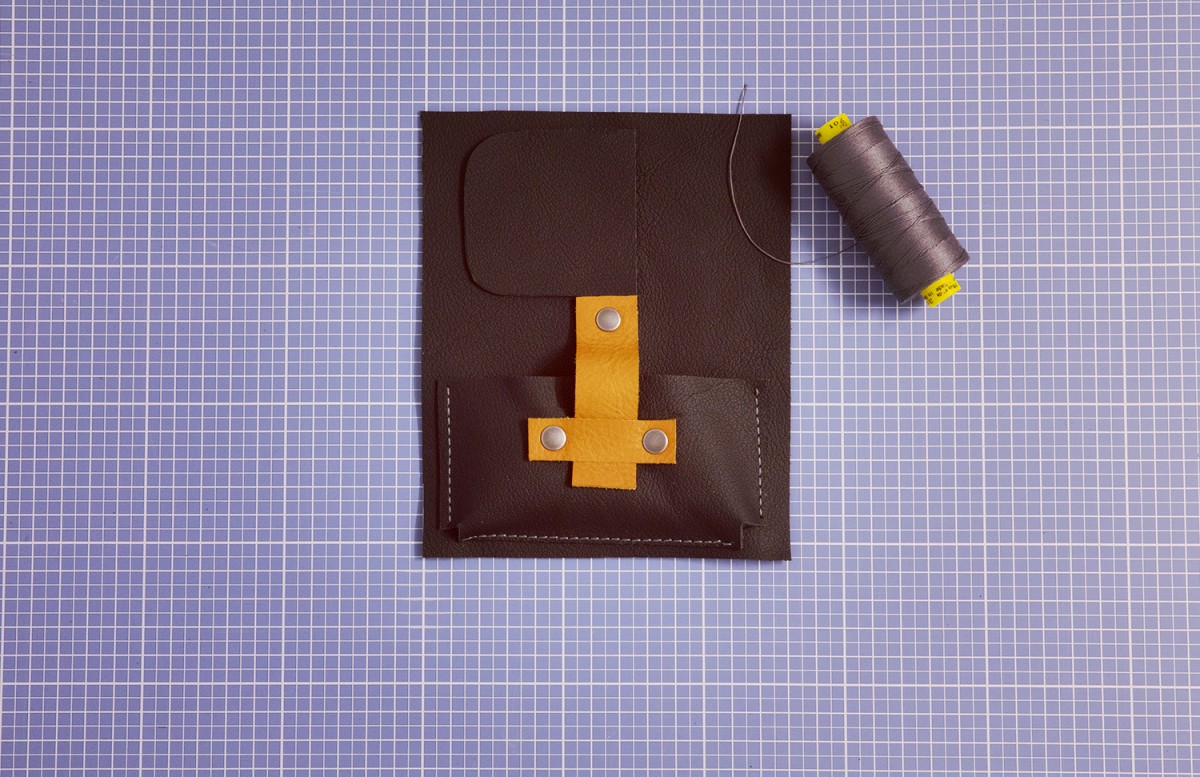
ASSEMBLE THE LEFT-HAND INNER SIDE: SMALL COMPARTMENT FOR ACCESSORIES
Position the top and left edge 1 cm away from the edge and start sewing on the small accessories compartment from there. The rounded section points to the left and the straight side to the right. Tip: Sew slowly and leave the needle down in the leather for every stitch to make the seam on the rounded section nice and even.
ASSEMBLE THE RIGHT-HAND INNER SIDE: CIGAR COMPARTMENT
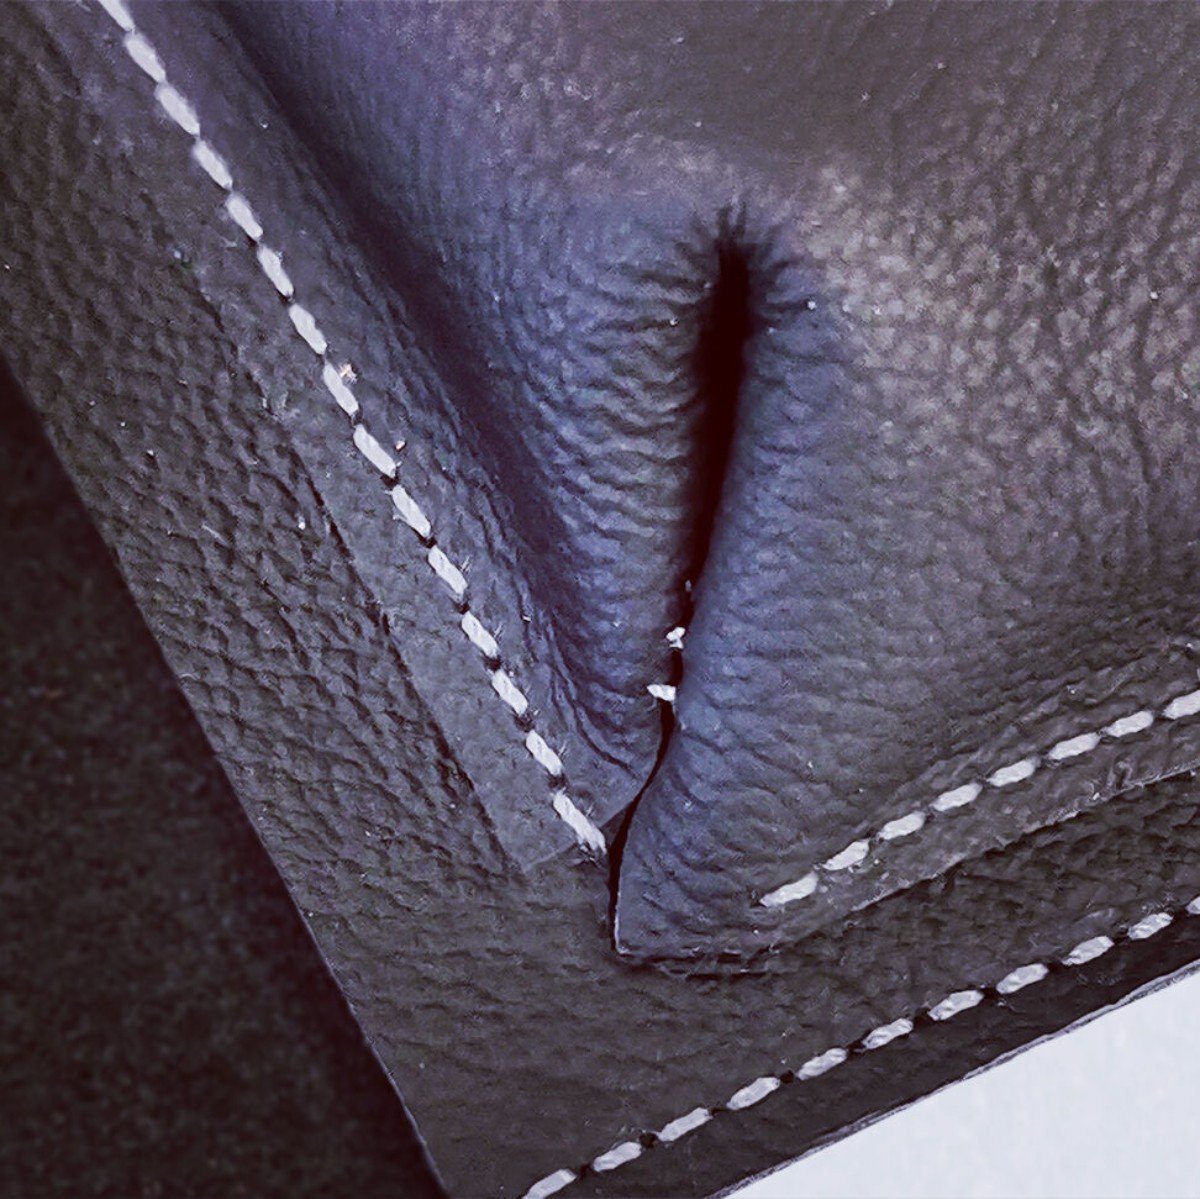
Place the edges of one cut-out corner right sides together and sew together 1.75 cm. When doing so, make sure the seam is nice and secure, knotting the ends of the thread by hand if necessary. Then repeat on the other side. Turn inside out. Sew down the bottom side, 5 mm from the edge. Sew down both sides 1.5 cm from the respective edge (sew from the open edge towards the corner).
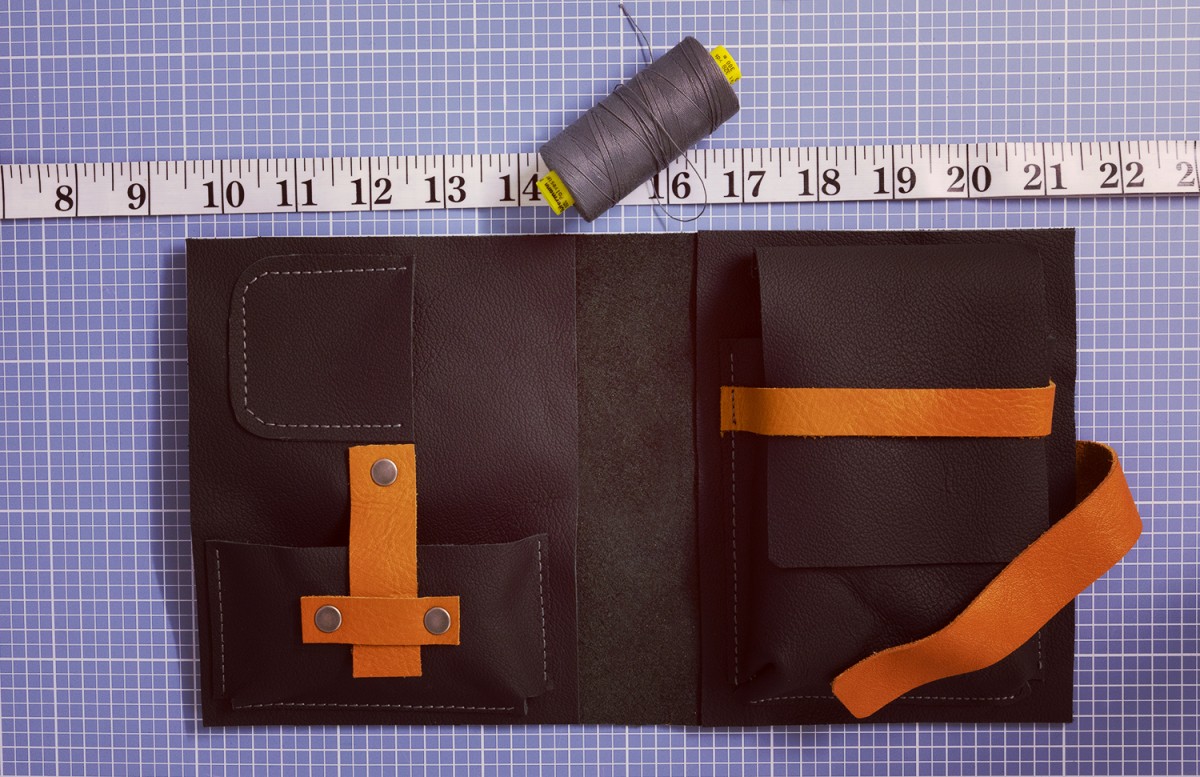
ASSEMBLE THE RIGHT-HAND INNER SIDE: STRAP NUMBER 2
Sew or rivet strap number 2 on both sides 1 cm from the top edge of the cigar compartment onto the existing seam. Secure the cigar cover to the top edge with the rough side of the leather facing up with a 1 cm overlap. Then sew down close to the edge. Reason: When assembling all parts (step 6), the cover is folded down. There then still has to be enough space for the surrounding seam.
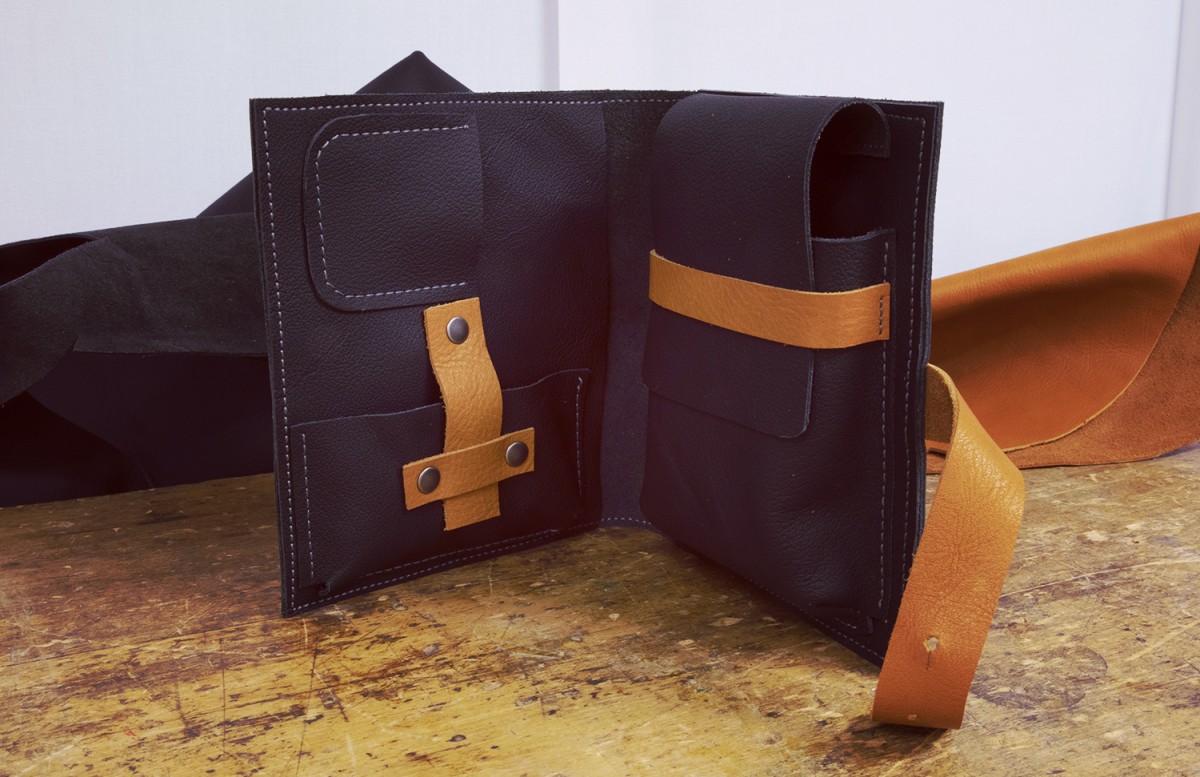
ASSEMBLE ALL INDIVIDUAL PARTS
If necessary, start by sticking together the three outer edges of the left- and right-hand inner sides to the outer section using Stylefix tape or use fabric clips to secure them tightly together. Leave open the long edges that will later be on the inside. For the next step, insert the cigar compartment into the flap, then sew once all the way round, keeping close to the edge. If necessary, carefully cut off the protruding edges on both parts using a rotary cutter and ruler.
That's it! The case can now be filled with your accessories. When everything is in place, punch a hole at the relevant place in strap number 1. Then expand the hole with a small cut of approx. 3-4 mm; the case can then be closed.