Your style highlight for fall
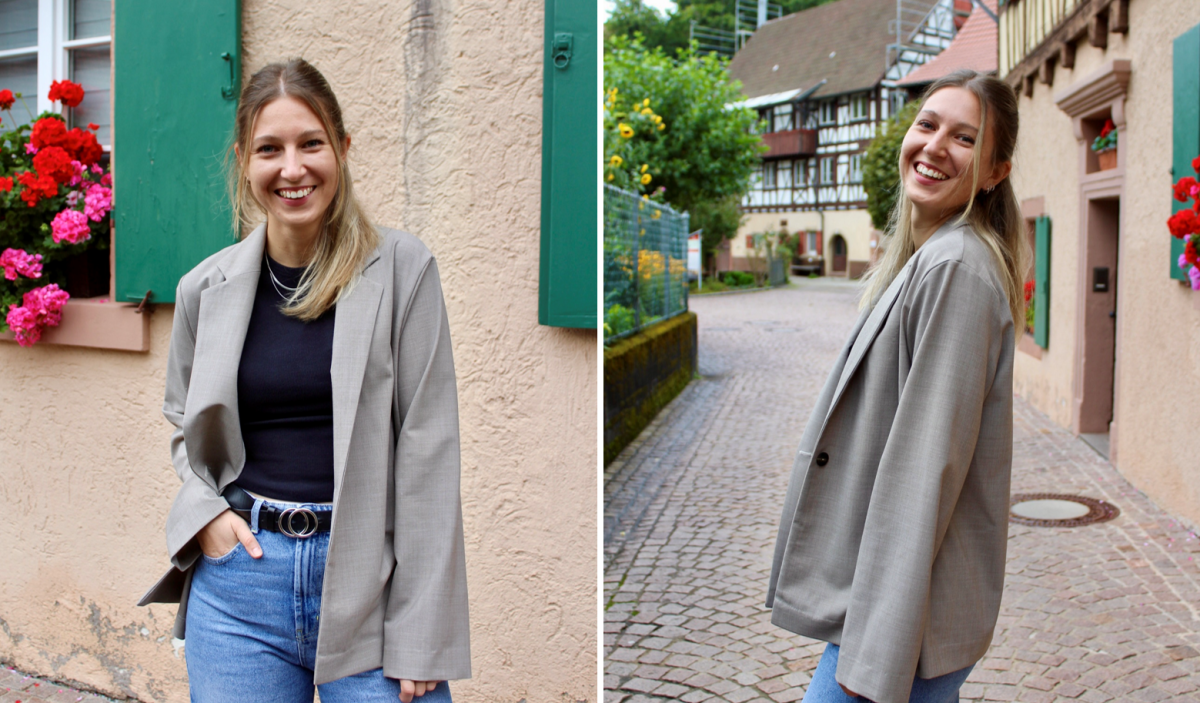
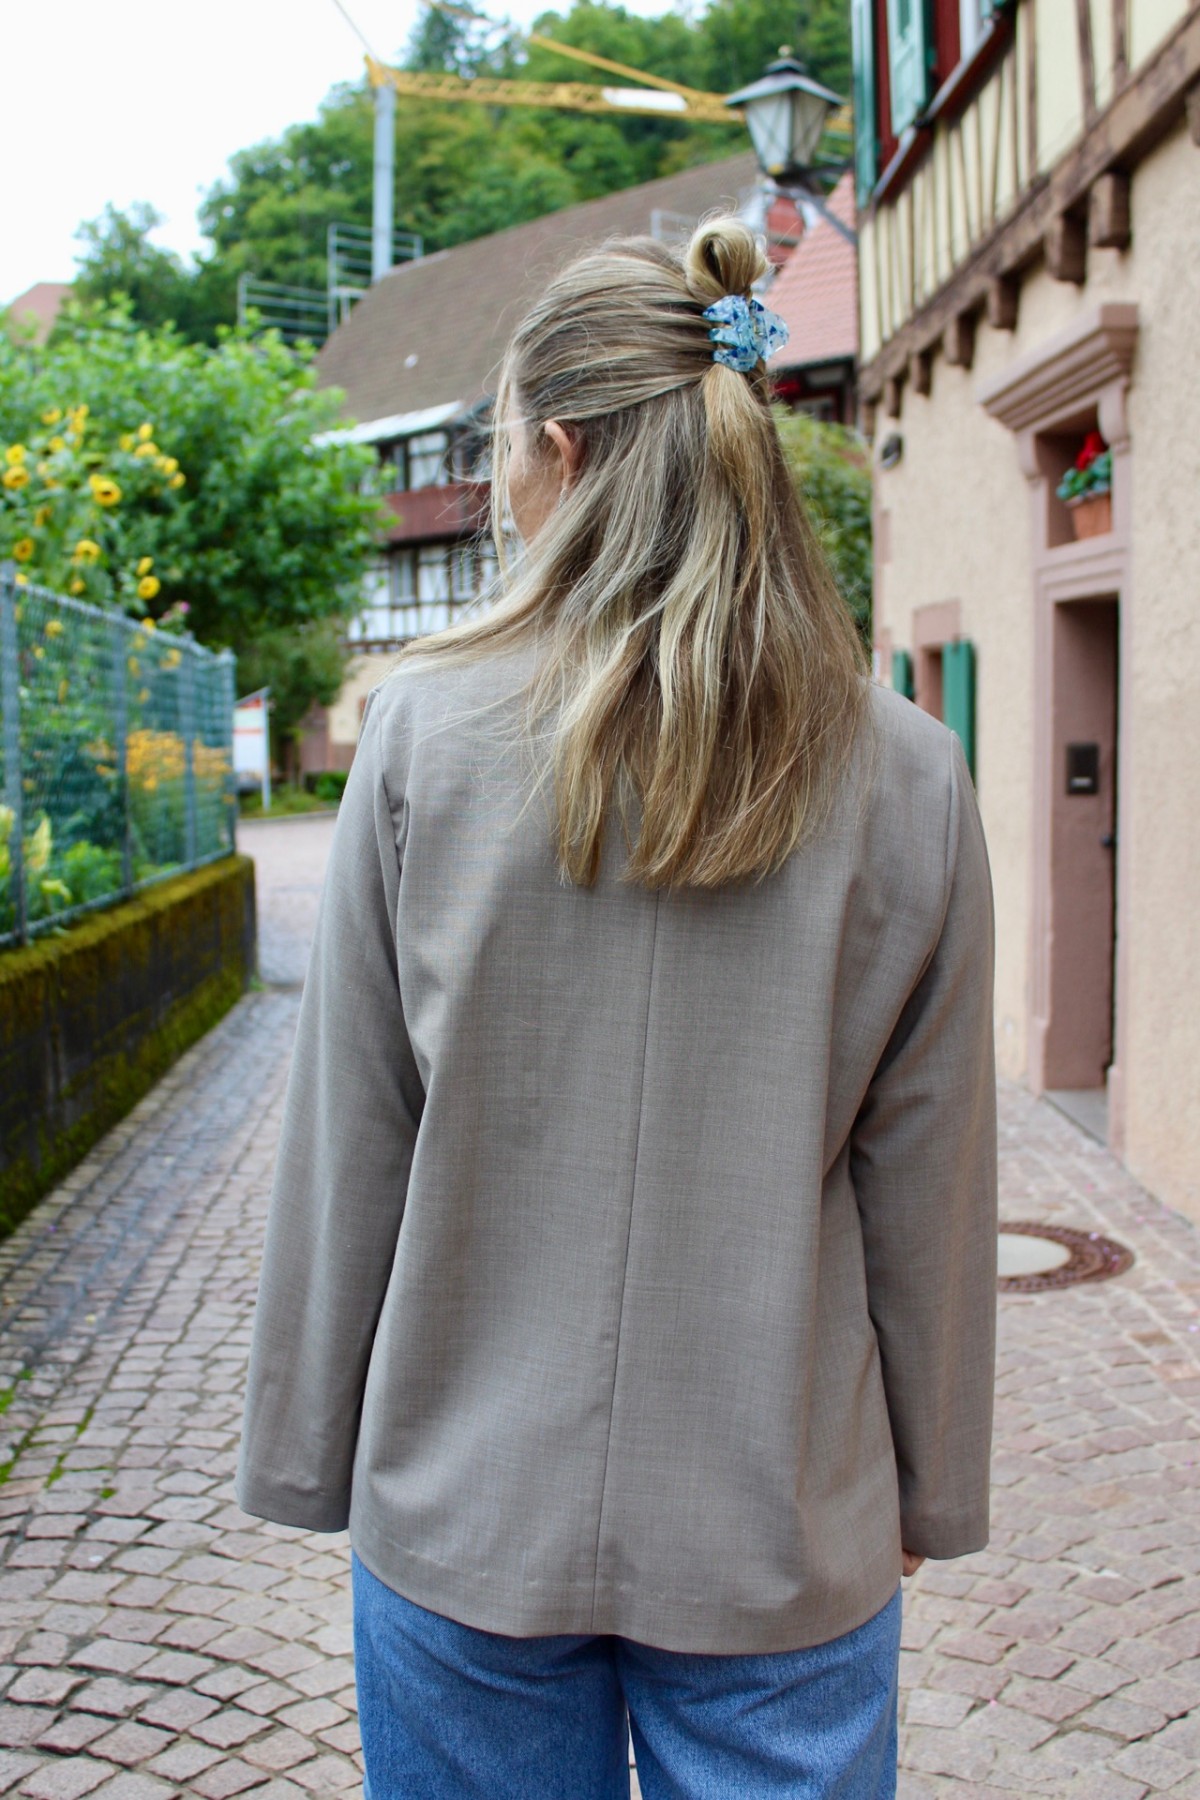
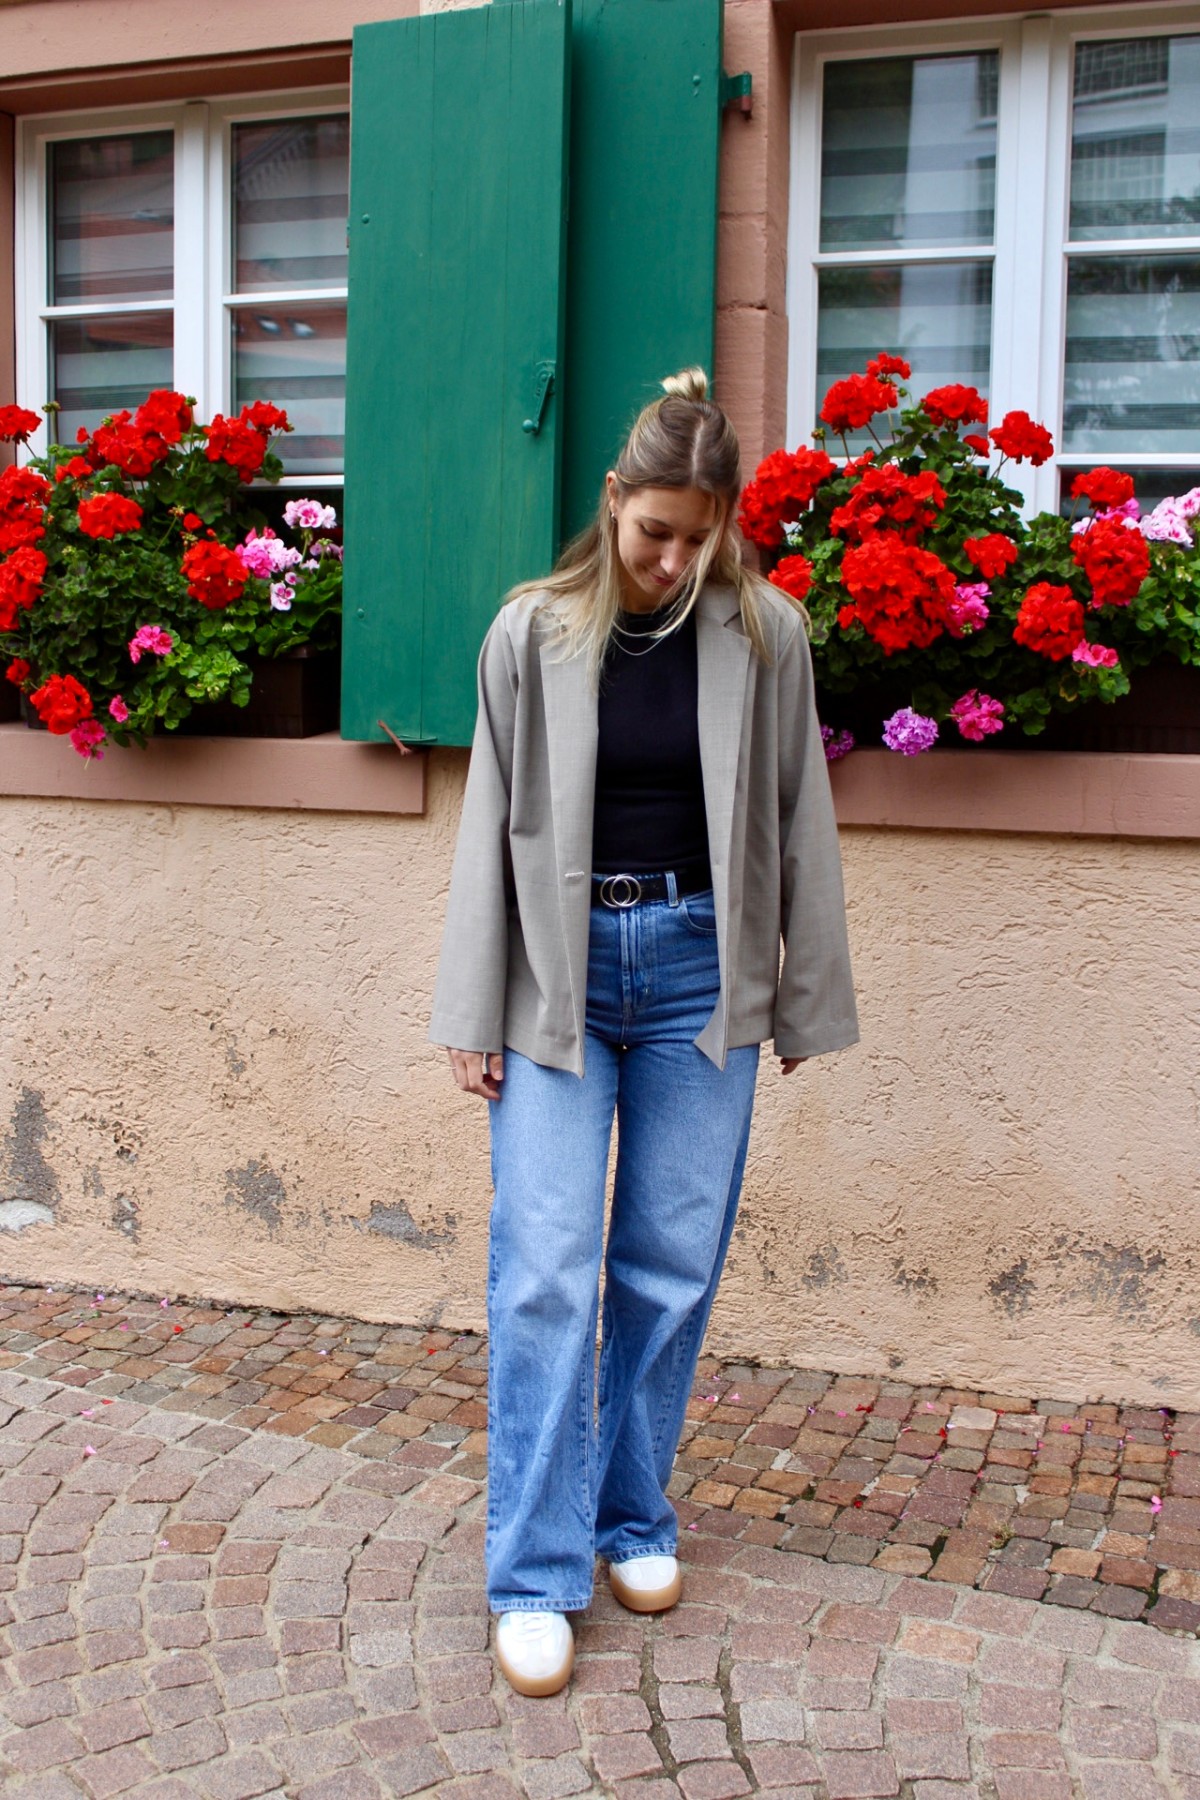
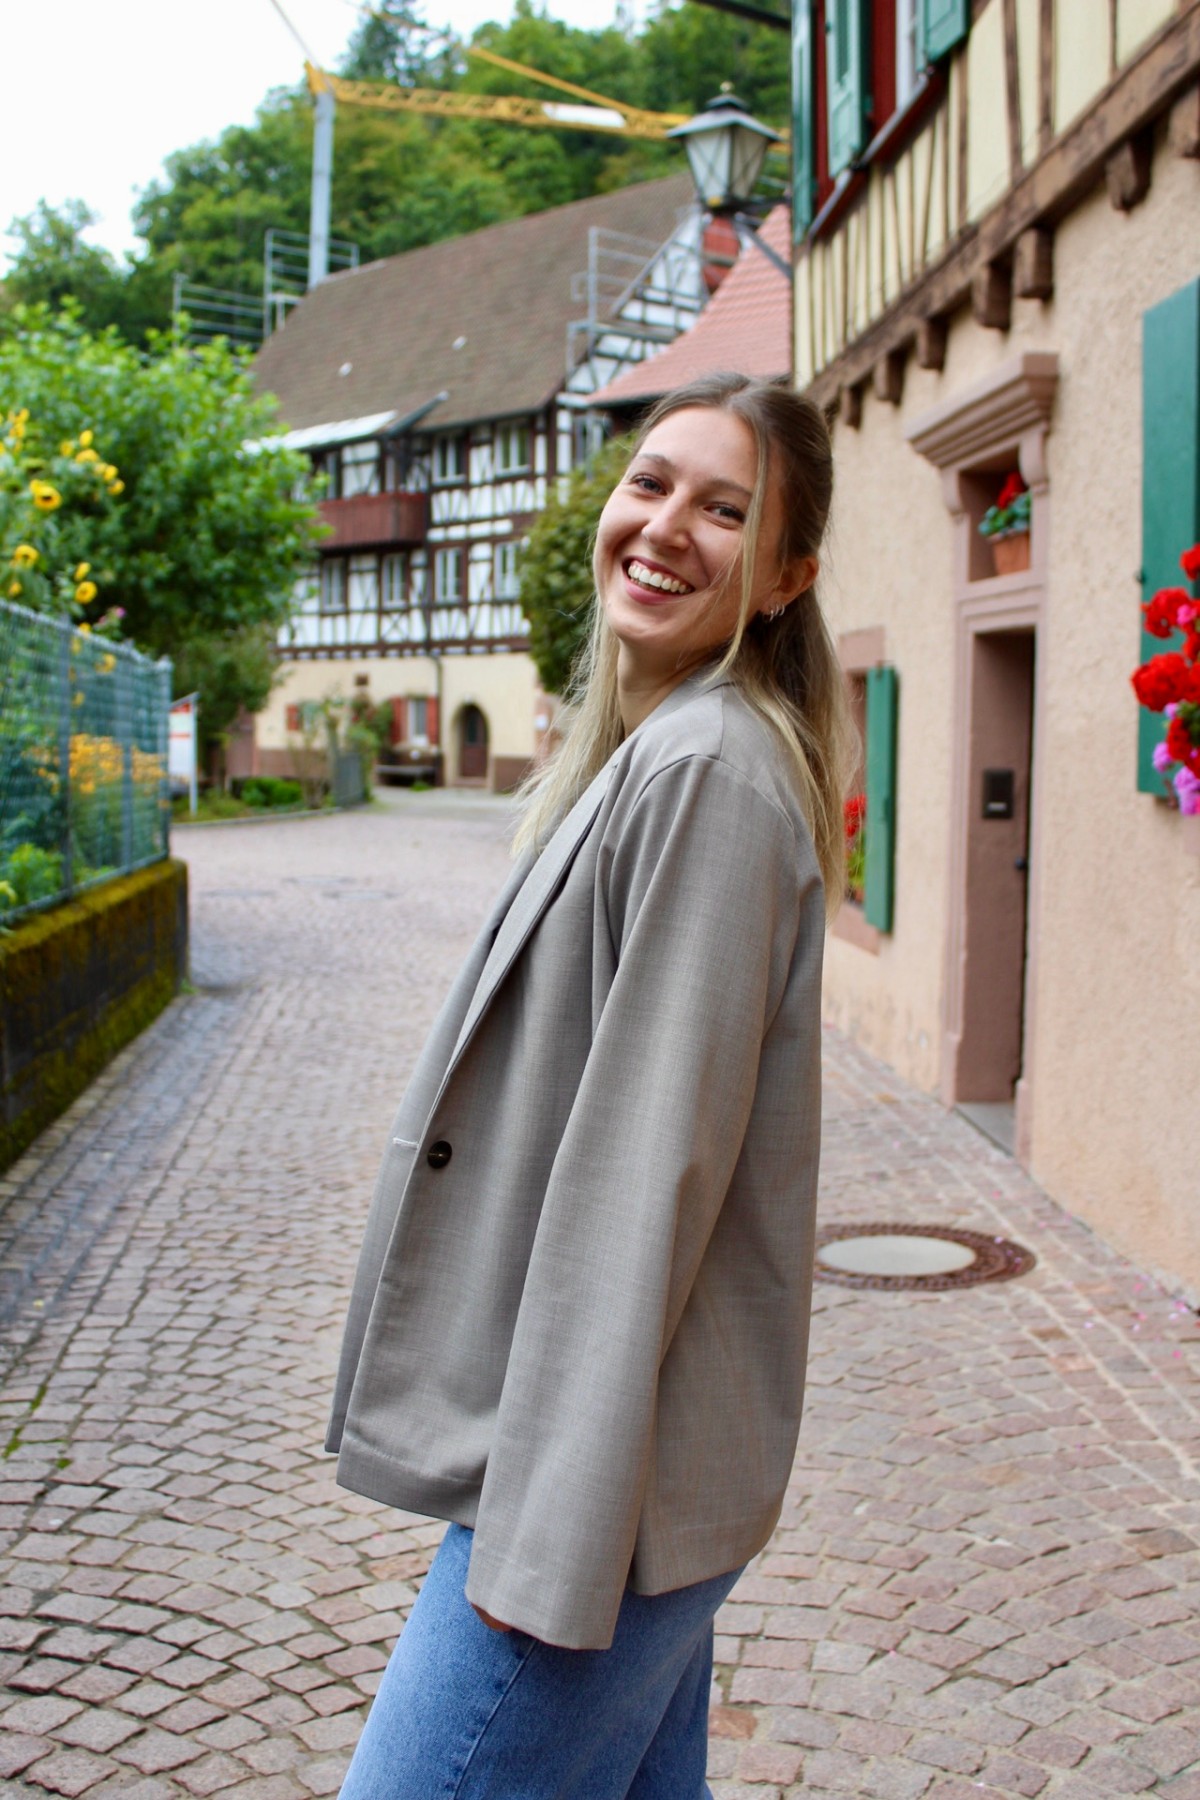
Oversized blazers are no longer just office basics, but a real must-have in every wardrobe. Their loose fit makes them look relaxed and chic at the same time. Whether worn casually with jeans and sneakers, elegantly over a dress, or in a cool layered look with a hoodie, they adapt to any style.
With your own choice of fabric, you can make your blazer your very special favorite piece. In the top fall 2025 trend colors – such as Electric Purple for a bold statement or Mocha Mousse for a warm, elegant look – it is guaranteed to be a winner. If you like a classic look, go for gray, black, or dark blue. Patterns such as checks or pinstripes add exciting accents, while corduroy will give your blazer a particularly autumnal touch.
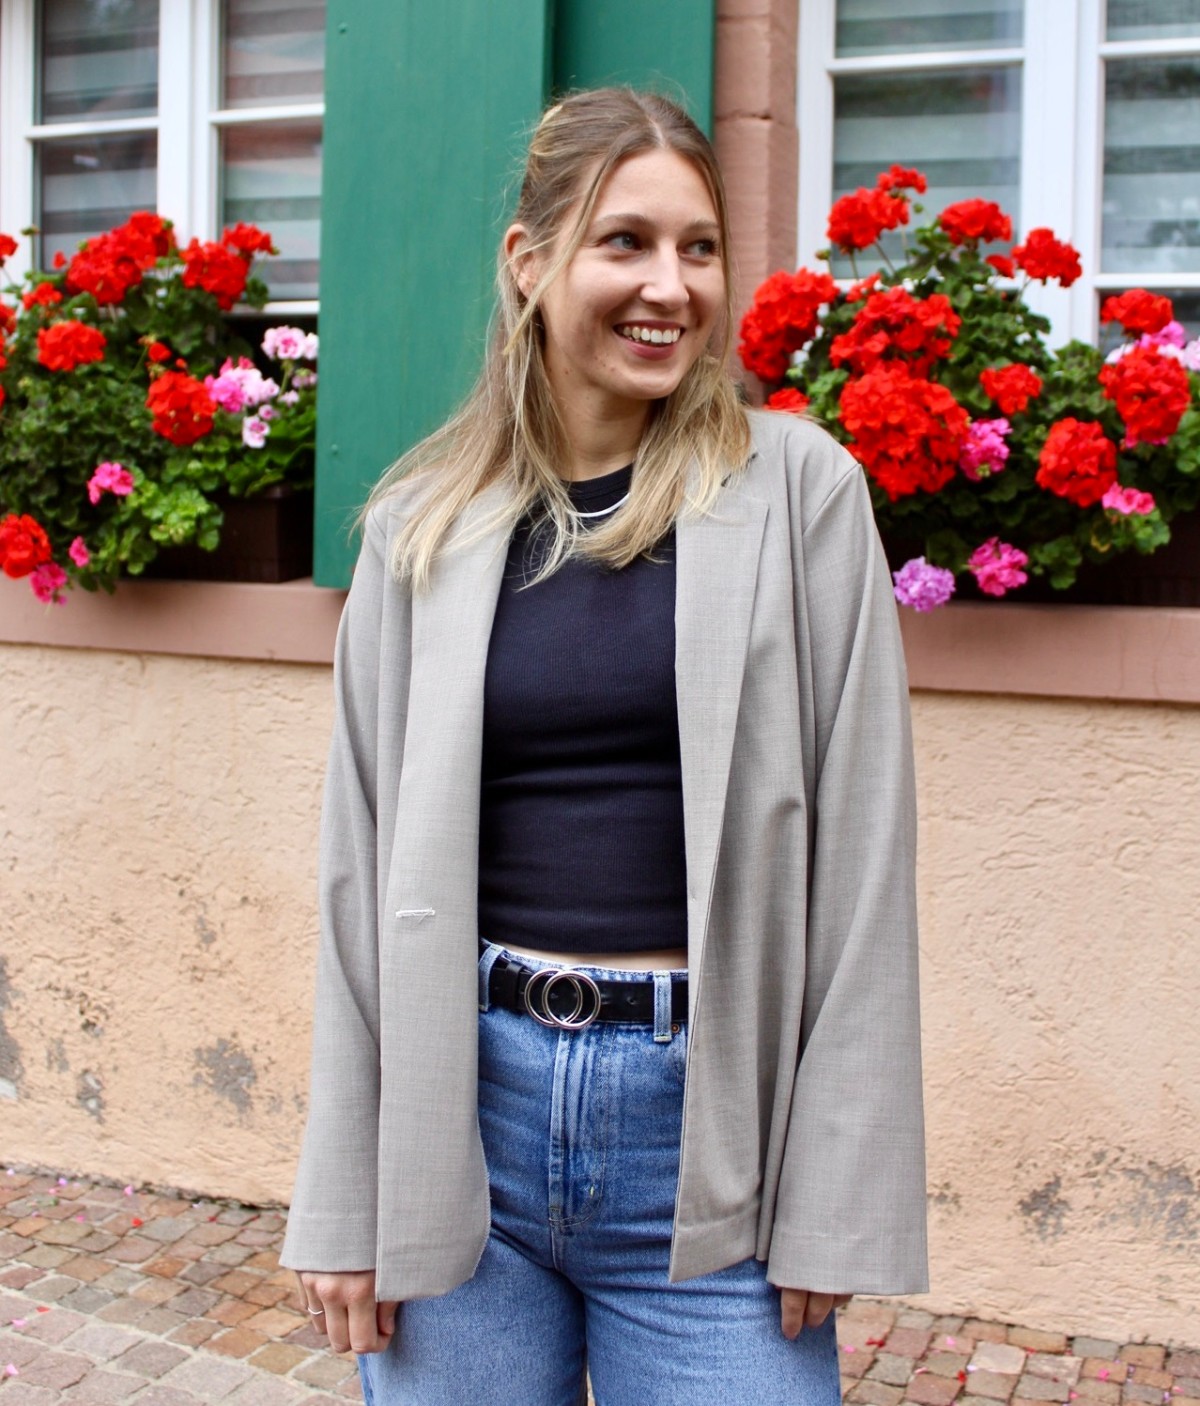
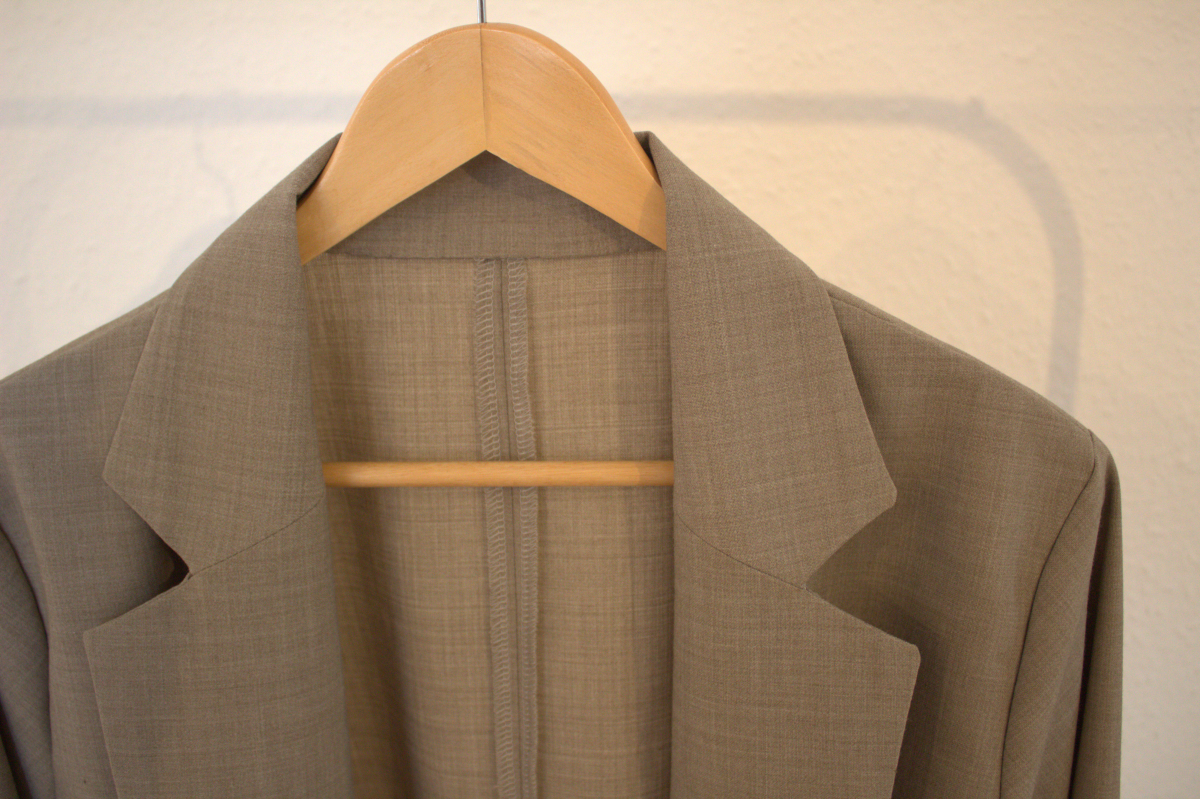
Chiara from @by.kicki opted for a dark beige wool blend fabric, creating the perfect oversized blazer for every occasion.
What combination will you choose? We can't wait to see what you will come up with and will be happy to repost your projects on our social media channels. Just tag us on Instagram @schmetz_official and let the community see your creations.
#oversizedblazer #sewingpattern #foryou #forfall
What you'll need
- Download sewing pattern
- SCHMETZ needles suitable for the fabric you choose.
(The SCHMETZ Needle ABC can help you to find the right needle.) - Fabric e.g. wool blend fabric, 150 cm wide:
165 (165) 165 (170) 170 (180) cm - Button 25,5 mm, 1 pc
- Interfacing
- Optional: hanger
Chiara chose a wool blend fabric (54% polyester, 44% virgin wool, 2% elastane) for her blazer. She used a Universal Needle size 80/12 for sewing. However, you can just as easily use another fabric of your choice. Get creative—the Needle ABC will help you choose the right needle.
Please note:
When printing the pattern, select setting "Actual size" or "100 %" to avoid measurement deviations. We recommend printing the test square (10 × 10 cm) first and checking the measurements. If the square has the correct dimensions, the entire pattern can be printed.
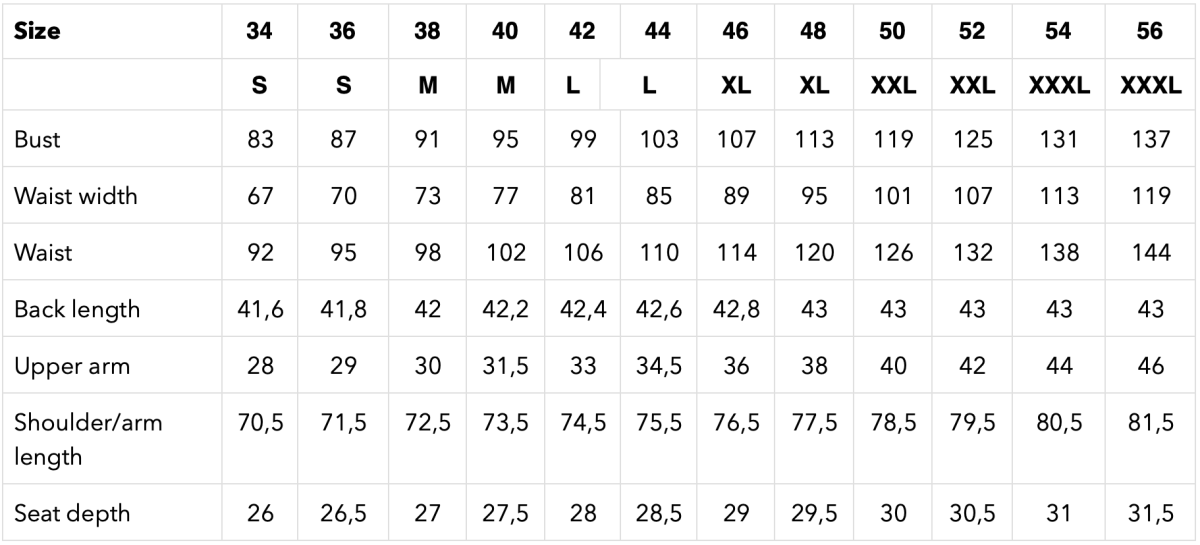
What size fits me?
Important: Our sizes cannot be compared with ready-to-wear sizes. It is very important that you take your measurements before you start.
- Tie a tight thread around your waist and pin the ends together.
- Take notes of your body measurements and use the measurement table to determine your sewing pattern size.
- Compare your body measurements with the table measurements. Your measurements may vary between different sizes. Choose the size closest to your measurements.
- Choose tops (for example dress, blouse, or jacket) according to the size of your bust; pants and skirts according to the size of your hips/waist.
- Always compare the body measurements with the table measurements, never with the paper pattern pieces. All pattern pieces already include a comfortable allowance.
How to take measurements:
It is best to take your measurements directly over your underwear. Wear a well-fitting bra. The waistband should not be too tight around the waist (it must still be possible to move it)
- Full body length: From head to toe.
- Bust: Over the fullest part of the chest. The measuring tape should be placed horizontally around the body.
- Waist: Measure at the waist. The tape should be at the level of your navel. Add 2 cm if you prefer a looser fit.
- Hips: Place the measuring tape around the widest part of your buttocks. The measuring tape should be placed horizontally around the body.
- Back length: Measure from the bottom of the neck (protrudes slightly) to your waist.
- Upper arm circumference: Place the measuring tape around the widest part of the upper arm.
Women's size chart, full body length 172 cm
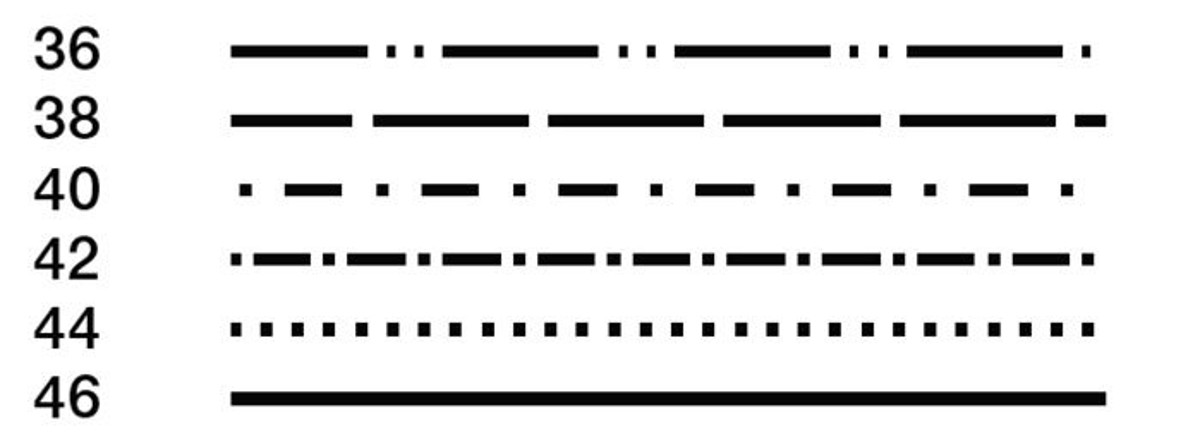
Cutting:
Size:
36 (38) 40 (42) 44 (46)
Length:
69,5 (70) 70,5 (71) 71,5 (72) cm
Sleeve length:
82,5 (83) 84 (84,5) 85 (86) cm
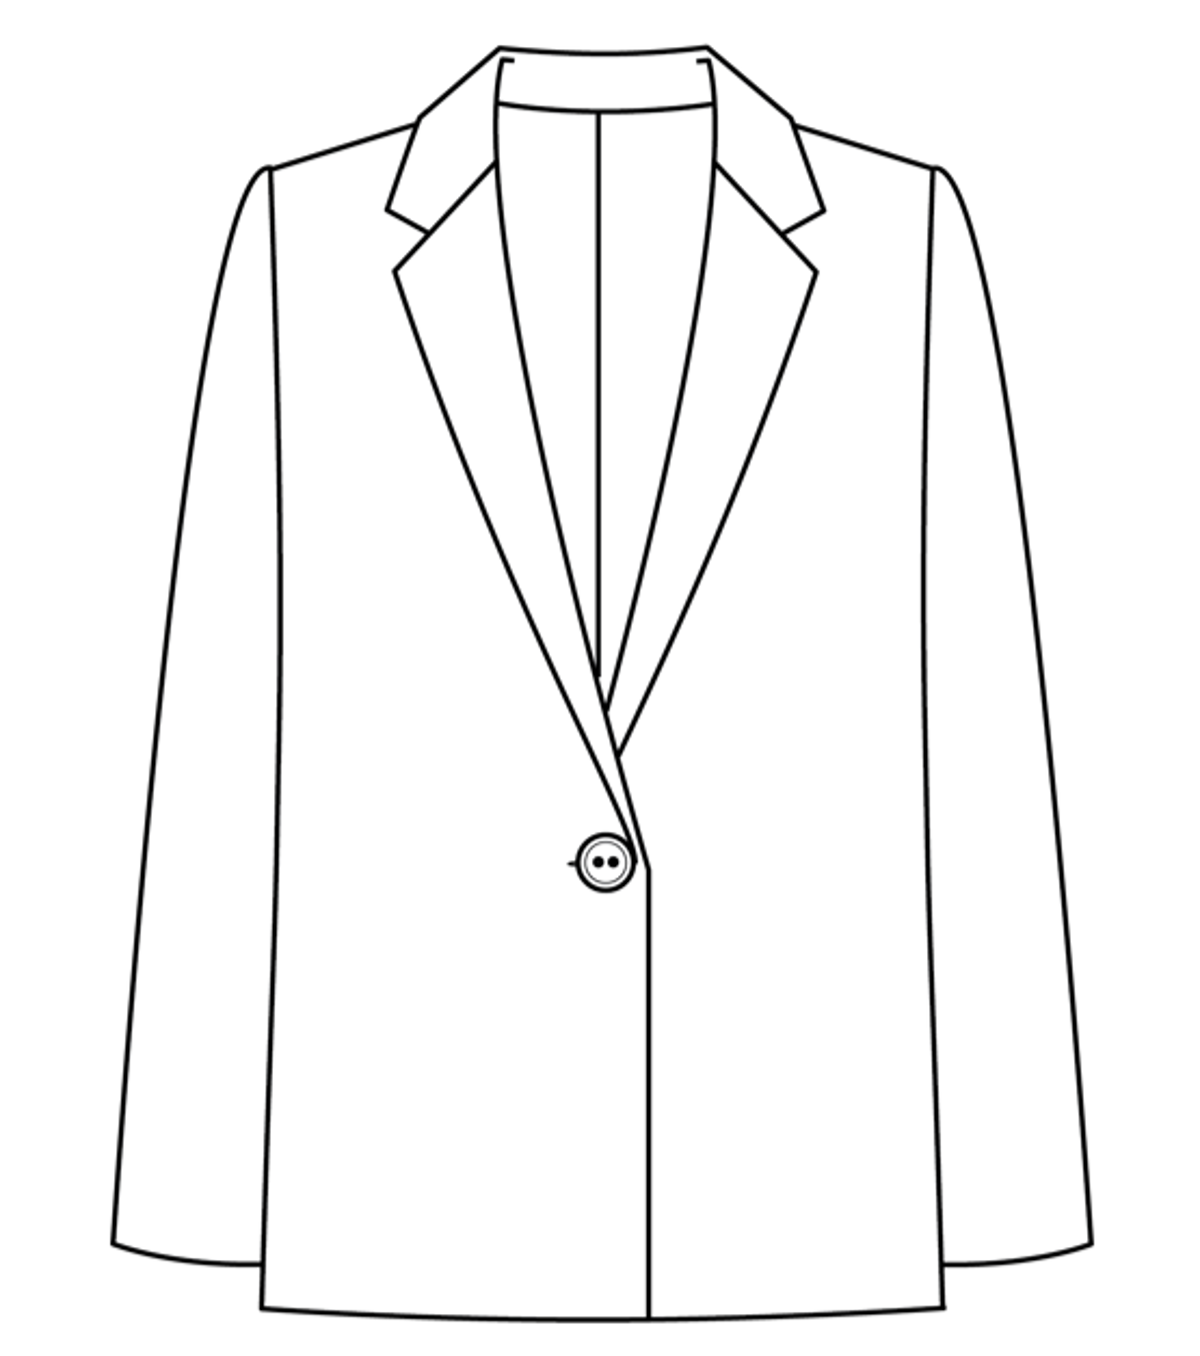
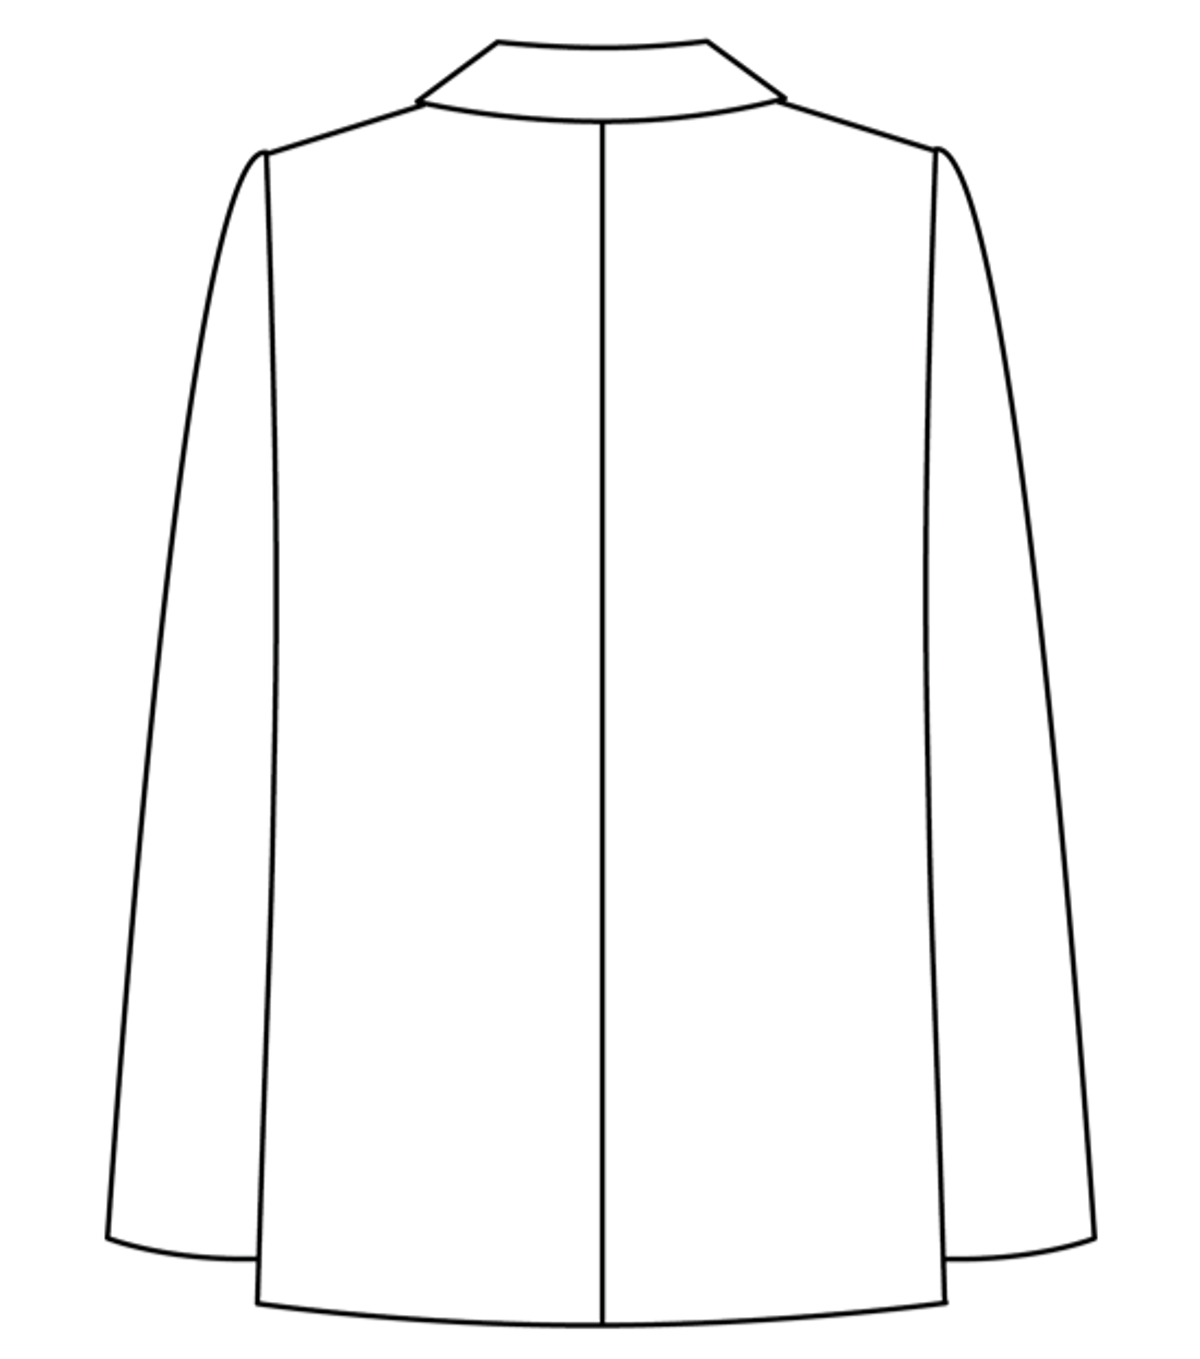
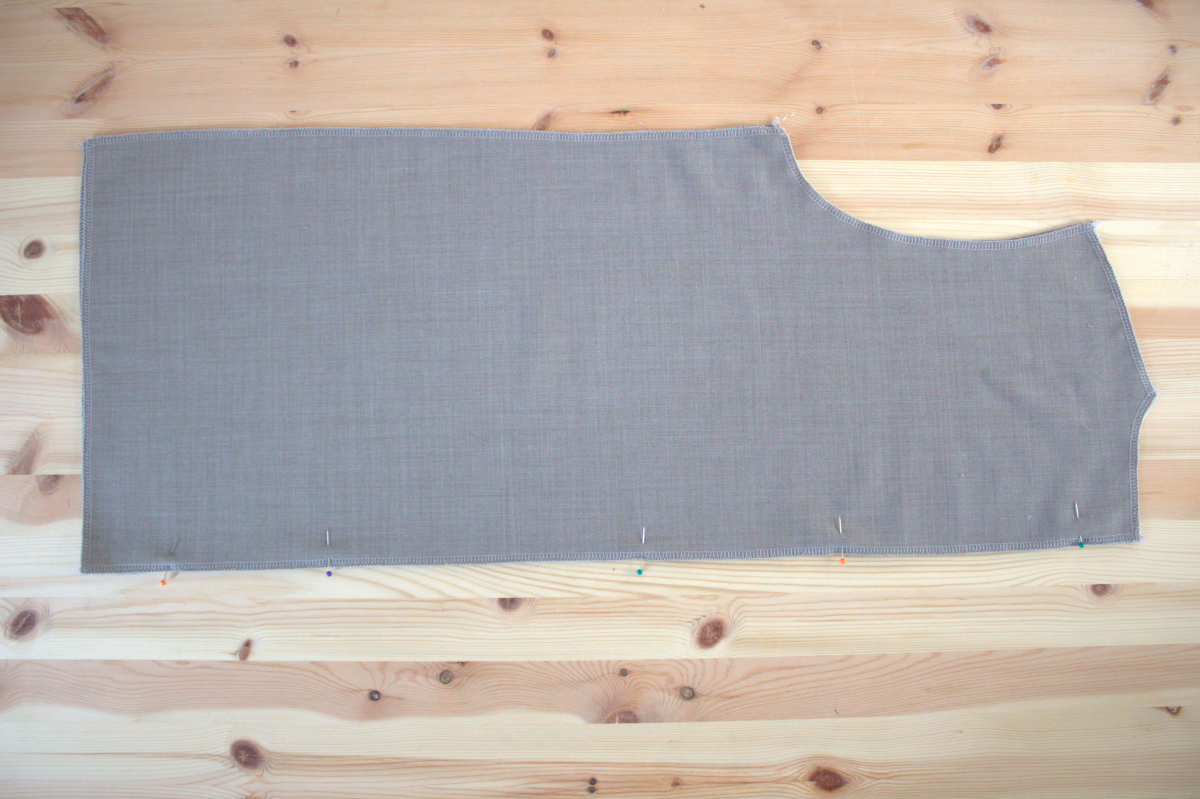
Pattern Pieces:

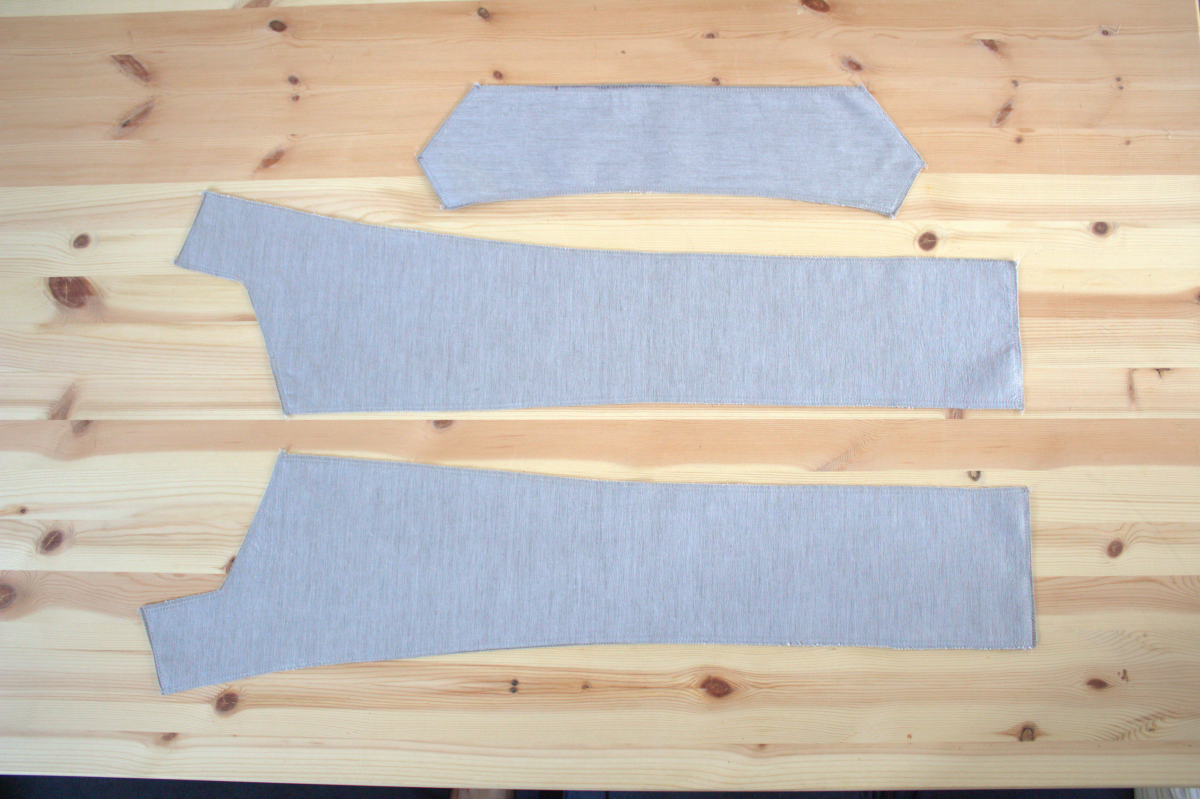
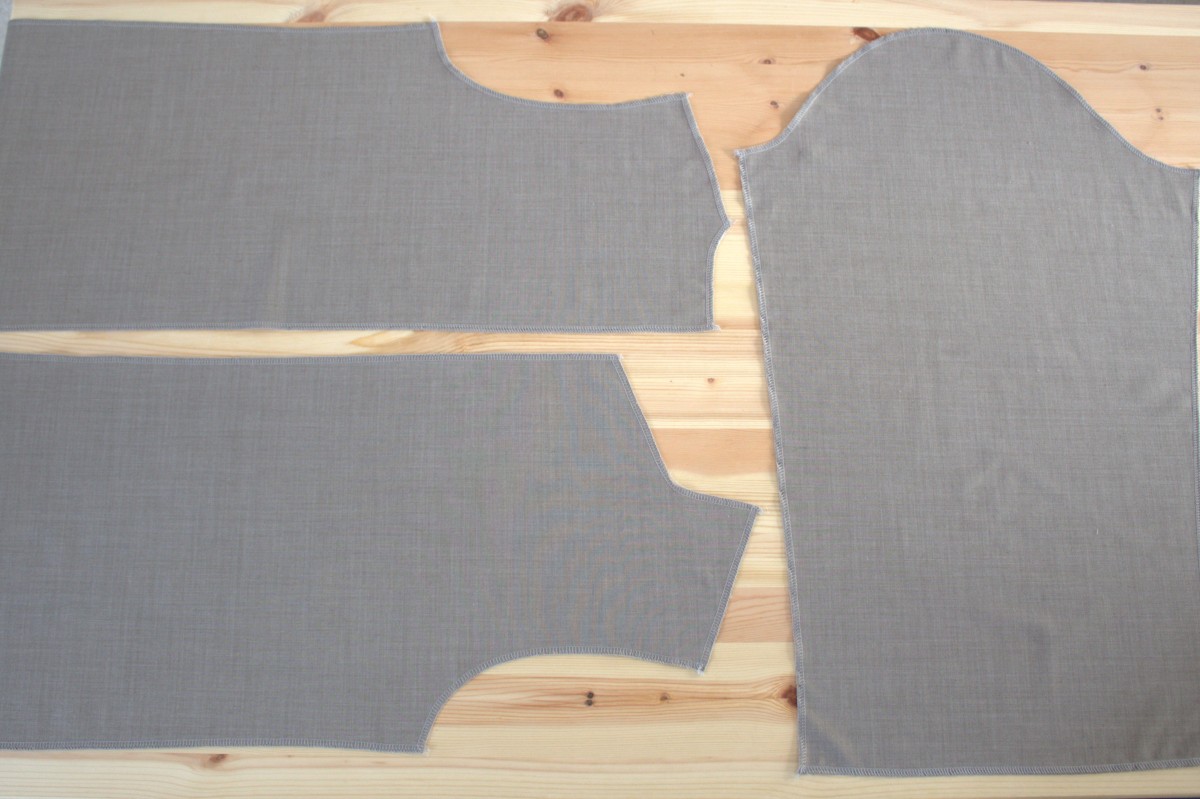
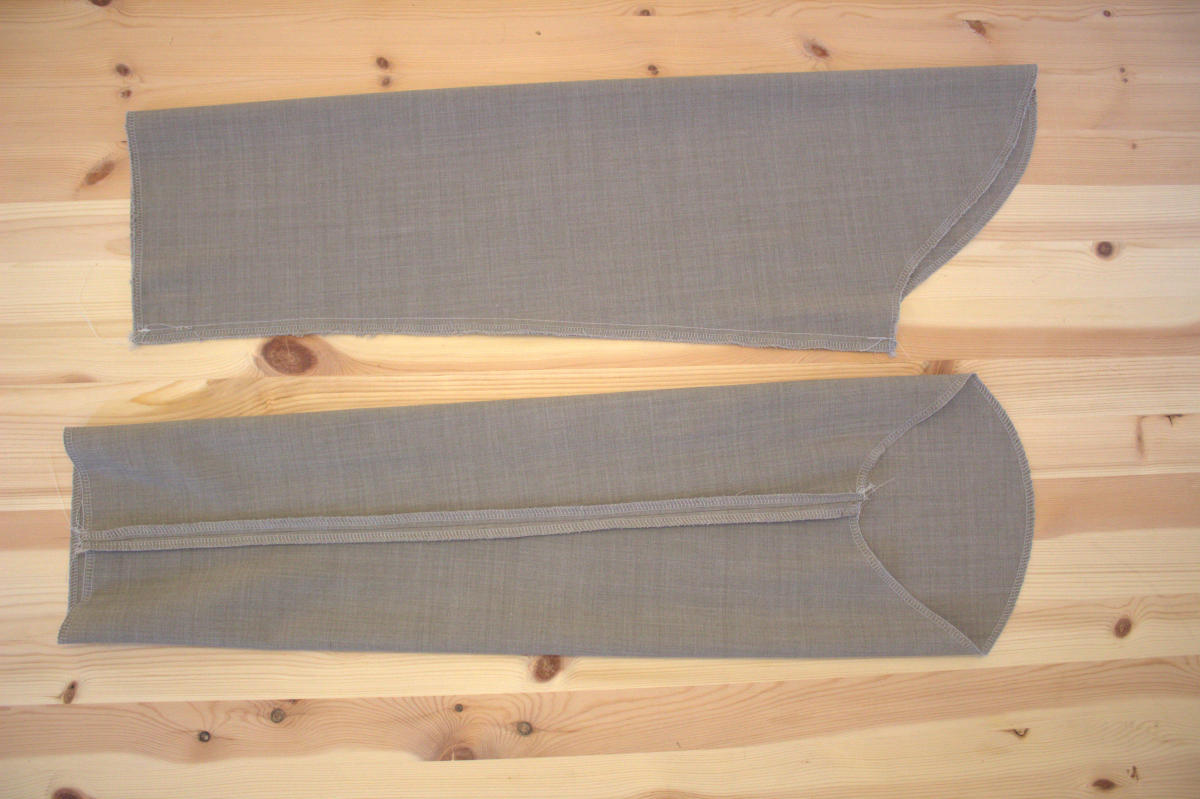
1. front part, 2x
2. back part, 2x
3. sleeves, 2x
4. facing, 2x
5. upper collar, 1x on the fabric fold
6. under collar, 1x on the fabric fold
Note:
The parts marked in gray on the pattern piece overview must also be cut from interfacing.
Time to get sewing! Sewing instructions
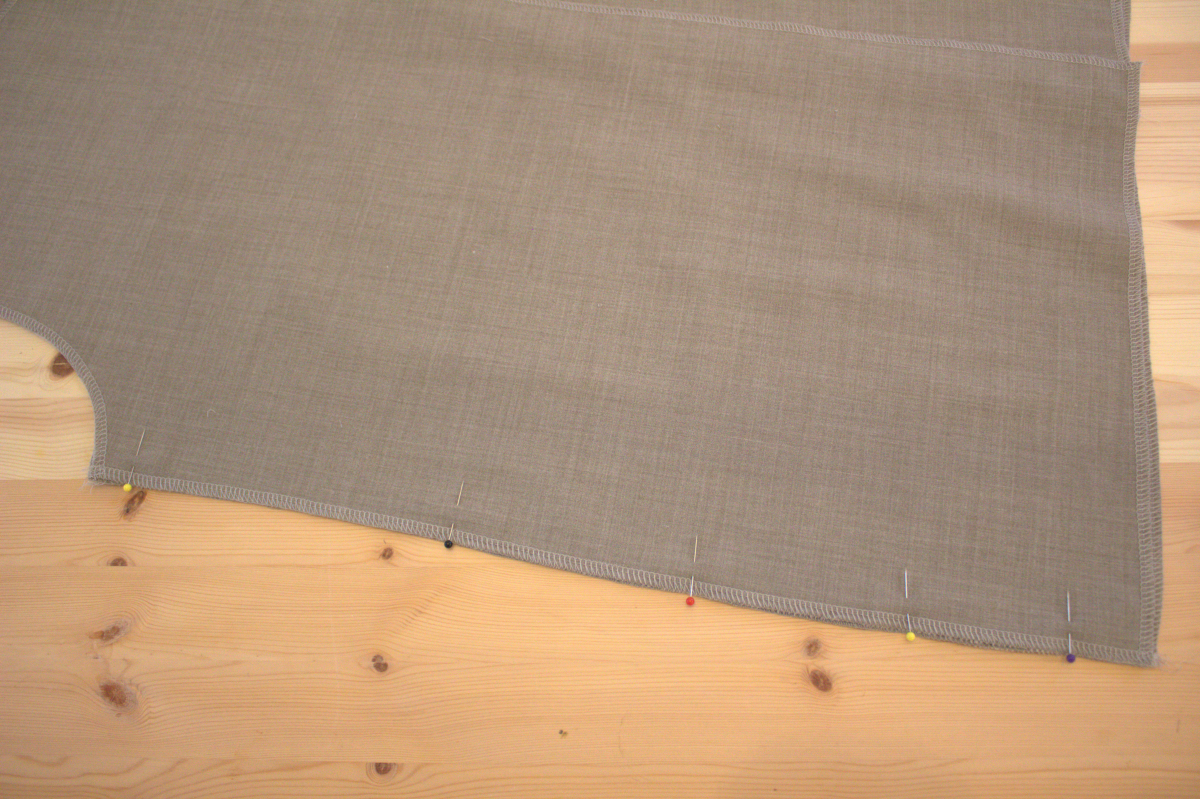
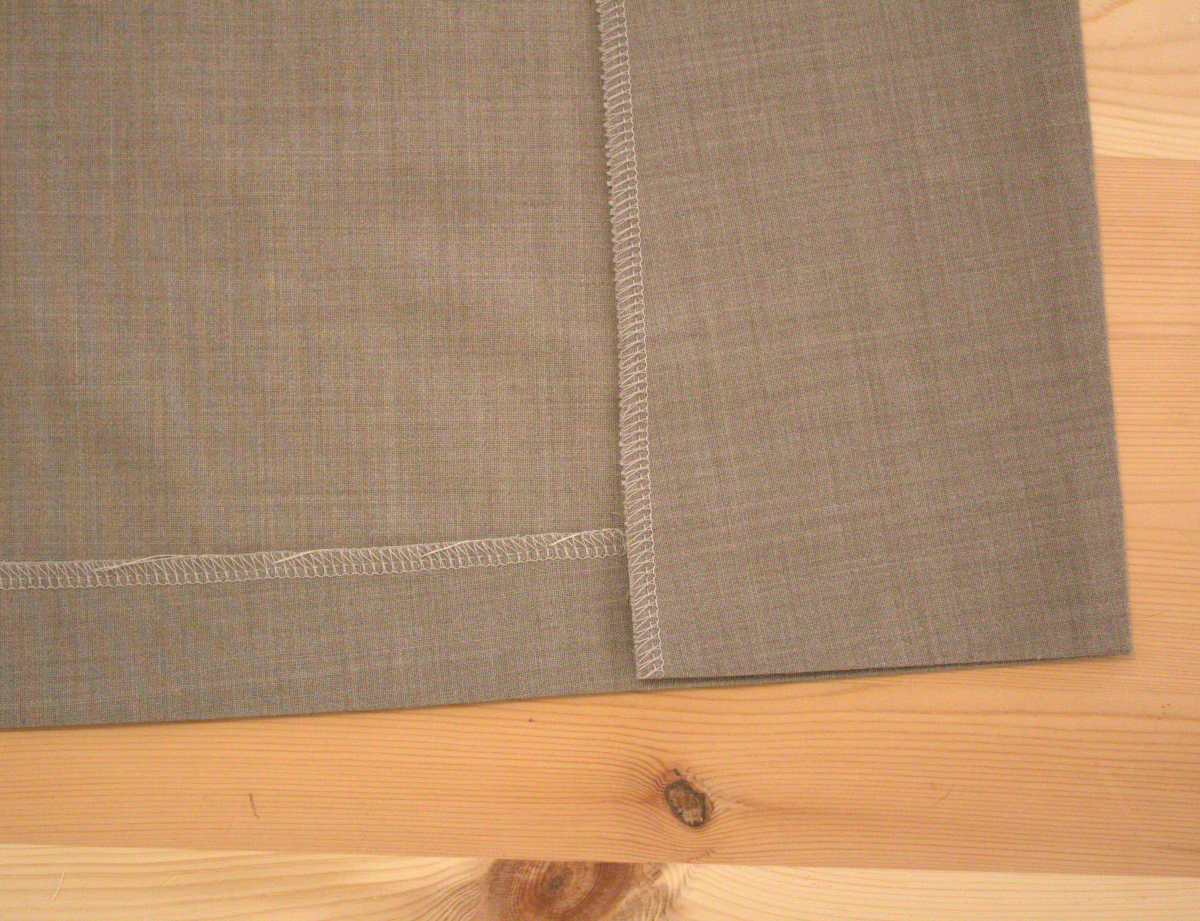
The pattern includes 4 cm hem and sleeve hem allowance. Add 1 cm seam allowance for all other edges and seams.
Iron the interfacing onto the reverse side of the fabric of the corresponding pieces.
Finish all seams on a serger or with a zigzag seam.
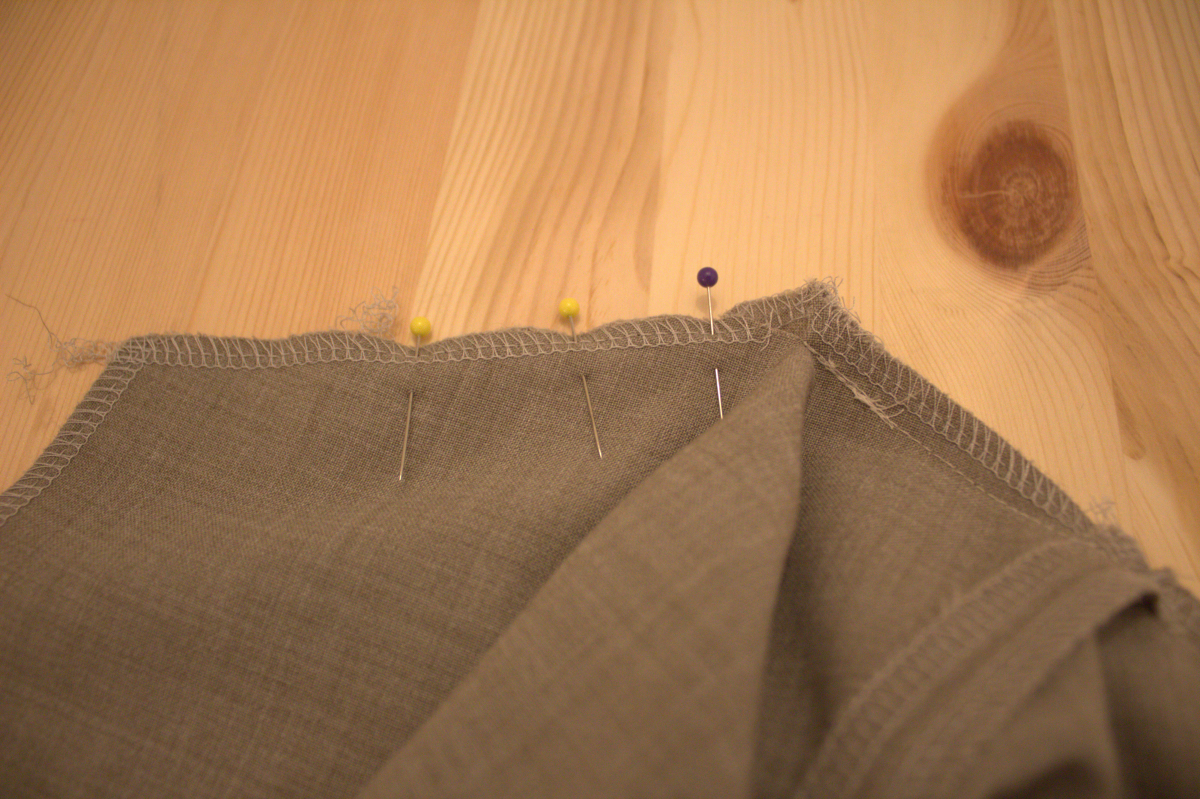
Sew the back pieces together at the center back.
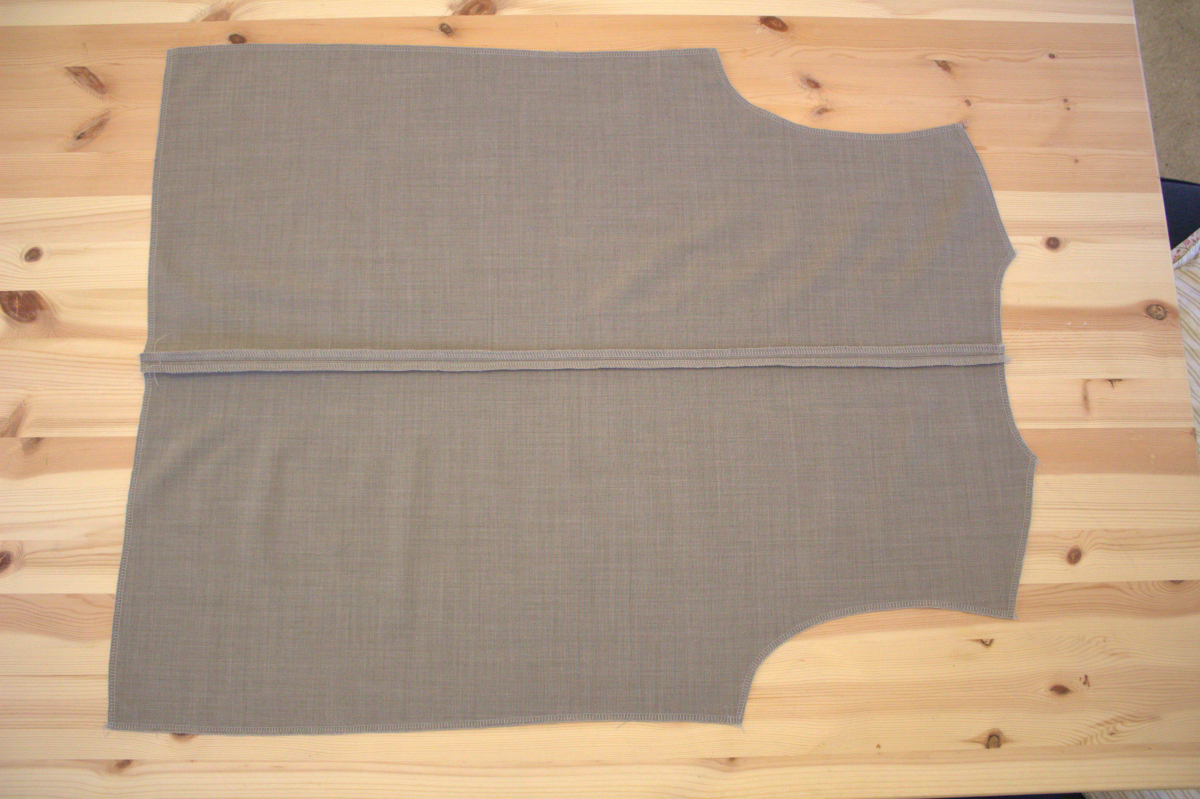
Iron the seam allowances open.
Stitch the shoulder seams. Iron the seam allowances open.
Stitch the side seams.
Iron the seam allowances open.
Stitch the sleeve seams. Iron the seam allowances open.
Insert the sleeves, matching the marks (asterisks) on the front and sleeves.
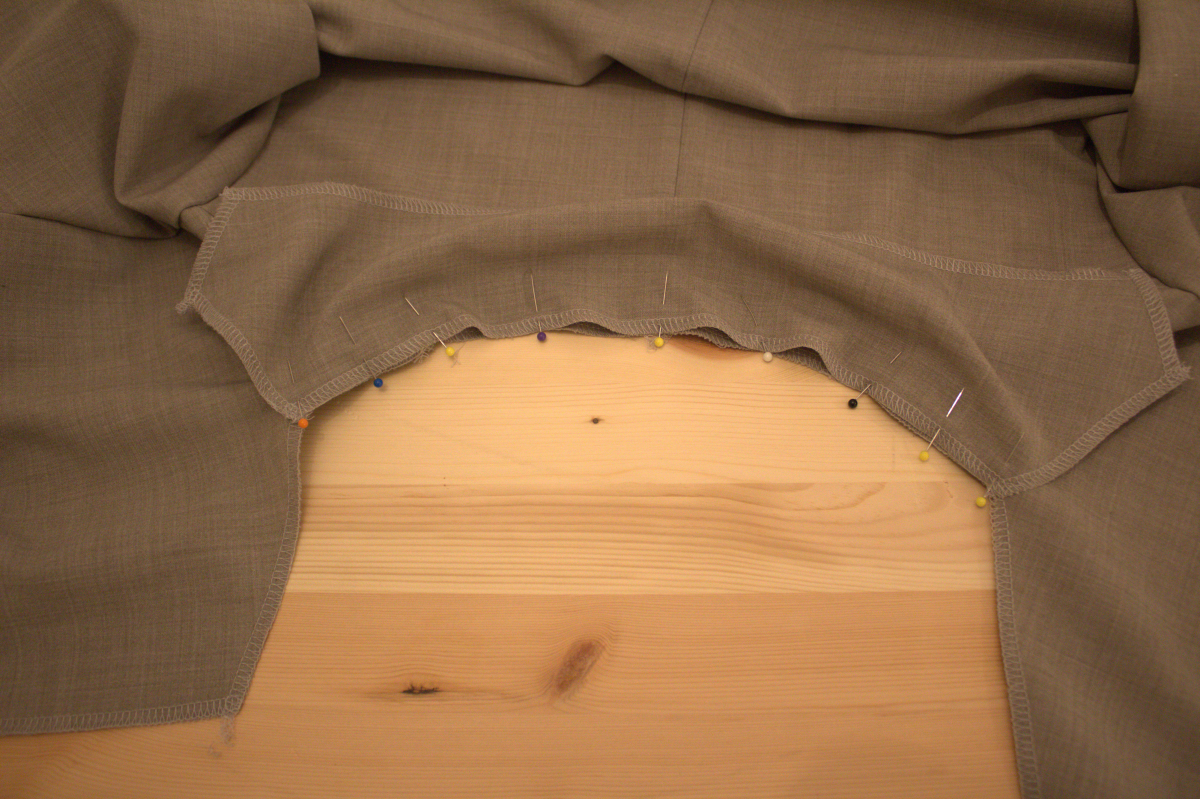
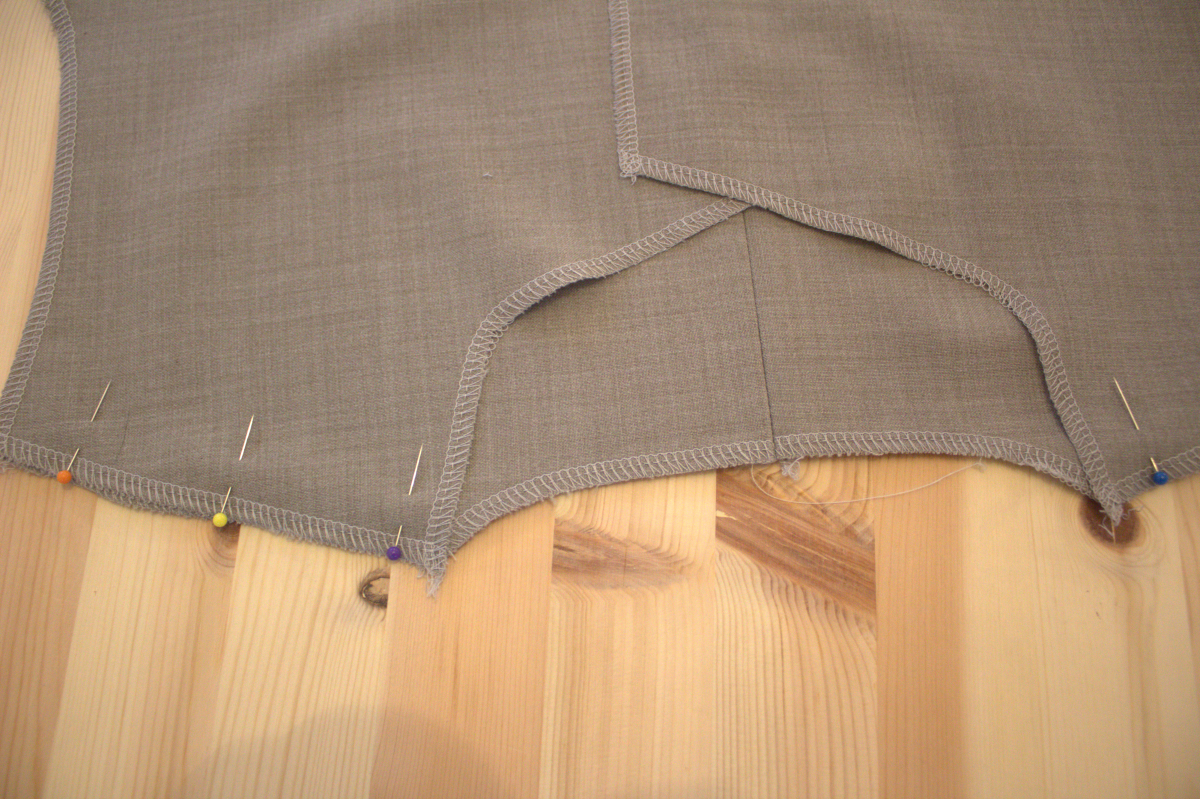
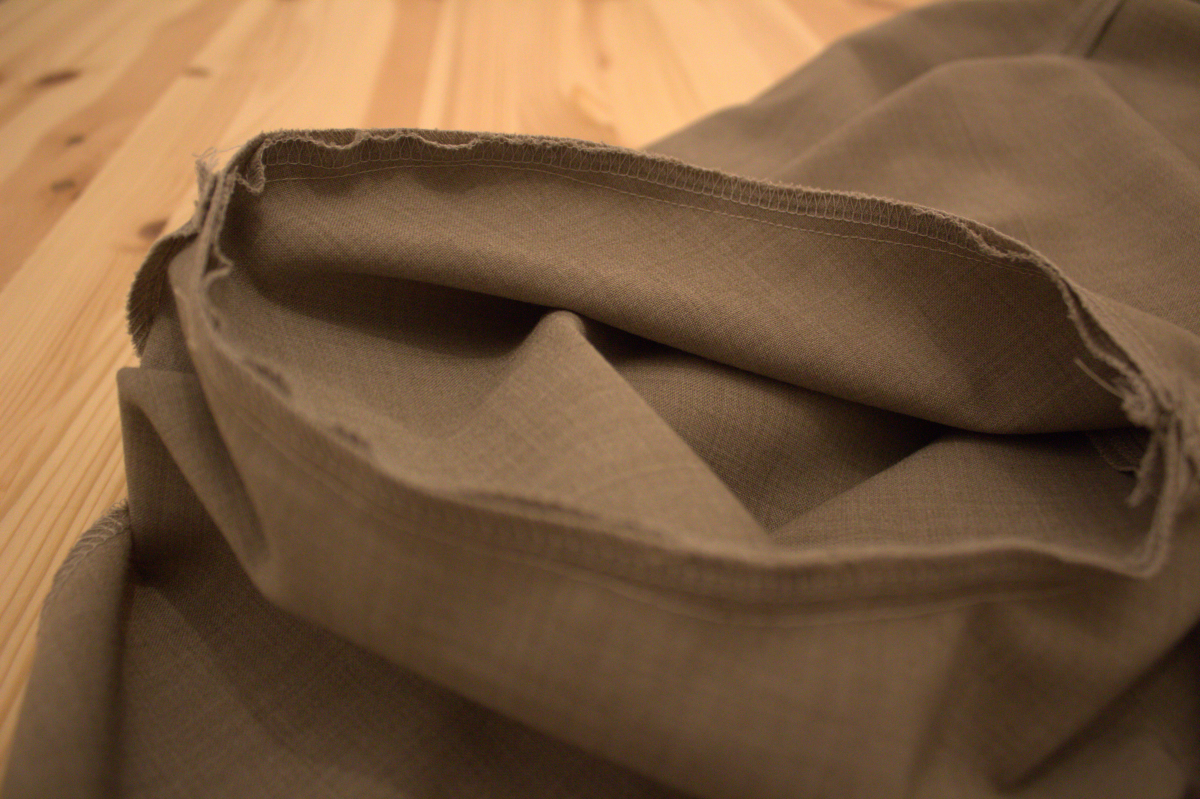
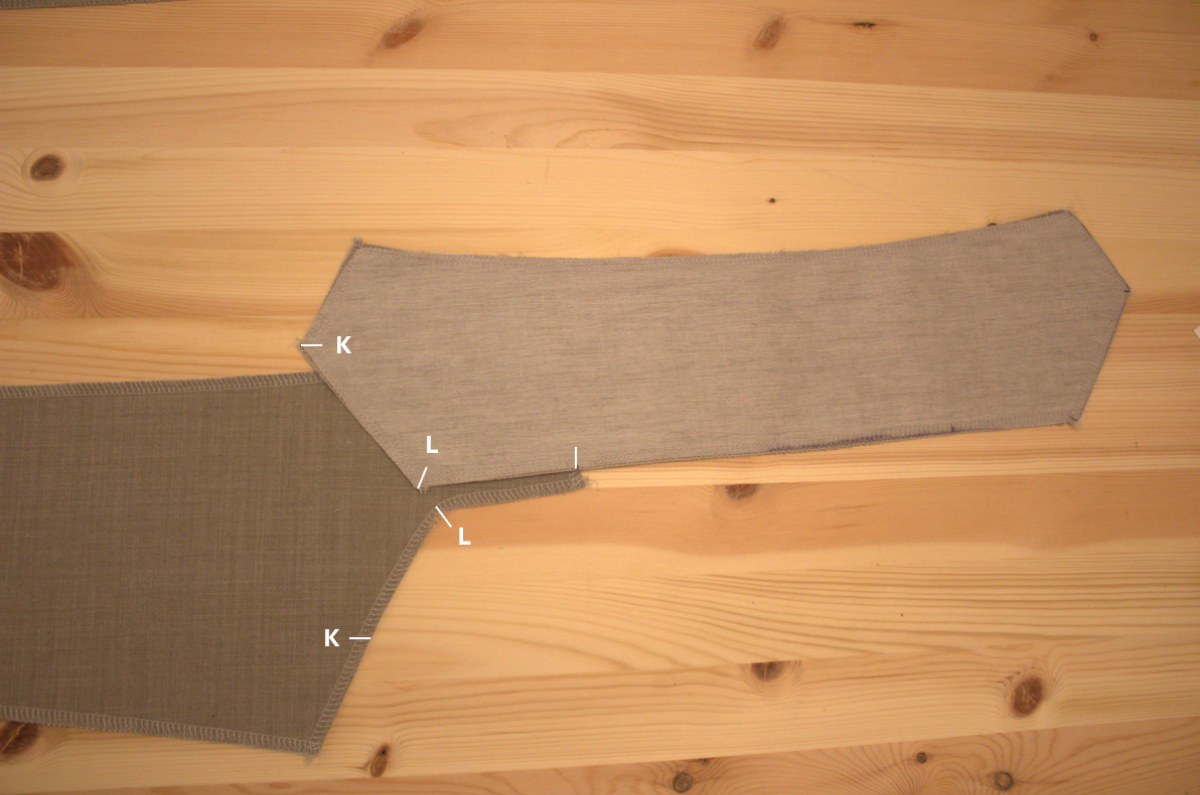
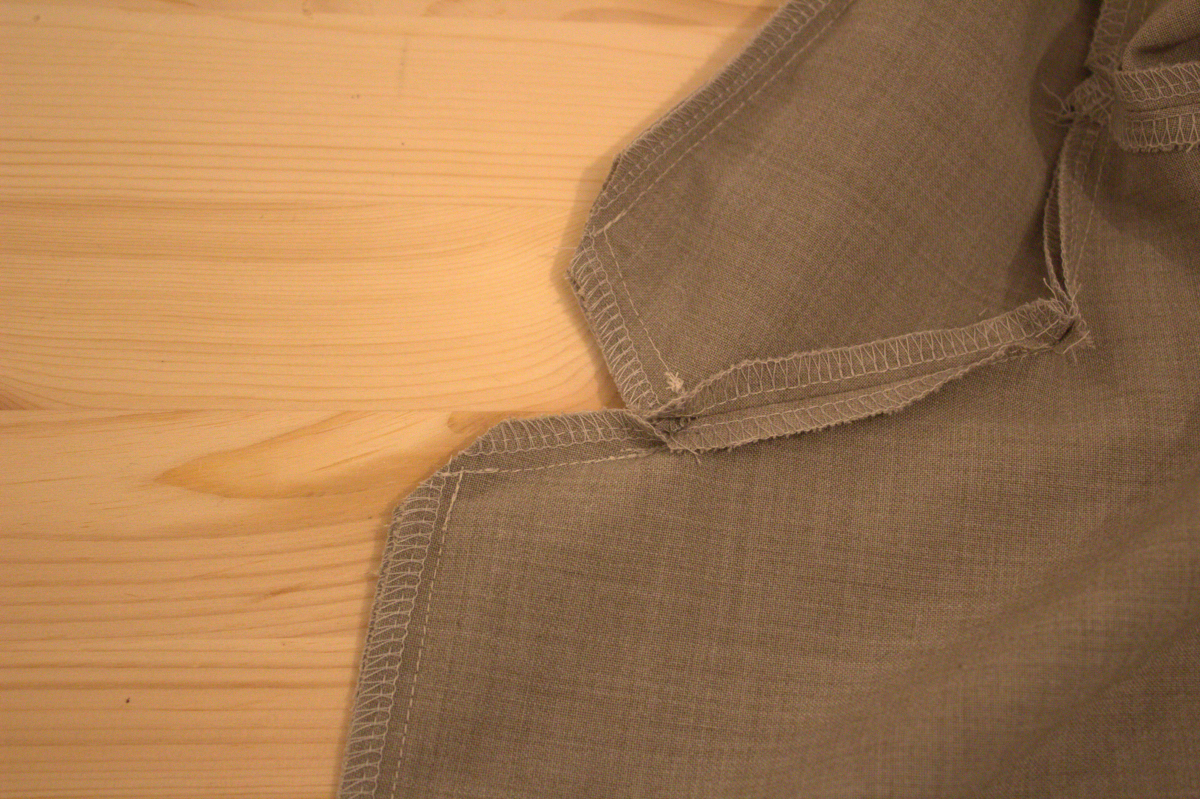
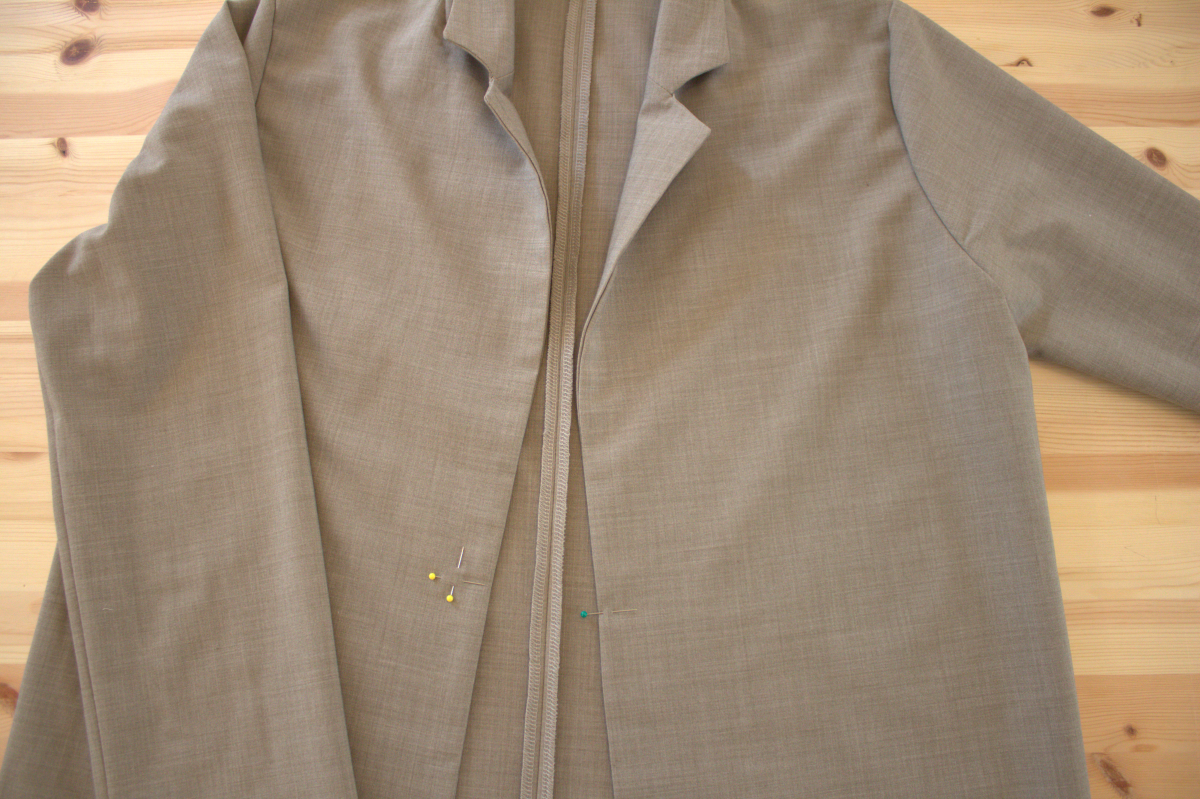
First sew the under collar from corner (L) to corner (L), right sides together, on the neckline edge.
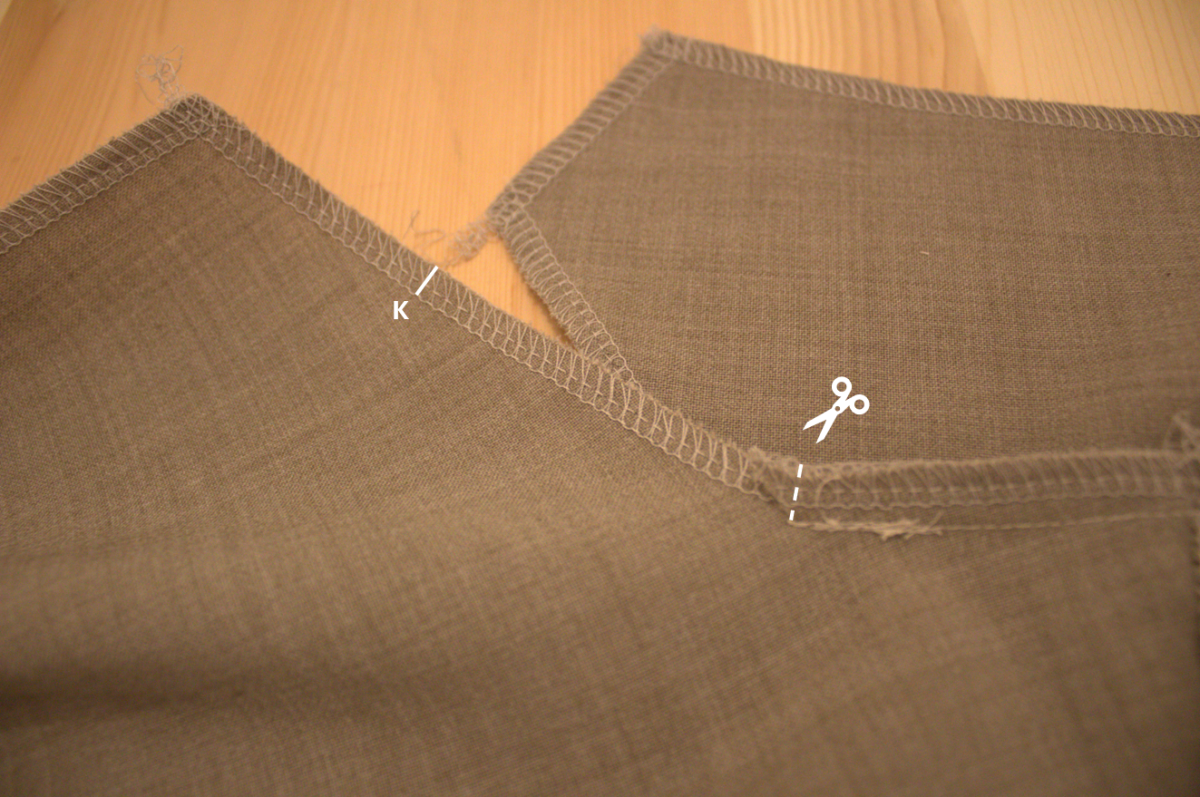
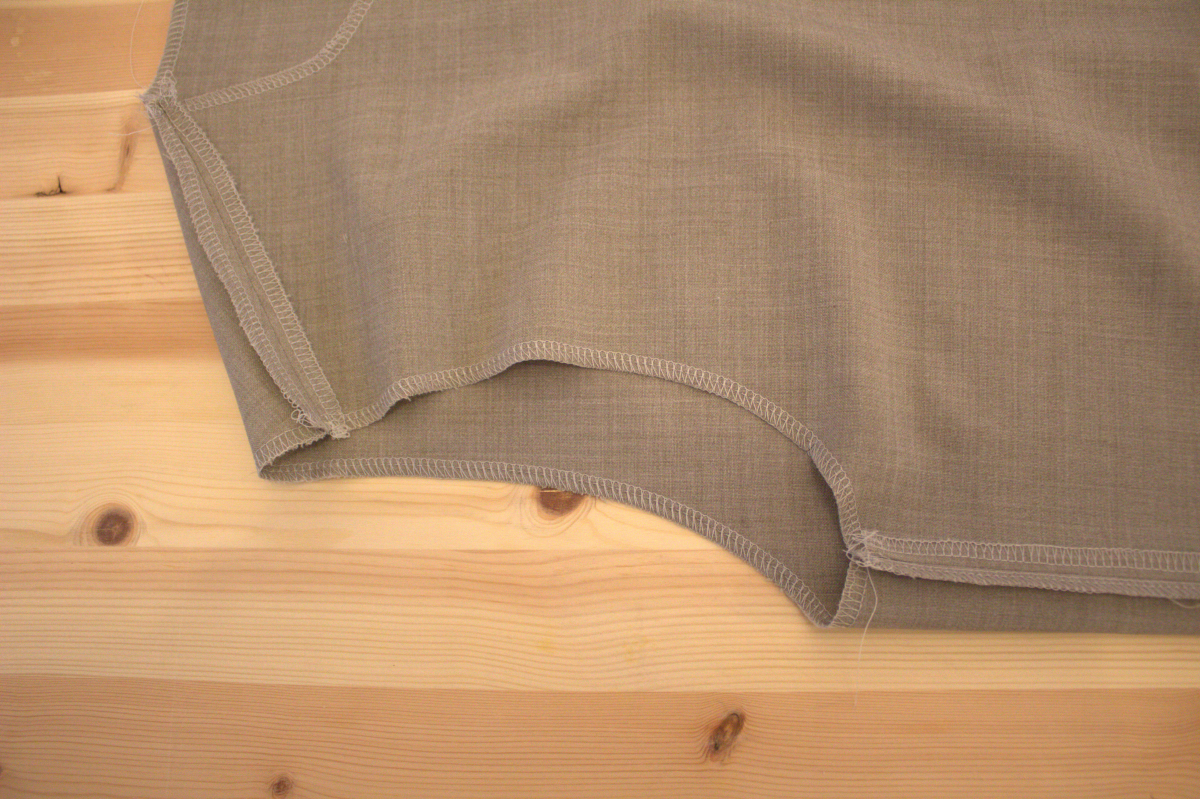
Cut the seam allowance of the front pieces diagonally at the corners.
Then sew the remaining edges of the undercollar to the front pieces from corner (L) to crossline (K).
Iron the seam allowances open.
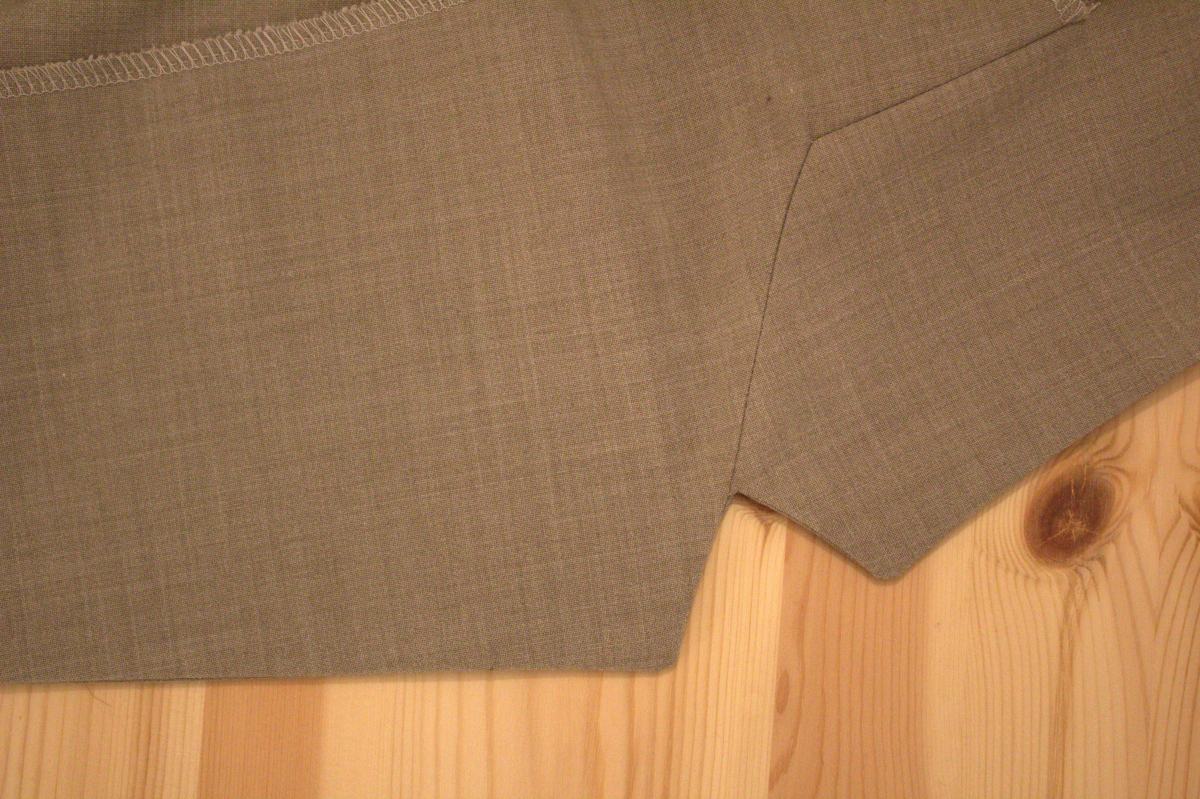
Sew the upper collar to the front facings, right sides together.
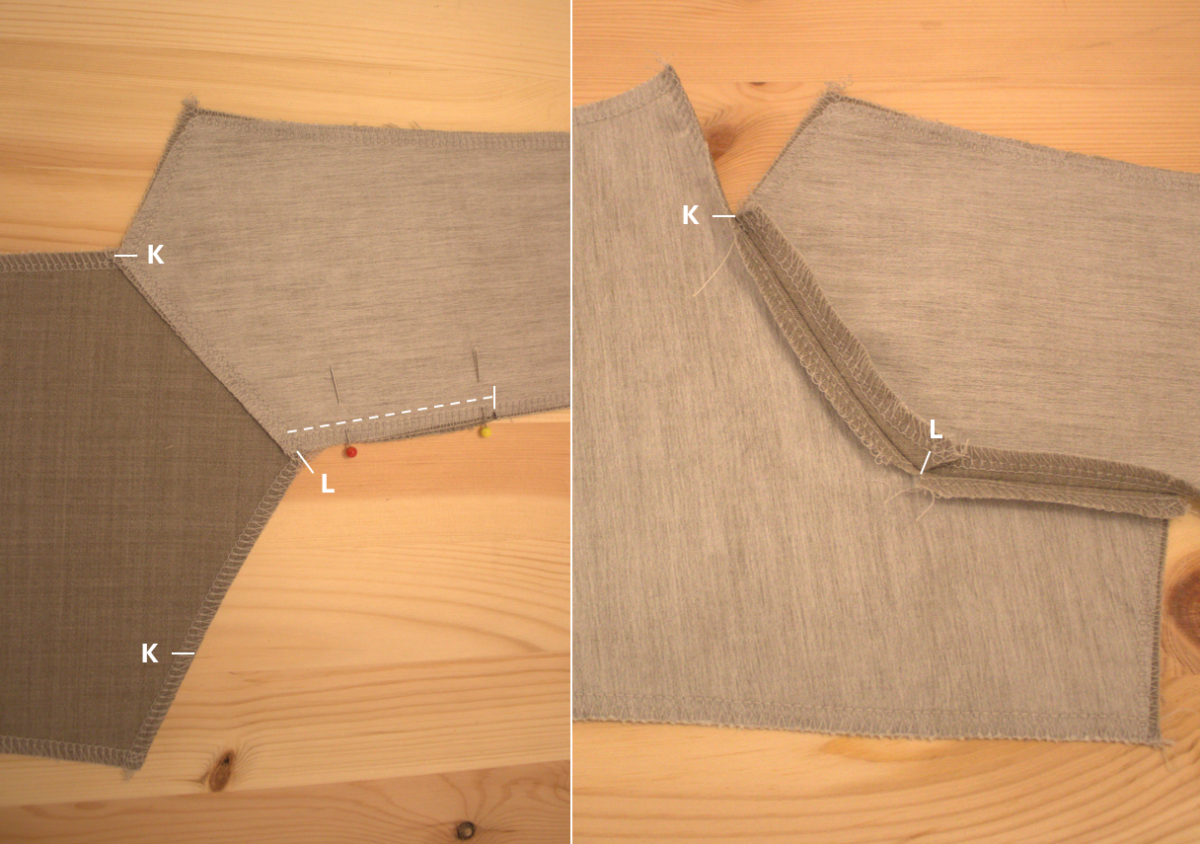
First, sew from the crossline at the lower collar edge to the corner (L), then from the corner (L) to the crossline at the facing (K). At the corners, cut diagonally into the seam allowance, as with the under collar. Iron the seam allowances open.
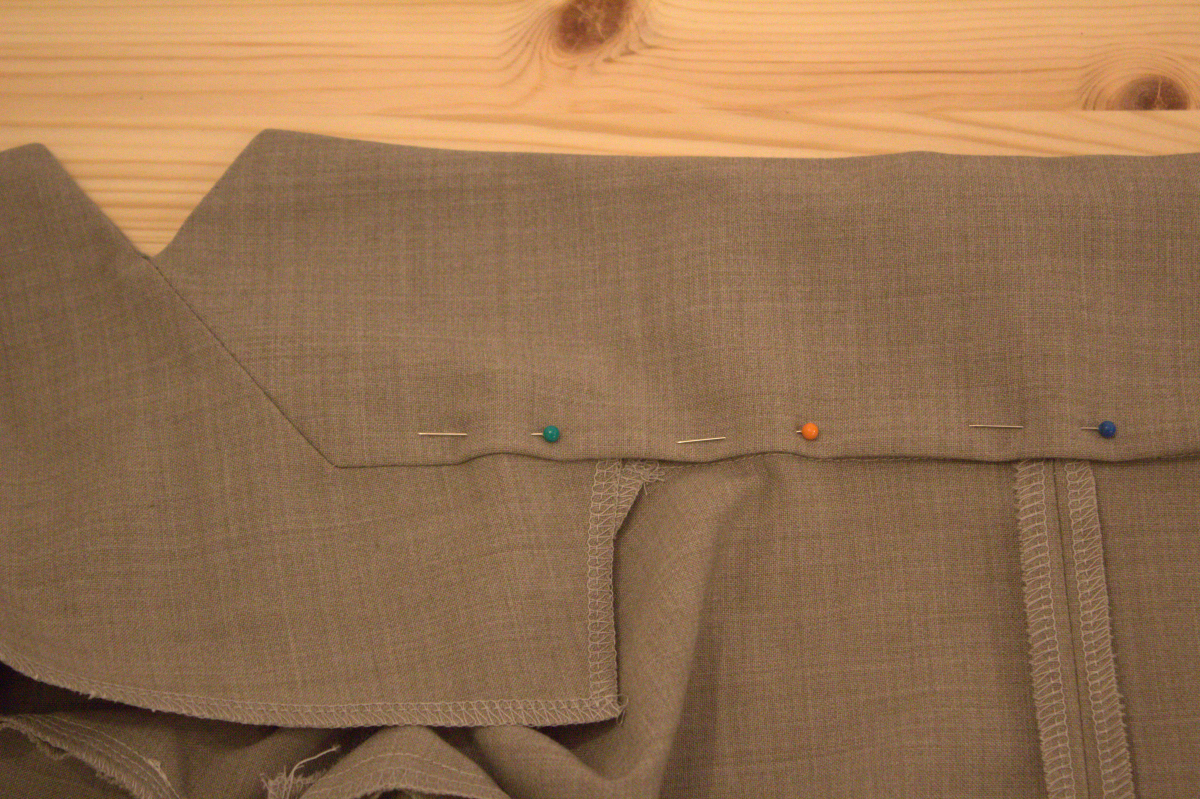
Pin the upper collar to the under collar, right sides together, then stitch them together, starting at the collar seam.
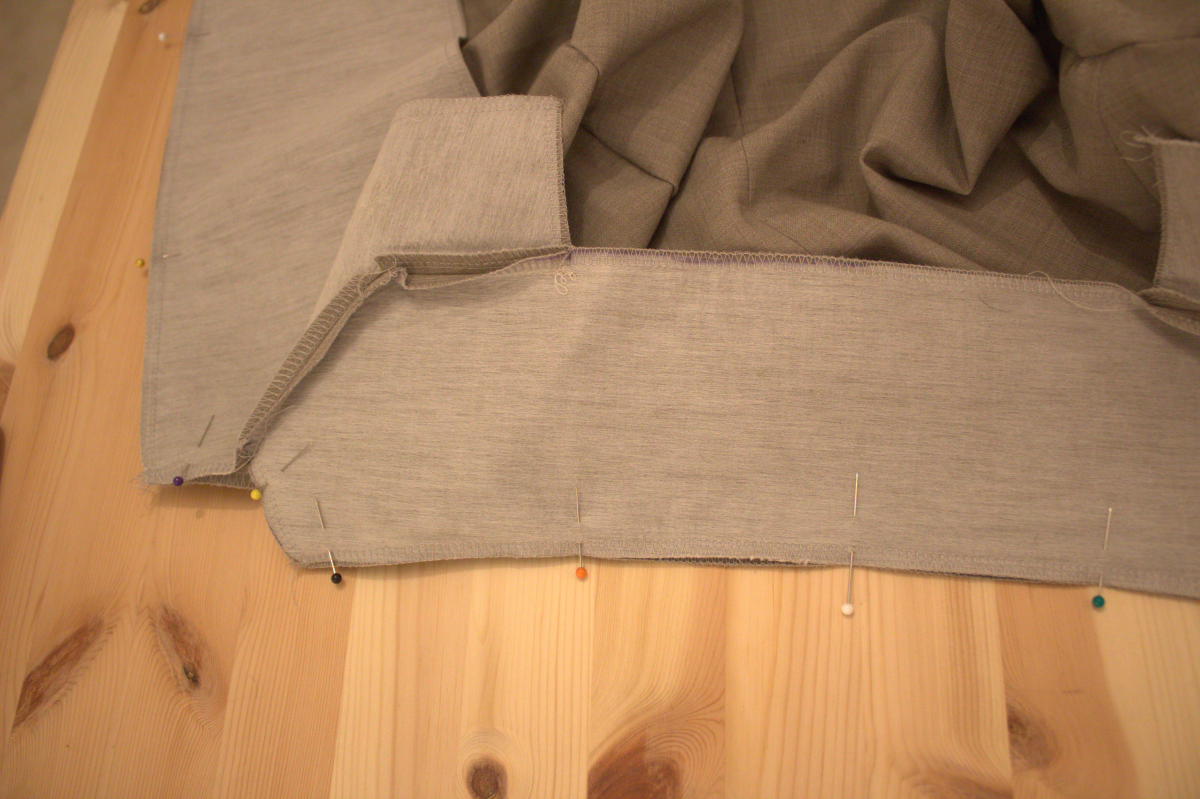
Pin the front facings to the front edges and the lapel edges to the blazer up to the crossline (K). To do this, fold the seam allowances at the crossline up again. Stitch along the front edges and lapel edges to the crossline (K). Trim the seam allowances at the corners at an angle.
Turn the upper collar and facings inward. Baste and iron the edges.
Fold the seam allowance at the bottom edge of the upper collar inward and hand stitch the upper collar to the neckline seam.
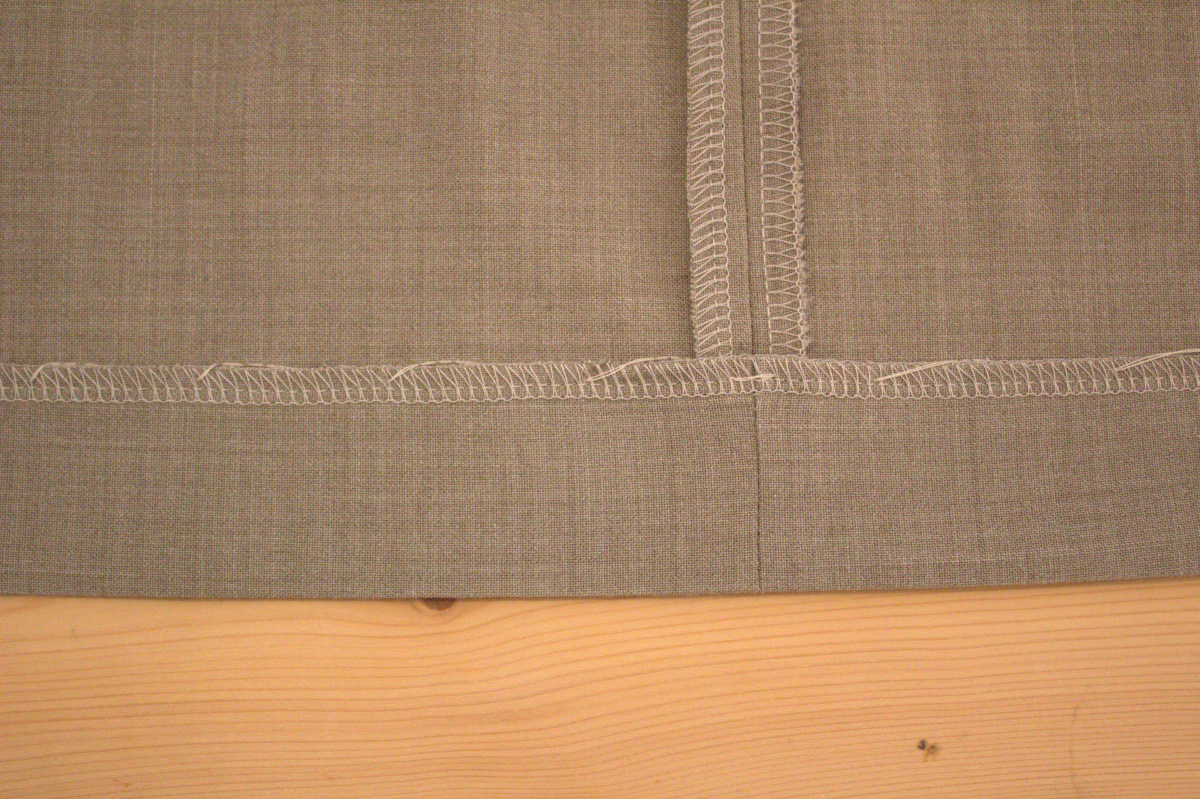
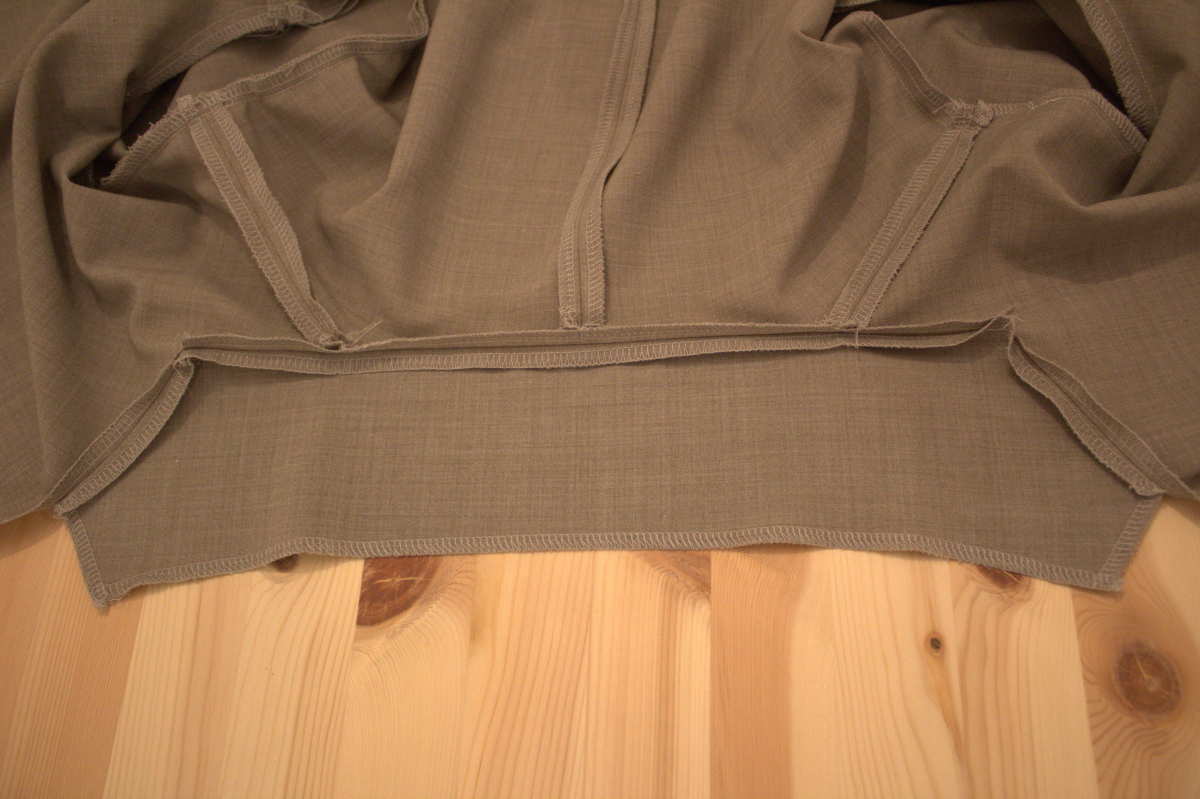
At the hem, fold the front facings outward. Iron the hem allowance inward. Loosely hand stitch the hem allowance.
Fold the front facings back inside and hand stitch them to the hem allowance.

Iron the sleeve hem allowances inward and sew them loosely by hand.
Sew a buttonhole crosswise at the right front piece as indicated in the pattern. The buttonhole size depends on the size of the button.
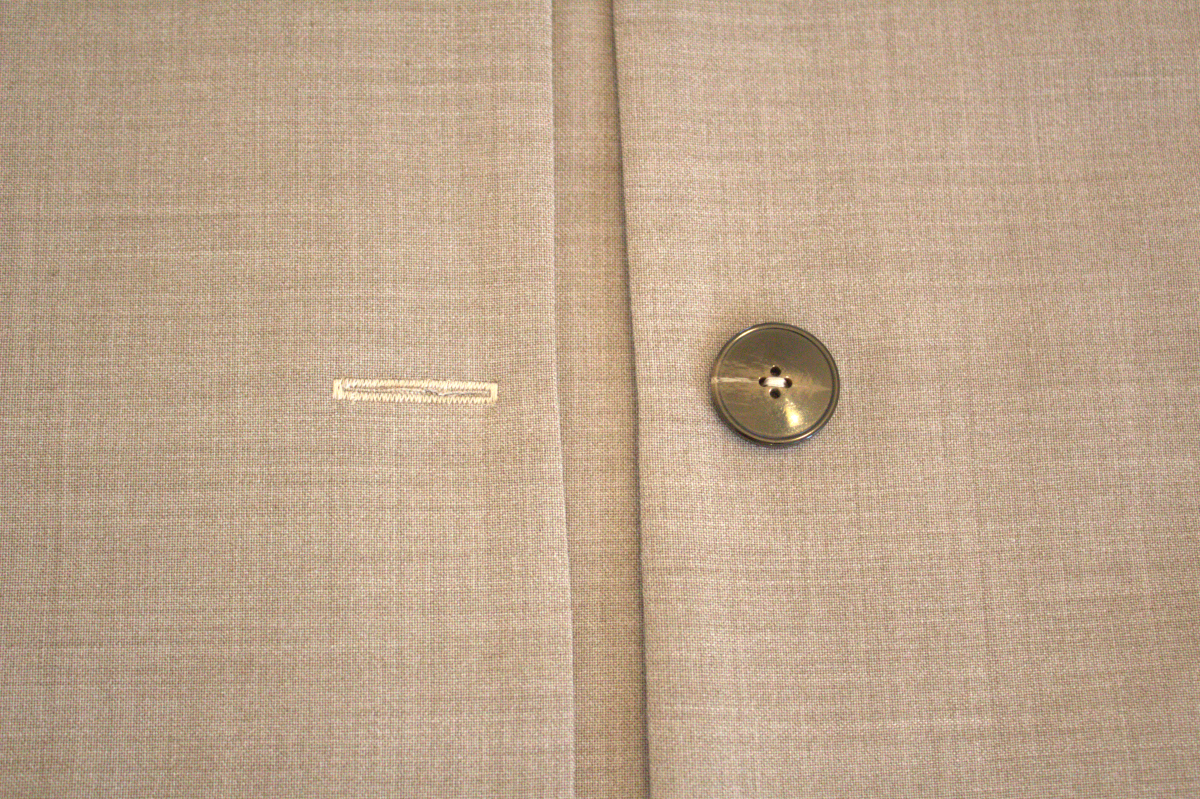
Sew the button to the left front piece.
Sew a hanger on the inside as desired