
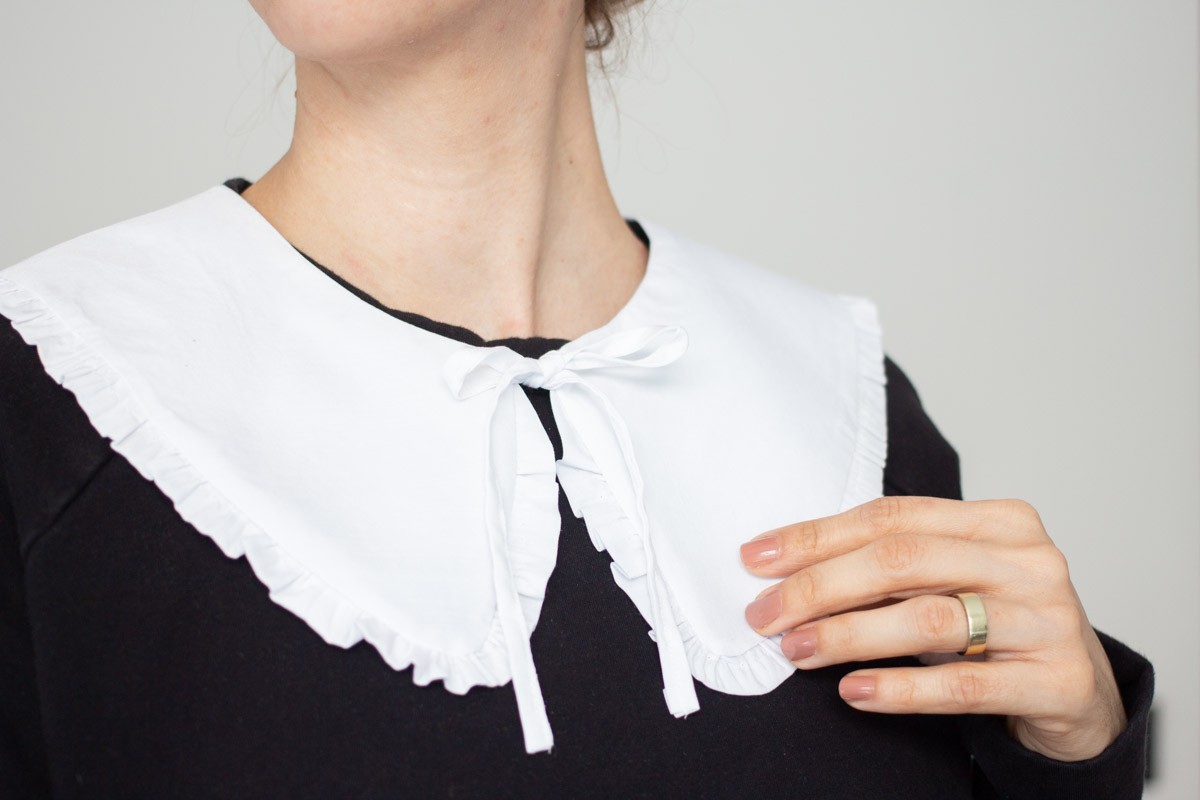
Suits you
On the hunt for fresh ideas? We have a DIY project for you that is not only bang on trend, but also really fun to make: a white statement collar. With this must-have piece, we will be enjoying spring 2021 in romantic, feminine style, while at the same time still satisfying our lust for handmade accessories. Check out the instructions!
#accessories #collar #fashionstatement
What you'll need
- Cutting pattern for download
- SCHMETZ needles suitable for the fabric you choose. We chose the Universal Needle in size 75 for the collar. (The SCHMETZ Needle ABC can help you to find the right needle.)
- Approx. 50 cm fabric
(The fabric must not be stretchy. Cotton poplin is best. For thinner fabrics, we recommend reinforcing one side of the collar with a very light fleece lining ,e.g. H200.) - Thread to match your material
- Sewing machine
- Fabric scissors
Preparation
Fabric:
Wash and iron the fabric before starting your project.
Pattern:
The seam allowance of 1 cm has already been taken into account in the pattern. Print the pattern onto A4 paper (2 sheets). When doing so, make sure that the printer does NOT make any page adjustments. To check the scale, measure the test square; it should be 6 cm x 6 cm. Now cut off the paper strip along the gluing line on one page and position the second page there. Glue the pattern together as positioned and cut it out.
Cutting:
- Collar section: 2 x on the fold (plus 1 x from fleece lining depending on the fabric)
- Tie 2 x
- For optional ruching: 6 ruching strips, 5 cm x 40 cm
To cut the collar, fold the fabric at an angle of approx. 45° and place the pattern on the resulting fold.
Time to get sewing! Sewing instructions
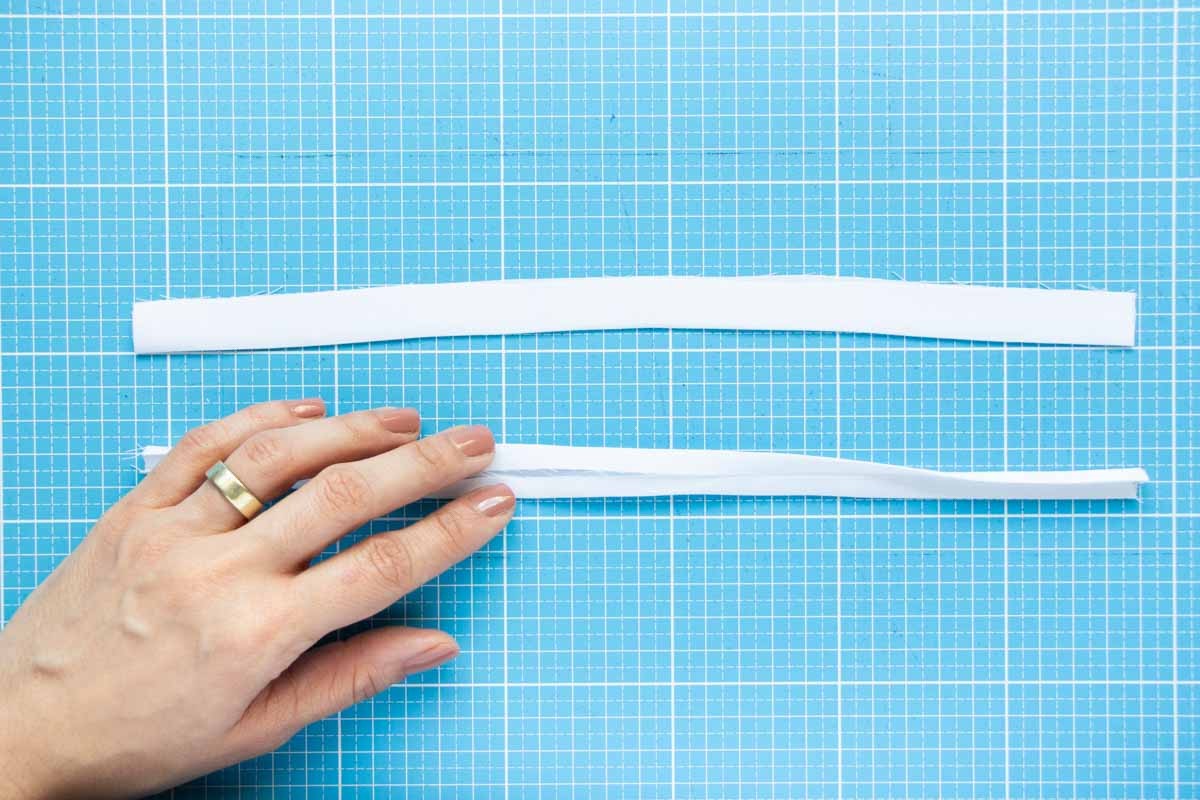
SEWING THE TIES
First fold one short side of the tie approx. 1 cm wrong side in and iron. Then fold the tie in half lengthwise (wrong side to wrong side) and iron the folded edge. Unfold again and iron the long cut edges into the middle. Fold it in half lengthwise again and iron the folding edge flat again. Then sew the open long side together. Repeat the process with the second tie.
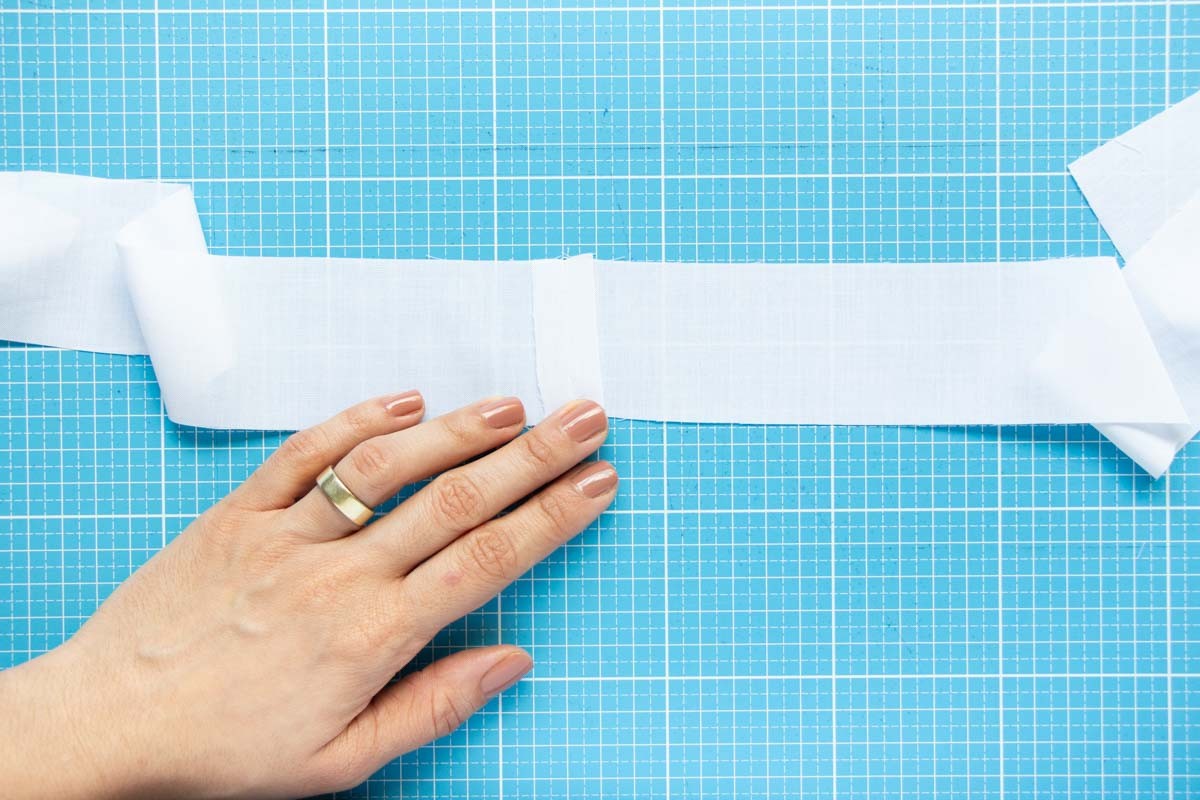
SEWING THE RUCHING
Sew the short sides of the fabric strips together with a seam allowance of 1 cm right sides together to create a long strip of fabric.
Fold the fabric strip in half lengthwise wrong side to wrong side) and sew two seams each with a stitch length of 4-5. The first seam should be sewn at a distance of 0.5 cm and the second at a distance of 1.5 cm from the open edge of the fabric. Leave the tails of the thread at the start and end of the seam.
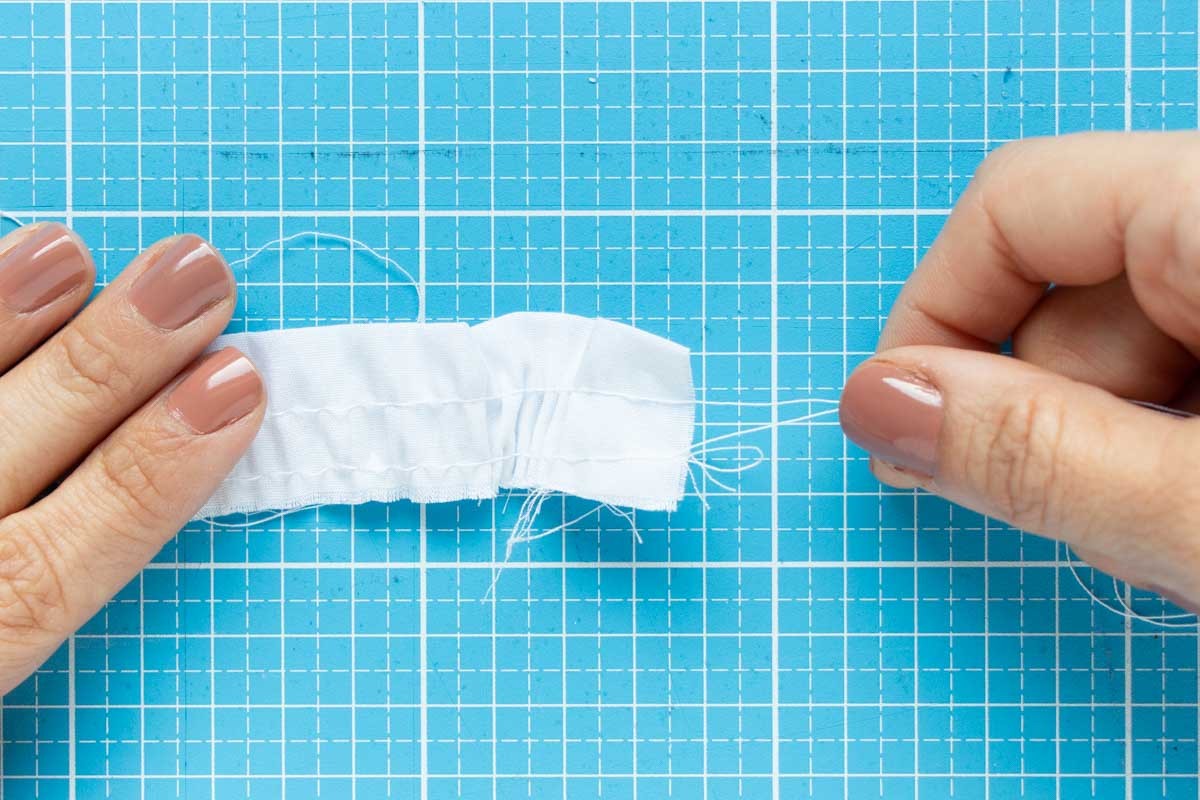
SEWING THE RUCHING
Now take hold of the top or bottom threads on one of the short sides and push the fabric strips together. Gather the fabric like this until the length of the ruching stretches once around the collar. Make sure that the frills are distributed as evenly as possible. The ruching can be secured by knotting the upper and lower threads at the ends.
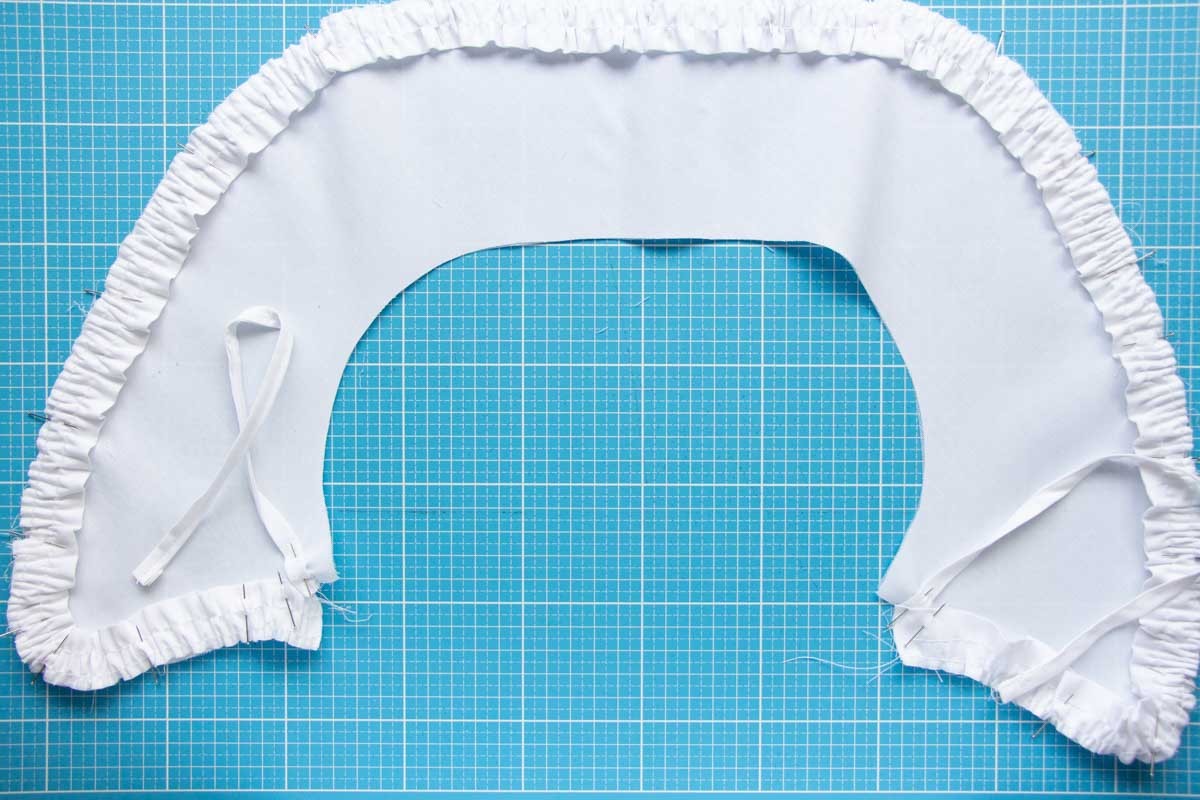
SEWING THE COLLAR
Place one section of the collar with the right side up. If necessary, secure the ruching with the open fabric edge along the outer edge of the collar, starting and ending at the corresponding markings on the pattern.
SEWING THE COLLAR
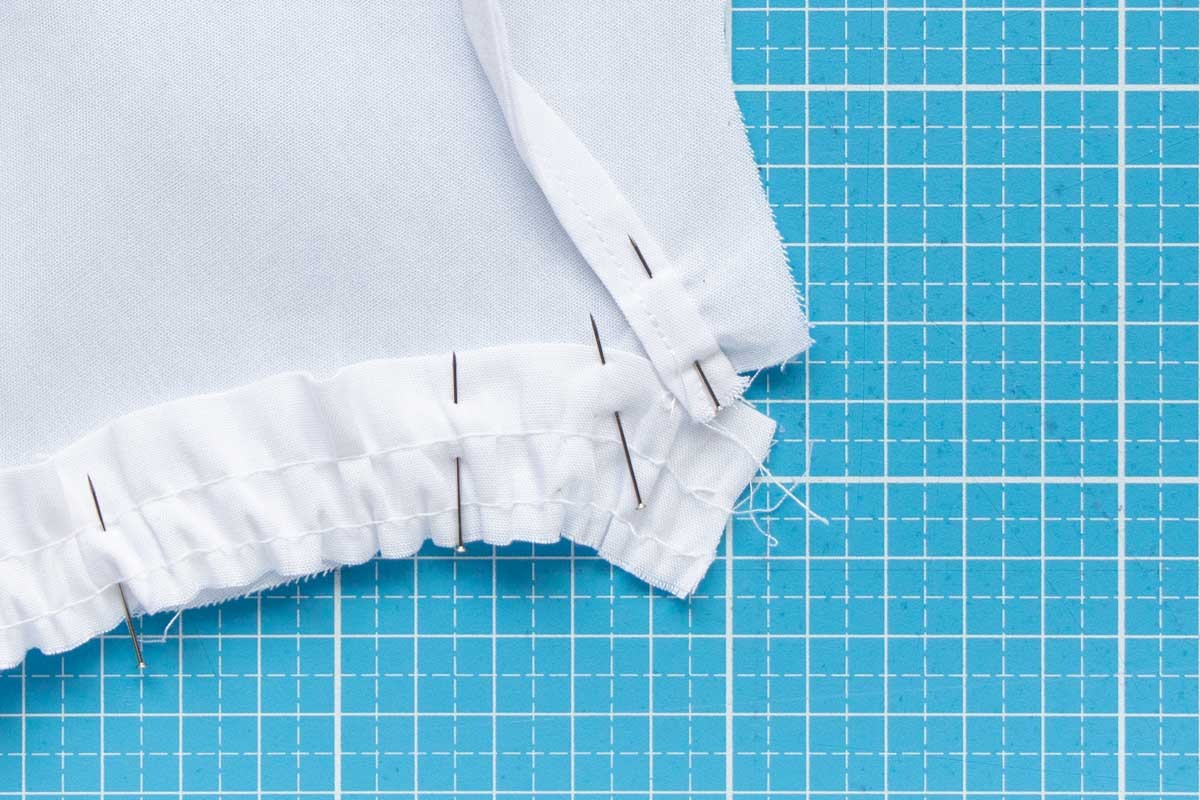
For a nice finish, the ruching should run at an angle across the edge of the collar. Attach the ties to the corresponding markings as well. The open edges of the ruching and ties should meet the selvage of the collar.
SEWING THE COLLAR
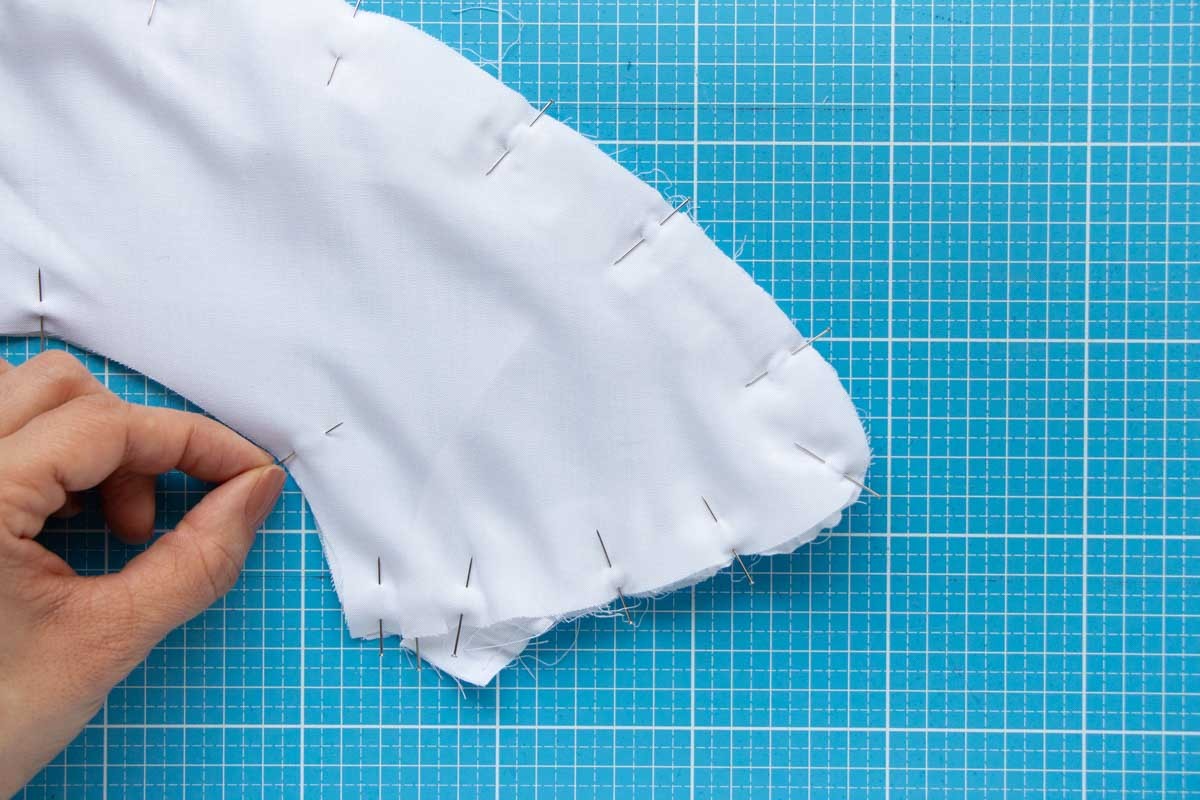
Place the second section of the collar on top, right side down. Pin in place all the way round and sew together with a seam allowance of 1 cm. Leave an opening of approx. 7 cm at the edge of the neck in the middle of the rear for turning.
SEWING THE COLLAR
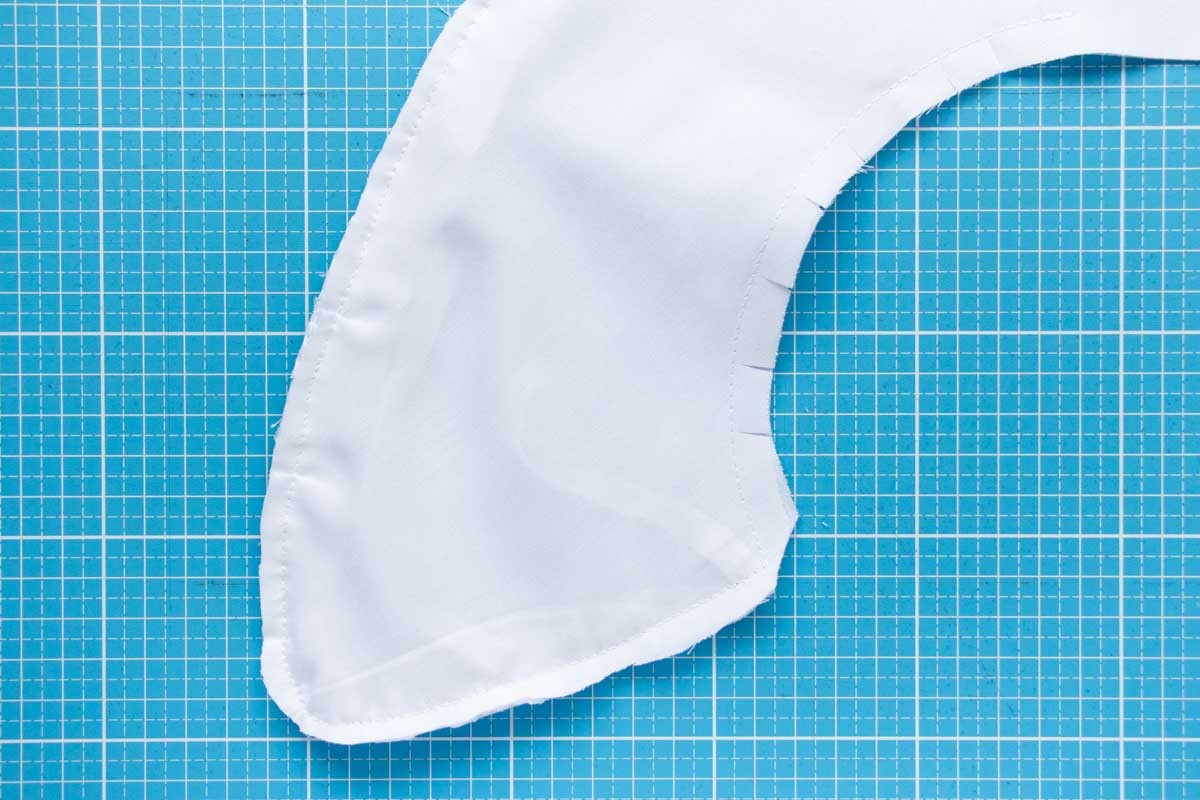
Reduce the seam allowance on the outer edge of the collar to 0.5 cm, cut into the inner edge of the collar right up to the seam and cut off the corners where the ties are attached at an angle.
Turn collar through the opening and shape nicely. Then iron and top stitch the collar all the way, keeping close to the edge. When doing so, sew shut the opening. Alternatively, you can miss out the top stitching stage. In this case, sew shut the opening by hand.